A wobbly wheel is one of those problems that sneaks up on you, and it almost always happens after a rough stretch of road. The good news is that a basic spoke wrench and a small nipple kit can fix most of it in under thirty minutes at home.
By the end of this article you will know how to choose the right spoke wrench for your wheels, understand the difference between brass and aluminium nipples, and follow a clear step-by-step process to get your wheel running true again. You do not need a fancy truing stand to get started.
Note for Australian riders:
- Australian roads, particularly rough chip seal and pothole-heavy suburban streets, knock wheels out of true more often than smoother surfaces overseas.
- If you ride in regional areas, access to a local bike shop can be limited. A spoke wrench costing under $20 AUD puts basic wheel care in your own hands.
- Coastal riders should pay attention to the brass versus aluminium nipple discussion below. Salt air and moisture affect long-term nipple serviceability.
At a glance:
- A spoke wrench is a small, affordable tool that every home mechanic should own.
- Nipple size must match your wrench size, or you will round off the flats and make the job harder.
- Brass nipples suit most Australian riders. Aluminium nipples are lighter but softer and less forgiving.
- Basic lateral truing (fixing side-to-side wobble) is well within reach for an intermediate rider.
Key takeaways:
- Buy the wrench size that matches your nipples, not just any spoke wrench off the shelf.
- Work in small quarter-turn increments and re-check constantly.
- Know when to stop and take the wheel to a shop. Some jobs are beyond home truing.
Why Wheel Truing Is a Skill Worth Having
Most riders have experienced a wheel that rubs the brake pad or visibly wobbles when spinning. It feels minor, but left unaddressed, an untrue wheel puts extra stress on spokes, accelerates rim wear, and can affect handling on fast descents. The fix is often simple, and it does not require a trip to the shop every time.
Wheel truing is one of those skills that pays for itself quickly. Once you own a spoke wrench and understand the basics, a minor wobble becomes a ten-minute job at home rather than a week without your bike waiting for a service slot. For riders who use their bikes to commute or train regularly, that matters.
What Happens When You Ignore an Untrue Wheel
An untrue wheel does not fix itself. The imbalance in spoke tension that causes the wobble will generally get worse over time, especially under load. Here is what happens if you leave it:
- Spokes on the slack side become more susceptible to fatigue and snapping.
- Brake rub from rim brakes can wear a groove into the rim over time.
- In a badly buckled wheel, handling becomes unpredictable at speed.
- Continued riding on a severely untrue wheel risks spoke breakage, which can cause sudden and dangerous wheel collapse.
The key word is "severe." A small lateral deviation of a millimetre or two is cosmetic. A significant buckle that causes consistent brake rub or visible side-to-side movement at speed needs attention promptly. If a spoke has already broken, stop riding the wheel and get it repaired before your next ride.
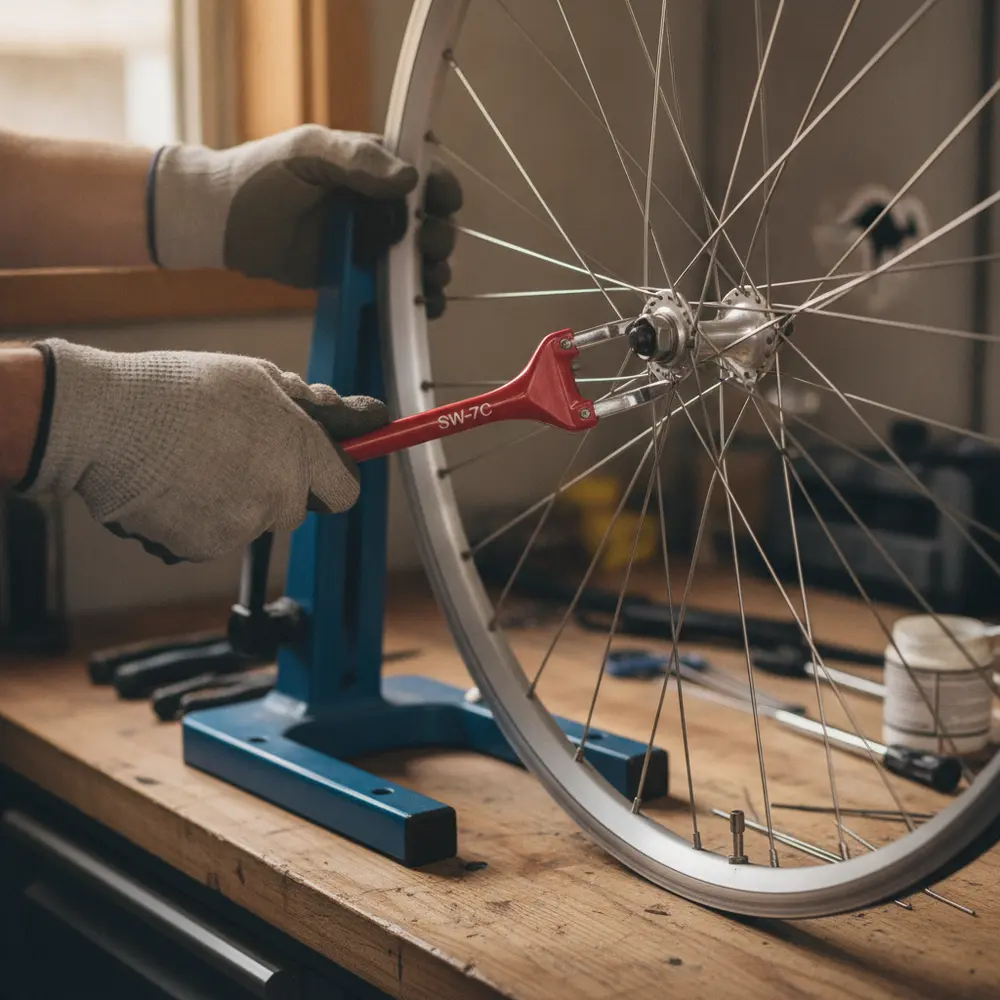
What Is a Spoke Wrench and What Does It Actually Do
A spoke wrench is a small, handheld tool that fits around the flats of a spoke nipple, the small threaded piece that sits in the rim and connects the spoke to the rim. Turning the nipple with the wrench either tightens or loosens the spoke, which changes the tension and pulls the rim in that direction.
The tool itself is simple, usually a flat or curved piece of steel with a notch or socket cut to fit the nipple. Good ones have a comfortable grip and are colour-coded by size. The Park Tool spoke wrench guide is a solid reference if you want to understand how spoke tension works before you touch anything.
Spoke Wrench Sizes and How to Match Them to Your Nipples
This is where most people go wrong. There are several common nipple sizes, and using the wrong wrench is the fastest way to round off the nipple flats, which makes future adjustments very difficult. The critical measurement is the flat-to-flat dimension of the nipple head.
The three most commonly encountered sizes are 3.2mm, 3.3mm, and 3.45mm. According to the spoke nipple size reference on Bicycles Stack Exchange, these sizes vary between manufacturers and are not always labelled on the bike. If you are not sure what size your nipples are, take the wheel to your local shop and ask them to check before you buy a wrench.
| Nipple Size | Common Use | Park Tool Wrench |
|---|---|---|
| 3.2mm | Most common on standard alloy wheels | SW-0 (black) |
| 3.3mm | Common on many mid-range builds | SW-1 (green) |
| 3.45mm | Older or budget wheels, some specific brands | SW-2 (red) |
| Hex / internal | Deep-section carbon rims, some aero wheels | Hex key from inside rim |
Park Tool's SW-series wrenches are colour-coded by size, which makes it easy to grab the right one. You can buy spoke wrenches in Australia from Pushys and most other online retailers, with entry-level options available for under $20 AUD.
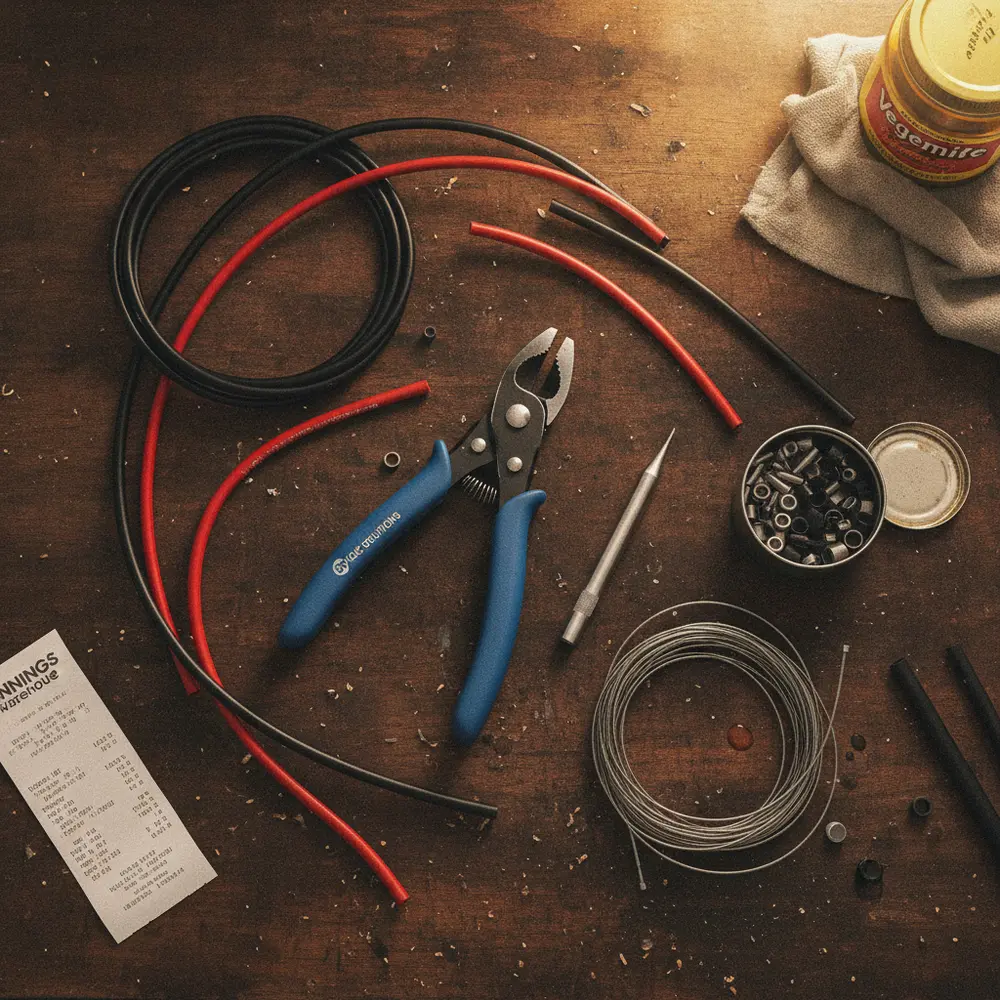
Spoke Nipple Kits - What They Include and When You Need One
A nipple kit is a small collection of replacement spoke nipples, usually in a single size or a mixed assortment. You need one when a nipple is stripped, cracked, or corroded beyond use. They are also handy if you are building or rebuilding a wheel and need a full set.
For most home mechanics doing basic truing, you will not need a nipple kit immediately. But if your wheel is more than a few years old or you ride in wet or coastal conditions, having a small stock of replacement brass nipples in the correct size is good forward planning. Replacing a single seized nipple without the right spare on hand means a trip to the shop for a part that costs cents.
Brass vs Aluminium Nipples - Which Should You Use
This is a straightforward call for most Australian riders. Brass nipples are heavier than aluminium, but they are more durable and hold up far better in wet and coastal conditions. According to Sheldon Brown's spoke nipple reference, brass nipples are more corrosion-resistant than aluminium in most conditions, which matters if you are riding near the coast or through wet winters.
Aluminium nipples save a small amount of weight across a full wheel build. For performance-focused riders chasing grams, that can be relevant. But aluminium is softer, more prone to rounding if you use the wrong wrench, and more likely to seize or corrode over time. For everyday riding and home maintenance, brass is the sensible choice.
- Brass: heavier, durable, corrosion-resistant, easier to work with, suits most riders.
- Aluminium: lighter, softer, more prone to rounding, less forgiving in coastal or wet conditions.
- Stock wheels: most entry-level and mid-range bikes come with brass nipples as standard.
How to Choose the Right Spoke Wrench for Your Wheels
Start by identifying your nipple size. If you have the wheel's documentation or the rim is a known brand, you can often look up the nipple spec online. If not, a good bike shop can measure it in seconds. Once you know the size, match it to the correct wrench.
For riders who own multiple bikes with potentially different nipple standards, a multi-size or adjustable spoke wrench can be a practical option. The trade-off is that adjustable wrenches can be slightly less precise than a dedicated fixed-size wrench, so fit matters. As Cycling Weekly's spoke wrench buying guide notes, a snug fit is critical to avoid rounding nipple flats, and you should check the fit before purchasing where possible.
Adjustable vs Fixed Spoke Wrenches - Pros and Cons
- Fixed size wrench: precise fit, less risk of slipping, best for a single nipple standard.
- Adjustable wrench: covers multiple sizes, convenient for mixed workshop use, slightly less precise.
- Multi-slot wrench: a flat tool with several slots, budget-friendly, works for occasional use on known sizes.
- Ergonomic handle: worth paying a little more for if you are doing longer truing sessions. Reduces hand fatigue.
Step-by-Step: Basic Wheel Truing With a Spoke Wrench
This guide covers lateral truing, which is fixing side-to-side wobble. Radial truing (correcting up-and-down hops) is more complex and more likely to need professional attention if significant. For a full procedural reference, the Park Tool step-by-step wheel truing guide is the most thorough resource available.
- Set up your reference. Mount the wheel in a truing stand if you have one. If not, leave the wheel in the bike frame and use the brake pads as your reference points. Rim brake users have an advantage here as the pads give a clear visual guide.
- Spin the wheel and find the buckle. Watch where the rim moves closest to the brake pad or the stand's indicator. Mark the approximate location of the wobble with a piece of tape or a chalk mark.
- Identify the relevant spokes. Spokes alternate sides. If the rim pulls to the left in the buckled section, you need to tighten the right-side spokes in that area, loosen the left-side spokes, or a combination of both.
- Turn the nipple in the correct direction. When viewed from the nipple end (looking down from the rim), clockwise tightens the spoke. When you are working from underneath the rim this can feel counterintuitive, so take a moment to orient yourself before turning.
- Work in quarter-turn increments. Small adjustments. One quarter turn per spoke, then re-check. Do not try to fix the whole wobble in one go on a single spoke. Spread the adjustment across two or three spokes in the affected area.
- Re-check and repeat. Spin the wheel again. The wobble should reduce. Repeat the process until the deviation is minimal. A perfectly true wheel takes practice and the first attempt rarely achieves perfection.
- Know when to stop. If the wobble is not improving, if you are dealing with a broken spoke, or if the rim is visibly damaged or badly buckled, stop and take it to a shop.
Checking your wheel true as part of a regular pre-ride inspection is a good habit. Bicycling Australia's wheel truing guide recommends this as a standard part of bike care for Australian riders dealing with rougher road surfaces.
Common Mistakes When Truing a Wheel
These are the errors that come up repeatedly, and most of them are easy to avoid once you know about them.
- Using the wrong wrench size. This rounds the nipple flats and makes the nipple very difficult to turn without slipping. Always confirm your nipple size first.
- Making large adjustments. Turning a nipple half a turn or more at once introduces new problems elsewhere in the wheel. Stick to quarter turns.
- Only adjusting one spoke. A buckle usually involves two or three spokes. Spreading small adjustments across the affected area produces a more stable result.
- Not re-checking between adjustments. The wheel changes with each turn. Check frequently rather than making multiple adjustments blind.
- Continuing to ride on a broken spoke. A single broken spoke puts the surrounding spokes under excess load and accelerates further damage. Replace it before riding.
- Attempting to true carbon rims at home without experience. Carbon rims require more care and specific knowledge. If in doubt, take it to a professional.
If You Are New to Wheel Truing
- Start with a wheel that has only a minor wobble. Do not attempt your first truing job on a badly buckled wheel.
- Use the bike frame and brake pads as your reference before investing in a truing stand.
- Buy a fixed-size spoke wrench matched to your nipple size. Do not guess.
- Accept that your first result will not be perfect. The skill improves significantly with repetition.
- If you get stuck or make things worse, take the wheel to a shop. It is not a failure, it is part of learning.
If You Have Trued a Wheel Before
- Consider a quality truing stand if you are doing this regularly. It makes the job faster and more accurate.
- A spoke tension meter is the next step up for checking even tension across the whole wheel, not just visual true.
- Keep a small nipple kit in your workshop. Having the right brass nipple on hand when one seizes means the job stays at home.
- If you have multiple bikes, check whether they use different nipple sizes and own the appropriate wrenches for each.
- Explore our full range of cycling tool guides to build out the rest of your home workshop kit.
Frequently asked questions
How do I know if my wheel needs truing?
Spin the wheel slowly and watch the gap between the rim and the brake pad (for rim brakes) or the frame and fork. If the rim moves side to side consistently as it rotates, it needs truing. A small deviation of a millimetre or two is common and not urgent. Consistent brake rub or a visible wobble at speed is worth fixing promptly. See our bike maintenance guides for more pre-ride checks worth adding to your routine.
Can I use the bike frame instead of a truing stand?
Yes, for basic lateral corrections, the bike frame and brake pads work as a reasonable reference. A proper truing stand gives a more accurate and stable reference point, but it is not essential for minor home corrections. The bike frame method is a perfectly valid starting point for intermediate-level work.
Which direction do I turn the nipple to tighten the spoke?
When viewed from the nipple end, looking down from the rim toward the hub, clockwise tightens the spoke. When you are working from beneath the rim it can feel the wrong way around, so take a second to orient yourself before turning. Work in quarter-turn increments and re-check after each adjustment.
Do I need a full nipple kit or just a spoke wrench?
For most home truing jobs, a spoke wrench is all you need. A nipple kit becomes useful when a nipple is stripped, cracked, or corroded and needs replacing. If your wheel is several years old or you ride in wet or coastal conditions, having a small supply of replacement brass nipples in the correct size is worth having on the shelf. If you are unsure what size you need, get in touch and we can point you in the right direction.
When should I take the wheel to a professional instead of truing it at home?
Take it to a shop if a spoke is broken, if the rim is visibly dented or cracked, if the buckle is severe enough that large amounts of tension adjustment are needed, or if the wheel is a carbon rim and you have not worked on carbon before. Home truing suits minor wobbles on alloy wheels. Anything beyond that is better handled by a mechanic with the right equipment and experience.
Quick summary
- A spoke wrench matched to your nipple size is one of the most cost-effective tools you can add to your workshop.
- Brass nipples are the right choice for most Australian riders, particularly in coastal or wet conditions.
- Work in quarter-turn increments, spread adjustments across several spokes, and re-check constantly.
- Know the limits of home truing. Broken spokes, badly buckled rims, and carbon wheels belong at a shop.
- Building this skill saves time, money, and keeps your wheels rolling true through whatever Australian roads throw at them.
This is educational content, not financial advice.