If you have ever stared at the back of your wheel and wondered how to get that cassette off, you are not alone. These two cycling tools, the chain whip and the cassette lockring tool, are the specific pair that makes it possible, and once you own them you will use them far more often than you expect.
By the end of this article you will understand exactly what each tool does, how to use them together safely, and what to look for when buying in Australia. Whether you are swapping cassettes between wheelsets or replacing worn sprockets, this is the practical knowledge you need to do it yourself.
Note for Australian cyclists:
- Most Australian club riders run Shimano HG drivetrains, so this guide prioritises that system first.
- SRAM is increasingly common on road and gravel bikes here, and compatibility differences are covered clearly below.
- Budget combo tool sets start from around AUD $25-$40 at local Australian retailers, with quality brands like Park Tool also available locally.
At a glance:
- You need both tools together. One holds the cassette, the other loosens the lockring.
- Most Shimano HG cassettes use the same splined lockring tool across 8 through 12-speed.
- SRAM XD and XDR systems require a completely different removal tool.
- Correct reinstallation torque for Shimano HG lockrings is approximately 40 Nm.
Key takeaways:
- A chain whip and cassette lockring tool are a one-time purchase that pays off quickly for any regular rider.
- Chain whip technique is the trickier part. Get it wrong and you risk skinned knuckles or a slipped tool.
- Always check your drivetrain brand and freehub type before buying tools.
What Is a Chain Whip and What Does It Actually Do
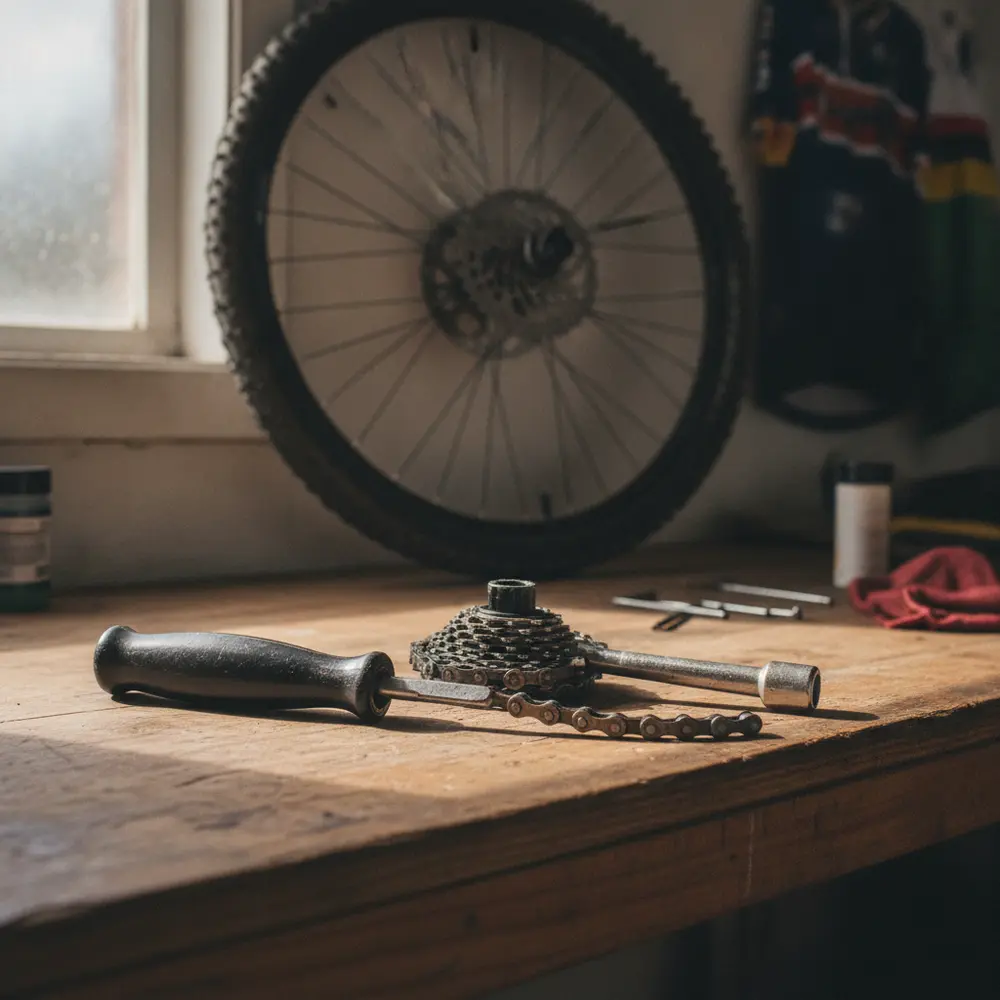
A chain whip is a flat metal handle with a section of bicycle chain attached to one end. You wrap that chain around one of the smaller sprockets on the cassette. When you apply force to loosen the lockring, the chain whip prevents the cassette from spinning in the same direction, effectively locking it in place.
Without the chain whip, the cassette would just rotate freely on the freehub body as you tried to undo the lockring. That is the whole reason it exists. It is a simple tool doing a very specific job, and it does it well.
How the Chain Whip Holds the Cassette in Place
The cassette sits on a freehub body, which is the ratcheting mechanism on your rear hub. The freehub drives the wheel forward when you pedal, but it spins freely in the opposite direction. That is the clicking sound you hear when you coast.
When you try to undo the lockring, the counterclockwise force would normally just spin the cassette freely on the freehub. The chain whip wraps around a mid-range sprocket and resists that rotation. You apply downward force on the chain whip handle at the same time as you turn the lockring tool counterclockwise. Both hands are working against each other, and that tension is what breaks the lockring free.
The direction you wrap the chain matters. The chain must be positioned so that your downward push on the handle resists the cassette spinning, not assists it. If you wrap it the wrong way, the chain will just release and slip off as soon as you apply force.
What Is a Cassette Lockring Tool and Why You Need Both
The cassette lockring tool engages with splines on the lockring itself, the threaded ring that holds the entire cassette onto the freehub body. On Shimano HG systems, this lockring has an internal splined interface that the tool slots into. You then use a spanner or breaker bar on the tool to apply rotational force.
The lockring thread is a right-hand thread, which means it loosens counterclockwise and tightens clockwise. That is standard. You turn the lockring tool counterclockwise to remove, and clockwise to reinstall. Simple to remember once you have done it once.
Most riders use a 24 mm spanner or a 3/8-inch socket drive with the cassette tool, or an adjustable spanner works fine too. A longer breaker bar makes a real difference if the lockring is on tight, and it usually is.
Shimano, SRAM and Campagnolo Lockring Tool Compatibility
This is where riders often get caught out. Not all cassette systems use the same tool. Here is a clear comparison to help you work out what you need before you buy anything.
| Drivetrain System | Cassette Interface | Tool Required | Notes |
|---|---|---|---|
| Shimano HG (most road and MTB) | Splined HG freehub | FR-5.2 or TL-LR15 | Covers 8 through 12-speed HG cassettes |
| SRAM (HG-compatible groupsets) | Splined HG freehub | Same as Shimano FR-5.2 | Works on SRAM cassettes using HG spline body |
| SRAM XD / XDR | Thread-on XD driver body | Dedicated XD cassette tool | Road is XDR, MTB is XD. Different tool entirely |
| Shimano Micro Spline | Micro Spline freehub | TL-LR15 or compatible | Used with 12-speed MTB Shimano cassettes |
| Campagnolo | Campagnolo-specific spline | Campagnolo lockring tool | Not interchangeable with Shimano tools |
The key thing to check is your freehub body type, not just your groupset brand. A SRAM Rival AXS road groupset uses XDR, while an older SRAM groupset may still use an HG-compatible freehub. If you are unsure, check SRAM's XDR cassette system information or ask your local bike shop before buying tools.
When You Will Actually Need These Tools
This tool pair is not something you use every week, but when you need it, you really need it. Riders who invest in these tools are usually motivated by one of a few common situations.
Cassette Swaps, Worn Sprockets and Wheel Transfers
Here are the most common reasons you will reach for these tools:
- Swapping cassettes between wheelsets. If you have training wheels and race wheels, moving a cassette across saves money and keeps your gearing consistent.
- Installing a climbing cassette. Many Australian riders run a flatter cassette for criteriums or flat rides and switch to a wider-range cassette for hilly courses or sportives.
- Replacing a worn cassette. Cassettes wear out, especially if you are riding a lot of kilometres. Swapping one at home saves a workshop visit and labour cost.
- Cleaning the freehub body. Grit and old grease accumulate on the freehub over time. You need to pull the cassette off to do a proper clean.
- Wheel changes after a crash or puncture. If you need to move a cassette to a replacement wheel, you will need both tools to do it properly.
As the team at Bicycling Australia workshop essentials notes, buying quality tools once is a far better investment than cheap tools that slip and damage your components.
How to Remove and Install a Cassette Step by Step
This is the practical part. Follow these steps carefully the first time and the process will make complete sense. For a more detailed visual walkthrough, Park Tool's cassette removal and installation guide is the industry standard reference.
- Secure the wheel. Remove the wheel from the bike and lay it flat on your workbench or floor. Make sure it cannot roll or tip while you are applying force.
- Seat the lockring tool. Insert the cassette lockring tool into the splines on the lockring. On Shimano HG, the tool should sit flush and engage cleanly. Do not force it at an angle.
- Wrap the chain whip. Drape the chain section of the chain whip over one of the middle sprockets, with the handle pointing to the right (roughly at 3 o'clock when the wheel is flat). The chain should wrap clockwise around the sprocket.
- Apply force in opposite directions. Push down on the chain whip handle with your left hand while turning the lockring tool counterclockwise with your right hand using a spanner or breaker bar. Keep your hands clear of the sprocket teeth.
- Break the lockring free. The first movement is usually the hardest. Once it cracks loose, spin the lockring off by hand. Keep track of any spacers that sit between the smallest sprocket and the lockring.
- Slide the cassette off. The cassette will slide off the freehub splines. Note the master spline position so you know the correct orientation when reinstalling.
- Clean the freehub body. Wipe down the freehub splines with a clean rag and apply a thin layer of grease. This prevents the cassette from seizing onto an aluminium freehub body over time.
- Reinstall the cassette. Align the master spline (the wider spline) and slide the cassette back on. It only fits one way. Stack any spacers correctly as they were when you removed them.
- Thread on the lockring by hand first. Always start the lockring by hand to avoid cross-threading, especially on aluminium freehub bodies. If it does not thread smoothly by hand, stop and check the alignment.
- Torque the lockring to spec. Use a torque wrench and tighten the lockring to approximately 40 Nm for Shimano HG systems. You can check Shimano's official technical service documentation for the exact spec for your groupset.
Safety note: The chain whip can slip suddenly if it is not wrapped correctly or if the cassette is oily. Keep your knuckles clear of the sprocket teeth at all times. Experienced mechanics get caught by this too. It is worth taking a slow first pass to check your tool positioning before applying full force.
Choosing the Right Chain Whip and Cassette Tool for Your Setup
The good news is that for most Australian riders on Shimano HG drivetrains, the tool selection is simple. You need one chain whip and one HG-compatible lockring tool. The Park Tool FR-5.2 lockring tool and the SR-2.3 chain whip are widely regarded as solid, reliable options and are stocked locally in Australia.
If you are on a budget, combo sets from around AUD $25-$40 are available and will do the job for occasional home use. If you are doing this regularly, stepping up to a quality individual tool from Park Tool or Unior is worth the extra spend. Cheap tools that slip can round off the splines on your lockring, and that becomes an expensive problem.
What to Look For When Buying in Australia
Here is a quick checklist before you purchase:
- Confirm your freehub type. HG spline, XD, XDR, or Micro Spline. This determines which lockring tool you actually need.
- Check chain width compatibility on the chain whip. Most chain whips work across 8 to 11-speed chains. Some are specifically designed for 12-speed narrow chains, so check the product specs if you are running a 12-speed drivetrain.
- Look for a tool with a solid handle. A longer handle gives better leverage without needing a breaker bar extension. Comfort grip handles reduce fatigue if you are doing multiple wheels.
- Buy from a local Australian retailer where possible. Tools from local shops and retailers mean faster delivery, no customs hassle, and someone to talk to if you have questions. For an overview of what is available locally, check the essential bicycle tools guide from Bicycles Network Australia.
- Consider a torque wrench. Not strictly part of this tool pair, but if you do not own one yet, the cassette lockring is a good reason to get one. Over-tightening can damage the freehub body.
If you are building out your home workshop more broadly, it is worth reading our guide on essential workshop tools for Australian cyclists to plan your purchases sensibly.
Common Mistakes and How to Avoid Them
These are the errors that come up again and again, even among riders who have done this a few times before.
- Wrapping the chain whip the wrong way. If the chain is oriented incorrectly, it releases under force instead of holding. Double-check the wrap direction before you commit to a full push.
- Skipping the hand-thread step on reinstallation. Always start the lockring threads by hand. Cross-threading on an aluminium freehub is easy to do and expensive to fix.
- Forgetting the spacer. Some cassettes use a small spacer between the smallest sprocket and the lockring. Lose it and your cassette will not sit correctly on the freehub.
- Not cleaning the freehub splines. Old grease and grit can cause the cassette to stick or not seat properly. A quick clean every time pays dividends.
- Using the wrong tool for XD or XDR systems. A standard Shimano HG lockring tool will not work on SRAM XD or XDR cassettes. Using it anyway risks damaging the cassette.
- Under-torquing the lockring. A loose lockring will allow the cassette to shift under load, which feels horrible and can damage the freehub splines over time. Torque it properly.
If You Are New to This
If this is your first cassette removal, here are a few things that will make the process easier:
- Watch one short video walkthrough before you start. Seeing the chain whip in action makes the wrapping direction much clearer than reading about it.
- Do not rush the lockring thread-on. Slow and deliberate by hand first, every time.
- Have a clean rag and some degreaser nearby before you start. The cassette and freehub will be grimy.
- Practice the chain whip and lockring tool positioning before you apply full force, just to get the feel of how the two tools work against each other.
- If the lockring will not budge, use a longer breaker bar extension rather than muscle. Force applied badly is how knuckles get hurt.
If You Have Done This Before
For riders who have removed a cassette before but want to sharpen their process:
- Check your chain whip chain for wear. An old chain whip with a stretched chain section is more likely to slip on sprocket teeth.
- Consider applying a thin smear of anti-seize or copper grease to the lockring threads on reinstallation, particularly if you are in a humid coastal environment. This makes future removal much easier.
- Inspect the freehub pawls and body for wear while the cassette is off. If the freehub is slipping under load, this is your opportunity to catch it early.
- If you are running 12-speed, confirm your chain whip is rated for narrow 12-speed chain. Older whips can work, but a narrower chain whip gives better sprocket engagement.
- Keep a note of the torque you applied last time. Consistent reinstallation torque keeps the lockring and freehub in better condition over the long term.
Frequently asked questions
Can I remove a cassette without a chain whip?
Technically some people improvise using a spare chain and a vice, but it is not recommended. Without a proper chain whip you risk slipping, injuring yourself, or damaging the cassette sprockets. For the low cost of the tool, there is no good reason to avoid buying one.
Does one chain whip work for all cassette speeds?
Most chain whips are compatible across 8 to 11-speed cassettes without issue. For 12-speed drivetrains, check that the chain whip uses a narrow chain section compatible with 12-speed chain. Some manufacturers produce speed-specific chain whips, so check the specs before purchasing.
Is the lockring torque spec the same for road and MTB cassettes?
The widely cited figure for Shimano HG cassette lockrings is approximately 40 Nm, but it is worth checking the specific figure for your groupset in the Shimano technical service documentation, as specs can vary between road and MTB tiers and between groupset generations.
Do SRAM cassettes need a different tool to Shimano?
It depends on the freehub. Older SRAM groupsets using an HG-compatible splined freehub body use the same lockring tool as Shimano. However, SRAM XD (MTB) and XDR (road) systems use a thread-on cassette design that requires a dedicated XD cassette removal tool. Check which driver body your wheel is fitted with before buying.
Should I grease the lockring threads on reinstallation?
A light application of grease or anti-seize on the lockring threads is generally considered good practice, particularly if you are in a wet or coastal environment. It makes future cassette removal easier and reduces the risk of the lockring seizing onto an aluminium freehub body. Some manufacturers have specific guidance on this, so it is worth checking if you are unsure.
Quick summary
- A chain whip and cassette lockring tool are the two cycling tools you need to remove and install any cassette at home.
- Most Australian riders on Shimano HG can use the same lockring tool across multiple cassette speeds. SRAM XD and XDR systems need a separate dedicated tool.
- Always thread the lockring by hand first, torque to approximately 40 Nm for Shimano HG, and clean the freehub body while you have it off.
- Quality tools from Park Tool, Unior and Pedro's are available from Australian retailers and are a worthwhile long-term investment for any regular rider.
- If you are building out your home workshop, check our guide to essential workshop tools and get in touch if you have questions about your specific setup.
This is educational content, not financial advice.