A loose or grinding headset is one of those problems that gets worse every ride if you ignore it, and one full service with the right tools fixes it completely. The headset press and crown race setter are the two cycling tools that make the difference between a job done properly and one that causes expensive frame damage.
By the end of this article you will know exactly what each tool does, whether you need to buy one or borrow one, and how to work through a full headset service at home with confidence. We cover every stage from stripping the front end to checking for play after reassembly.
Note for Australia:
- Australian riding conditions, including coastal humidity, dusty inland trails, and strong UV exposure, accelerate bearing wear and increase how often a full headset service is worthwhile.
- Tools and replacement headsets are available locally through retailers like Pushys AU and Chain Reaction Cycles AU, so you are not waiting on international shipping.
- If you ride gravel or mountain bike trails regularly, budget for a headset service once a year at minimum. Road riders on sealed surfaces can often stretch this to every two years.
At a glance:
- A headset press seats bearing cups squarely into the head tube. Getting this wrong risks binding, premature wear, and frame damage.
- A crown race setter drives the crown race fully onto the fork steerer shoulder. A pipe and mallet can work as a substitute on steel or alloy frames, but not on carbon.
- Integrated headsets (common on modern road and gravel bikes) do not need a press. If you have one, this article still covers removal, cleaning, and reassembly.
- Most intermediate home mechanics need one universal press and one crown race setter. That is the whole tool investment for this job.
Key takeaways:
- Carbon frames require a proper press tool. The DIY threaded-rod method carries a real risk of pressing a cup in crooked, which can crack the head tube.
- Identifying your headset standard before buying tools or a replacement headset saves money and frustration.
- A full headset service is a satisfying job to do yourself, but a good local bike shop is always a reasonable option for a one-off.
What Is a Headset and Why Does It Need Servicing?
The headset is the bearing assembly that connects your fork to the frame and allows the bars to steer smoothly. It sits at the top and bottom of the head tube, and on most modern bikes it uses a threadless system with a stem clamped onto the fork steerer tube. Older steel bikes often use a threaded headset, which has a locknut and threaded cups, and requires a different service process.
Over time, grit, water, and general wear break down the grease in the bearings, causing the characteristic "crunchy" feel or a slight knock when you brake and rock the bike. Left unchecked, pitted bearings eventually damage the bearing races themselves, meaning a more expensive repair.
For a deeper look at bicycle headset standards and types, Sheldon Brown's reference page is the most thorough resource available.
Signs Your Headset Needs Attention
- A knocking or clunking felt through the bars when braking hard.
- Roughness or grinding when you slowly turn the bars with the front wheel off the ground.
- Visible side-to-side play in the fork when you squeeze the front brake and rock the bike forward.
- Tight spots or notchiness through the steering arc, which often means a pitted bearing race.
- Corrosion or discolouration visible around the headset cups.
Headset Standards: Know What You Have Before You Buy
The headset world has a frustrating number of acronyms. Here is a plain-language breakdown of the four you are most likely to encounter. Knowing your standard before ordering a replacement headset or buying press adapters saves a wasted trip to the post office.
| Standard | What it means | Press tool needed? |
|---|---|---|
| EC (External Cup) | Cups sit outside the head tube. Common on older alloy and steel frames. | Yes, press required. |
| ZS (Zero Stack) | Cups sit flush with the head tube opening. Common on modern alloy and carbon frames. | Yes, press required. |
| IS (Internal-External) | Cups press deeper inside the head tube. Often found on older MTB frames. | Yes, press required. |
| Integrated | No pressed cups. Bearings sit directly in the head tube. Common on modern road and gravel bikes. | No press needed. |
For a fuller explanation, the headset standards guide on 99 Spokes walks through each type with diagrams and plain-language notes. Check your frame's spec sheet or measure the head tube diameter if you are unsure which standard applies to your bike.
The Headset Press Tool Explained
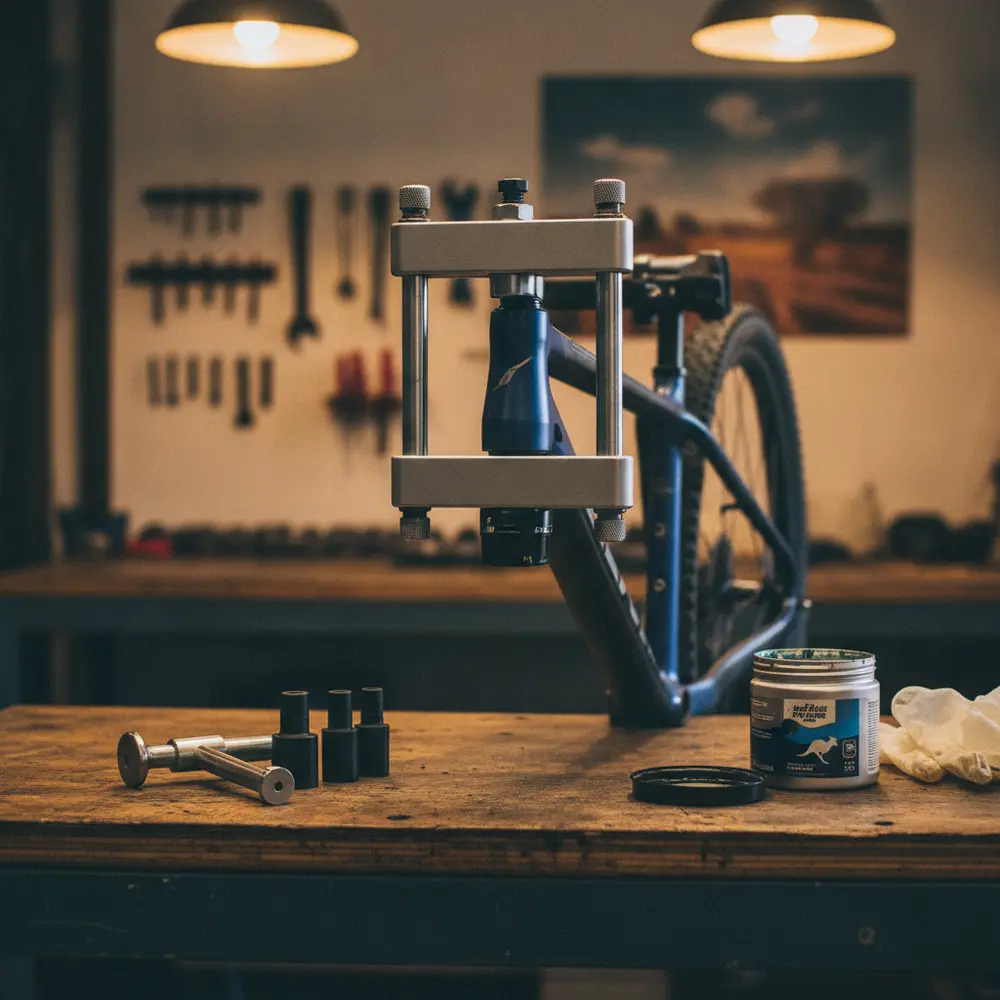
A headset press is a long threaded rod with bearing surfaces and interchangeable cups that sit against the headset cups. You tighten the rod from above and it draws both cups simultaneously into the head tube, applying even force around the full circumference. This is the key point. Even force is what keeps a cup going in straight.
How a Headset Press Works and When You Need One
When a cup is pressed in crooked, even slightly, it creates a tight spot in the steering and accelerates bearing wear. On a carbon head tube, a misaligned cup can cause cracking. A proper press prevents this by maintaining alignment throughout the installation. The Park Tool HHP-2 is the most widely referenced example, but there are solid options at lower price points that work just as well for home use.
You need a headset press any time you are installing new EC, ZS, or IS headset cups. If you are simply pulling the headset apart to regrease the bearings and the cups are staying in the frame, you do not need the press at all. Full installation after a cup replacement is when the tool earns its keep.
Types of Headset Press Tools: Budget vs Workshop Quality
- Universal press tools come with a range of cup adapters and cover most EC, ZS, and IS standards. These are the best choice for a home mechanic with more than one bike.
- Standard-specific presses are cheaper but only work with one cup size. Only worth it if you know you will only ever work on one frame standard.
- DIY threaded rod method uses a length of threaded rod, large washers, and nuts to mimic a press. It can work on steel and aluminium frames with care, but it is harder to keep square and is not recommended for carbon frames. The risk of pressing a cup in crooked is meaningfully higher.
- Workshop-grade presses from brands like Unior and VAR are built for daily professional use. More than most home mechanics need, but they hold their value well if you buy and resell.
For an honest take on the DIY headset press method vs using a proper tool, the Singletracks guide covers the tradeoffs clearly. The short version: if your frame is carbon, buy or borrow a proper press.
The Crown Race Tool Explained
The crown race is the lower bearing race that sits on the shoulder at the top of the fork crown. It needs to be driven fully down onto the fork steerer until it seats flat against that shoulder. If it sits even slightly proud, the bearing will not preload correctly and you will get play in the headset immediately.
What a Crown Race Setter Does and Why It Matters
A crown race setter is a cylindrical tool that slides over the fork steerer and is driven down onto the crown race with a mallet or by hand. It contacts the crown race evenly around its full circumference, seating it squarely in one or a few firm strikes. Without the tool, people often use a section of pipe, which works fine on steel and alloy forks. On carbon steerers, a dedicated setter is the safer choice because it is sized to contact the race without bearing on the steerer itself.
Crown race setters are usually sold separately from headset presses. They are one of the lower-cost tools in a home workshop and well worth having if you do this job more than once. You can find crown race setters and headset tools at Pushys AU with Australian delivery.
Full Headset Service: Step by Step
This walkthrough covers a standard threadless headset. If you have a threaded headset on an older steel bike, the cup installation uses a different process and the fork removal is also different. The principles around pressing and seating the crown race still apply.
Removing the Old Headset and Crown Race
- Remove the stem, top cap, spacers, and fork from the frame. Keep all spacers in order so reassembly is straightforward.
- Use a headset cup remover (a simple drift tool) tapped alternately around the inside of each cup to drive them out without distorting the head tube. Tap a little on one side, then the opposite side, working around the cup evenly. This alternating approach is described in detail in Park Tool's headset removal guide.
- Remove the crown race from the fork steerer. A flathead screwdriver or a dedicated crown race puller can lever it off. Take care not to gouge the fork crown on carbon forks.
- Inspect the head tube for burrs, corrosion, or damage. Clean it thoroughly before any new components go in.
- Inspect the removed cups and crown race. Heavily pitted or corroded components should not be reused.
Installing Cups with the Headset Press
- Apply a thin layer of grease to the outside of each cup and to the inside of the head tube where the cups will seat. This makes pressing easier and prevents corrosion bonding the cups to the frame later.
- Select the correct adapters for your headset standard and fit them to the press rod.
- Place both cups in position at the top and bottom of the head tube. Make sure they are sitting square before you start pressing.
- Thread the press rod through and tighten it slowly and evenly. Watch both cups as they enter the head tube. If one side looks like it is going in at an angle, back off and realign. See the full headset installation guide from Park Tool for reference.
- Press until both cups are fully seated and flush. Do not over-torque. When the cups stop moving, they are in.
Seating the Crown Race
- Slide the crown race onto the fork steerer with the bearing surface facing up.
- Fit the crown race setter over the steerer so it rests on top of the crown race.
- Strike the setter firmly downward with a mallet until the crown race seats fully against the fork crown shoulder. It should sit perfectly flat with no gap visible around the circumference.
- Wipe off any excess grease and inspect the fit before proceeding to reassembly.
Greasing and Reassembly
Apply fresh grease to the bearings and bearing races before fitting the fork back into the frame. Reassemble spacers in order, fit the stem, and thread the top cap in. Tighten the top cap until there is no play in the headset but the steering still turns freely, then clamp the stem pinch bolts. Check the manufacturer's torque spec for your stem pinch bolts, as carbon steerers have lower limits than alloy. Typical stem pinch bolt torques are in the 4 to 6 Nm range, but always confirm against your component documentation.
Rock the bike while holding the front brake to check for play. Lift the front end and turn the bars to check for tight spots or binding. If either is present, adjust the top cap preload before fully tightening the stem.
Buying Guide for Australian Cyclists
Most intermediate home mechanics need exactly two tools for headset work: one universal headset press and one crown race setter. You do not need a separate tool for every headset standard if you buy a universal press with a full adapter set. For a broader look at useful cycling tools to build out your home workshop, our tools section has more recommendations.
- Universal headset press with adapters: Covers EC, ZS, and IS standards. Brands like Unior and Feedback Sports are solid mid-range options available in Australia.
- Crown race setter: Often sold as a standalone tool. Check that it suits your fork steerer diameter (1-1/8 inch is most common on modern bikes).
- Headset cup remover: A simple drift tool, relatively inexpensive. Worth having alongside the press for a complete kit.
- Where to buy in Australia: Pushys AU and Chain Reaction Cycles AU both stock headset tools and ship nationally. Local bike shops can also order in specific tools, and some bike co-ops have tools available to members.
If you only ever plan to do this job once on one bike, borrowing a press from a local bike co-op or asking your local shop to do the pressing while you supply the headset is a completely sensible option. For everything else in your home maintenance toolkit, build up progressively as jobs come up.
Common Mistakes to Avoid
- Pressing cups in without grease. This makes the press fit harder than it needs to be and risks the cups corroding in place permanently.
- Using the DIY rod method on a carbon frame. The margin for error is too small. One cup pressed slightly crooked can crack the head tube.
- Not alternating strikes when removing cups. Tapping from one side only warps the cup and can damage the head tube.
- Reusing a pitted or corroded crown race. The cost of a new crown race is far less than the cost of a replacement fork.
- Over-tightening the top cap. The top cap sets bearing preload, not stem clamping. Tighten just until play disappears, then clamp the stem.
- Skipping the headset standard check before ordering parts. EC44, ZS44, and ZS56 cups look similar but are not interchangeable.
If You Are New to This Job
- Start with identifying your headset standard before touching any tools. Your frame manufacturer's website or the head tube diameter will point you to the right standard.
- Watch a video of a headset press in action before your first attempt. Seeing the tool work makes the process much clearer than reading alone.
- Borrow or hire a press for the first job if you are not sure you will do this again. Many co-ops and shops offer this.
- Take photos of the spacer stack and stem position before you remove anything. It saves guesswork on reassembly.
- If your bike has a carbon frame or carbon fork steerer, consider having a shop do the first press and crown race seating while you watch. It is a low-cost lesson.
If You Have Done Basic Headset Work Before
- A universal press with a quality adapter set is worth buying outright if you own more than one bike or plan to keep turning wrenches.
- Check your press adapters suit the new headset standard before starting. Buying a new headset and discovering your adapters do not fit mid-job is frustrating.
- When regreasing without removing cups, a thin syringe of grease pushed into the bearing gap is faster than a full strip and press every time.
- Consider whether the crown race is worth reusing. If it looks good and came off cleanly, it is usually fine. If it was seized or damaged on removal, replace it.
- Torque the stem pinch bolts to spec every time, not just by feel. This matters more on carbon steerers than alloy.
When to DIY and When to Take It to Your Local Shop
Doing your own headset service is genuinely satisfying and saves real money over time, especially if you ride gravel or mountain bike and service the headset annually. The tools pay for themselves quickly when you consider what a shop charges for labour on a full headset replacement. For more on knowing when to service your bike yourself, our servicing guides have you covered.
That said, there are situations where handing it to a professional makes sense. If your frame is high-end carbon and you have not pressed a headset before, the risk-reward on a first attempt is worth thinking about carefully. A good local bike shop will do the cup pressing for a modest fee, and watching them do it once is a worthwhile education.
The Bicycle Network Australia can also point you toward local cycling clubs and community workshops in your state, some of which have tools available and experienced members happy to help.
Frequently asked questions
Can I press a headset in without a dedicated press tool?
Yes, on steel and aluminium frames, the DIY threaded-rod method using a length of threaded rod, large washers, and nuts can work if you are careful to keep everything square. On carbon frames, the risk of pressing a cup in crooked is meaningful enough that a proper press tool is strongly recommended. The cost of a cracked head tube far exceeds the cost of a press.
Do I need a crown race setter, or can I use a piece of pipe?
A section of pipe that matches the crown race outer diameter can seat a crown race effectively on steel and aluminium forks. It is a widely used workshop improvisation. On carbon fork steerers, a dedicated setter is safer because it is designed to contact the race without bearing on the steerer tube itself. If you are doing this job regularly, the setter is a cheap tool worth having.
Does an integrated headset need a press tool?
No. Integrated headsets have no pressed cups. The bearings sit directly in the head tube. Service involves removing the fork, cleaning the bearing surfaces and head tube, replacing bearings if worn, regreasing, and reassembling. No press is required. This is one reason integrated headsets are appealing on lightweight carbon builds.
How often should I fully service my headset?
For regular Australian riding conditions, once a year is a reasonable interval for mountain bike and gravel riders. Road riders on sealed surfaces can often go longer, but it is worth checking for play and roughness every few months as part of a general bike check. Riders in coastal or high-humidity areas may find bearings deteriorate faster and benefit from more frequent attention.
Can I reuse the crown race after removing it?
In many cases, yes. If the crown race came off cleanly and the bearing surface shows no pitting, scoring, or corrosion, it can be reused with fresh grease. If it was seized to the fork or was damaged during removal, replace it. Crown races are inexpensive and not worth the risk of refitting a damaged one.
Wrapping Up
A full headset service is one of those jobs that rewards home mechanics well. You get a noticeable improvement in how the bike rides, and with the right tools the whole process is straightforward. Here is the short version of what matters.
- Know your headset standard before buying tools or parts. EC, ZS, IS, and integrated all require different approaches.
- A universal headset press and a crown race setter are the two tools that cover almost every job. You do not need more than that for home use.
- Carbon frames require a proper press. The DIY rod method is an acceptable shortcut on steel and alloy only.
- Grease the cups and head tube before pressing. Check for play and binding after reassembly before riding.
- If in doubt, your local bike shop is always there. Watching a professional do it once is worth more than reading any article.
If you have questions about tools or want to share how your headset service went, get in touch with us here. We are always happy to talk through specific setups or tricky situations.
This is educational content, not financial advice.