There is nothing quite like the sinking feeling of a puncture 40 kilometres from the car, in the middle of a group ride, with nothing in your pockets but a gel wrapper and a vague hope that someone else is better prepared. Being that rider is avoidable, and a well-packed tool roll is the simplest way to make sure it never happens to you.
By the end of this article, you will know exactly which cycling tools belong in a portable tool roll for group rides, how to organise them so you can actually find things roadside, and how to keep the whole kit light enough that you forget it is there until you need it.
Note for Australia:
- Australian chip seal roads are particularly aggressive on tyres. Carrying at least one spare tube is non-negotiable on most local club rides.
- If you ride in warmer regions, especially during summer, heat accelerates tyre rubber degradation and can cause CO2 cartridge pressure to feel inconsistent. A mini pump as backup is worth the extra grams.
- Remote gravel and regional road rides can leave you 80-plus kilometres from the nearest bike shop, so a slightly heavier kit is a smart trade-off on those days.
At a glance:
- A tool roll is lighter and more compact than a bulky saddle bag when carrying the same core tools.
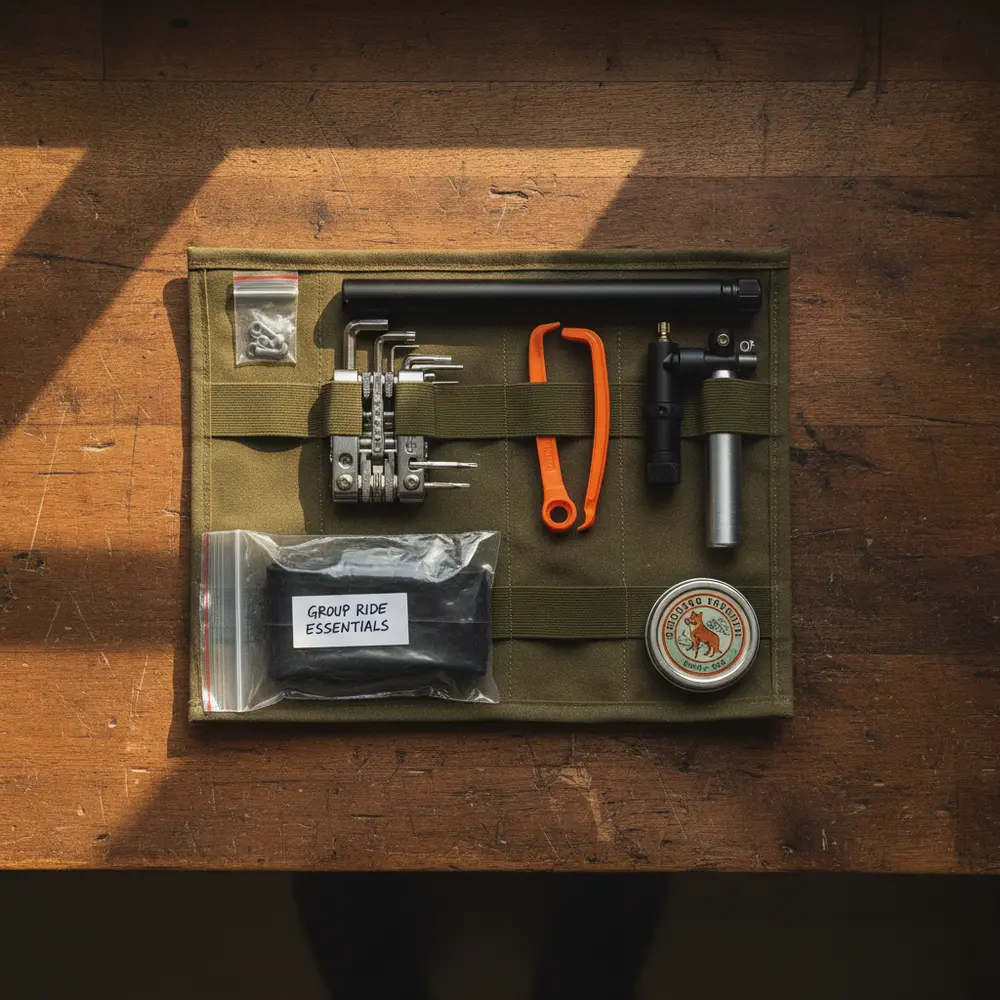
- The non-negotiables are a multi-tool, tyre levers, a spare tube, and an inflation device.
- A chain quick link and a patch kit are high-value additions for Australian conditions.
- Pack in reverse order of likely use so the items you grab first are always on top.
Key takeaways:
- A well-packed tool roll keeps you self-sufficient and means you are not the one who holds up the bunch.
- Carrying tools is as much about group ride etiquette as it is about personal convenience.
- Tubeless setups change what you carry, but do not eliminate the need for a backup tube.
Why a Tool Roll Beats a Bulky Saddle Bag on Group Rides
A standard saddle bag is fine for commuting or solo riding, where bulk and access time are less of a concern. On a group ride, the situation is different. You are stopped at the side of the road, the bunch is waiting, and fumbling through a disorganised bag under pressure is not a good look. A tool roll keeps everything visible, accessible, and in a predictable order every single time you open it.
Tool rolls also sit cleanly under a saddle or tuck into a jersey pocket, and they transfer easily between bikes. If you swap between a road bike and a gravel rig, one roll works for both. That flexibility alone is worth it for most riders who run more than one bike.
Weight vs Preparedness: Finding the Right Balance
The goal is not to carry the lightest possible kit. The goal is to carry the right kit for the ride you are doing, at a weight that does not genuinely affect your performance. For most group rides, a complete core tool roll sits comfortably under 350 grams. That is less than a medium bidon of water and far less than the cost of a long walk home.
For shorter rides close to town, you can trim the kit down. For regional or gravel rides, add a second tube and a few extra quick links. The tool roll format makes it easy to swap items in and out as the ride demands. Check out our cycling tools and gear guides for more ideas on what to carry for different ride types.
The Core Cycling Tools Every Roll Should Have
Get these right and you can handle the vast majority of roadside failures on a group ride. These are the items that earn their place every single time, not occasionally.
Multi-Tools, Tyre Levers and the Non-Negotiables
A quality cycling multi-tool is the single most important item in the roll. Look for one that covers 3, 4, 5, and 6mm hex keys as a minimum, along with a Torx T25 for modern disc brake rotors and brake lever bolts. A chain breaker on the multi-tool is useful, though a dedicated chain tool is more reliable if you have space. Screwdrivers, both flathead and Phillips, are worth having too.
Tyre levers come next. Two solid plastic levers are enough for most tyres. Cheap levers crack or snap at the worst moment, so buy a decent set and keep them in the roll permanently. Park Tool's roadside repair guide is a useful reference for understanding which tools are genuinely required for common repairs versus which ones are nice extras.
Tube, Patch Kit, or Both: What the Locals Actually Carry
Most experienced Australian riders carry one spare tube as the primary repair option and a patch kit as a backup. Swapping a tube is fast, clean, and reliable, which matters when the group is waiting. Patching roadside is slower and requires dry conditions and a clean surface, which is not always realistic on a chip seal road in summer. Sheldon Brown's flat tyre repair guide covers the full case for and against patching in good technical detail if you want to go deeper on the technique.
On longer or more remote rides, carry two tubes and a patch kit. The patch kit then becomes a genuine third option if you pick up two punctures, which does happen. Glueless patches are faster roadside and take up almost no space in the roll.
Here is a quick comparison to help you decide what to carry based on your ride type:
| Ride Type | Tube | Patch Kit | Notes |
|---|---|---|---|
| Short road ride, near town | 1 tube | Optional | CO2 is fine here. Quick getaway. |
| Long road ride, club group | 1 tube | Yes | Patch kit covers a second flat. |
| Remote gravel ride | 2 tubes | Yes | Distance from help makes backup essential. |
| Tubeless setup | 1 tube (backup) | Yes | Sealant handles most punctures. Tube is last resort. |
Situation-Specific Additions Worth Considering
Once the core kit is sorted, a few extra items can genuinely save a ride rather than just save a tyre. These are the tools that separate the prepared rider from the one borrowing from others.
Chain Tools, Quick Links and Knowing When They Save the Ride
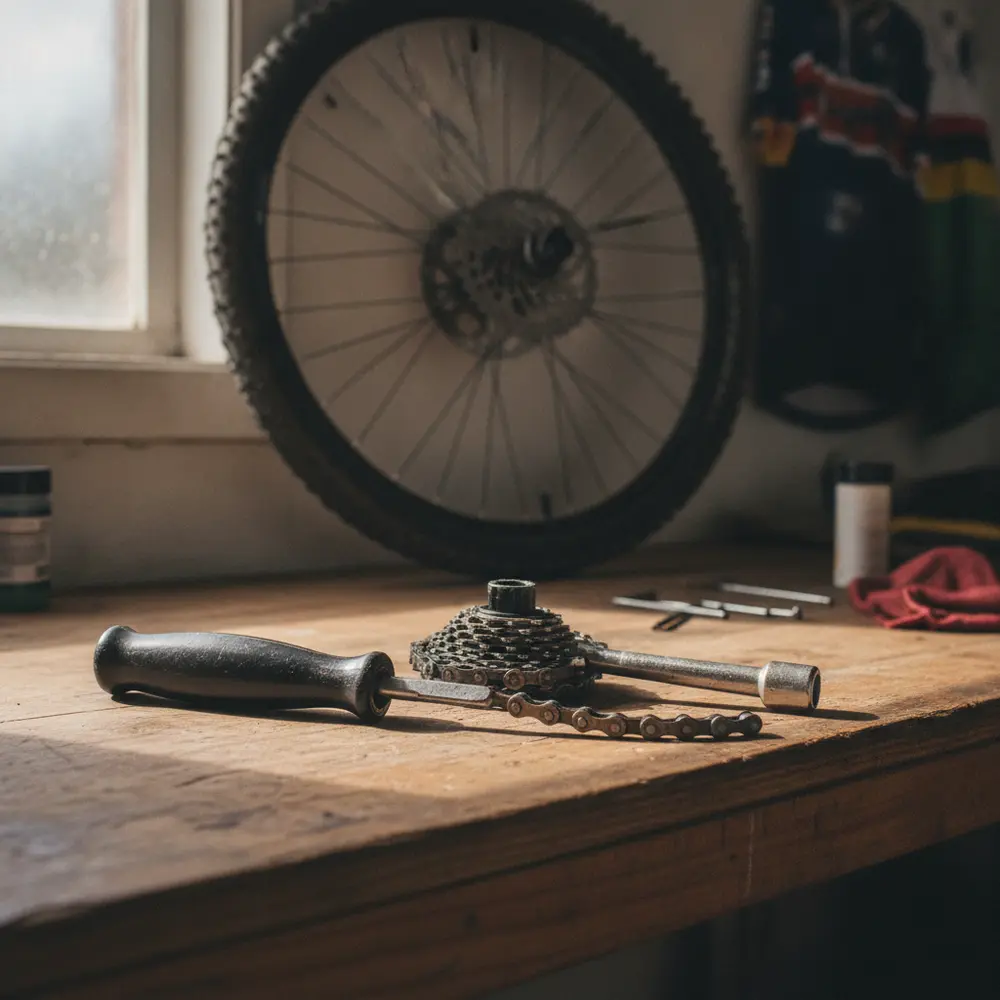
Chain failures on group rides are less common than punctures, but when they happen, they are ride-ending without the right tools. A dropped or broken chain can often be fixed with a spare quick link in under two minutes. Carry two quick links that match your chain speed, whether that is 10, 11, or 12-speed. They weigh almost nothing and live in a small zip-lock bag at one end of the roll.
A dedicated chain tool is worth adding if your multi-tool does not have one, or if the built-in chain breaker feels flimsy. CyclingTips covers the reasoning behind chain tools and quick links in their ride essentials guide, and it is worth a read if you are undecided. On gravel rides where you are more likely to drop a chain over rough terrain, this becomes a higher priority item.
A few other situational additions worth considering:
- Mini pump or CO2 inflator. CO2 is fast and compact, which suits group rides well. A mini pump is slower but works on every ride and never runs out. Many riders carry one CO2 cartridge and a small pump as a backup. For Australian summer rides, CO2 can behave slightly differently in extreme heat, so having a pump is good insurance.
- Tubeless plug kit. If you ride tubeless, a small plug tool and a few plugs can seal cuts that sealant cannot handle. Compact and lightweight, these are standard kit for gravel riders now.
- Nitrile gloves. Two gloves rolled up tight take up almost no space and mean you can fix a chain or swap a tube without covering yourself in grease. Your riding companions will appreciate this more than you expect.
- Tyre boot. A small piece of reinforced material that goes inside the tyre to cover a sidewall cut. A cut tyre with no boot will chew through a new tube in minutes. A folded dollar note works in a pinch, but a proper boot is better.
How to Pack Your Tool Roll Efficiently
A tool roll is only as useful as how well it is packed. The wrong packing order means you are pulling everything out to find the one item you need, while the group stands around getting cold and impatient.
Order of Access and Keeping Things Secure on the Road
Pack in reverse order of likely use. The items you will reach for first should be at the outermost position when you unroll the kit. For most puncture repairs, that means tyre levers on the outside, then tube, then inflation device. The multi-tool and less-used items sit deeper in the roll.
A few packing habits worth building:
- Keep the spare tube in its own small bag or wrap it in a cloth to protect it from abrasion against other tools.
- Use the pockets or loops in the roll to keep small items like quick links and CO2 cartridges from rattling loose.
- Roll the kit firmly but not so tight that it is hard to unroll quickly one-handed.
- Check the roll before every ride. Tubes develop slow leaks over time, and a flat spare tube is a frustrating discovery at the roadside.
- Keep the total weight under around 350 grams for your core kit. Add to that for longer or more remote rides, but be deliberate about each addition.
GCN has a practical tool roll packing tutorial that shows the order and technique visually, which is worth five minutes of your time before you put your first roll together.
Recommended Tool Rolls and Where to Buy in Australia
You do not need to spend a lot to get a functional tool roll. Canvas rolls with individual tool pockets and a secure closure strap are the most practical design. They are available from most Australian bike shops and online retailers. Pushys has a useful guide on what tools to carry that also gives you a sense of what is available locally.
When choosing a roll, look for:
- Enough individual loops or pockets to keep tools separated and secure.
- A roll width that fits under a standard saddle without flapping on rough roads.
- A secure closure, either a strap, velcro, or drawstring. Avoid rolls that rely on tension alone.
- Durable material that handles being compressed repeatedly. Canvas and coated nylon both work well.
For the tools themselves, most quality brands available at Australian bike shops will do the job reliably. What matters more than brand is that the multi-tool feels solid, the levers do not flex excessively, and the tube is the correct size for your wheels. Bicycling Australia's essential bike repair kit guide is a good local reference for product categories without being overly brand-specific.
The Group Ride Etiquette Side of This
Being prepared on a group ride is not just about your own comfort. It is about being a good member of the bunch. Group riding in Australia comes with an unspoken expectation that everyone shows up ready to handle a basic mechanical. If you regularly borrow tools or tubes from others without carrying your own, that gets noticed.
The flip side is that a well-stocked tool roll makes you the person others gravitate toward when something goes wrong. That is a good position to be in. Sharing a tube, a quick link, or even a tyre lever is part of the culture, and being able to offer those things builds goodwill in any bunch. Check the Cycling Australia group ride guidelines for a broader look at how to be a responsible and contributing group rider.
The Tiered Tool Roll Checklist
Use this checklist to build your kit based on the type of riding you do most. It is split into three tiers so you can scale up or down depending on the ride.
Must Have (every ride, no exceptions):
- Cycling multi-tool with 3, 4, 5, 6mm hex keys and T25 Torx
- 2 x plastic tyre levers
- 1 x spare inner tube (correct size for your wheels)
- Mini pump or CO2 inflator with at least one spare cartridge
Should Have (longer rides, regional routes, gravel):
- Glueless patch kit
- 2 x chain quick links (matching your chain speed)
- Tyre boot or folded reinforcement material
- 1 x additional spare tube for remote rides
- 2 x nitrile gloves in a small zip bag
Nice to Have (for the rider who wants to cover everything):
- Dedicated chain tool if your multi-tool does not include one
- Tubeless plug kit and plugs (for tubeless setups)
- Small zip ties, 2 to 3
- Cash for a cab or a coffee if it all goes wrong
Common Mistakes to Avoid
- Not checking the spare tube before the ride. Tubes stored in a roll can develop slow leaks over weeks. Test it before you need it.
- Carrying a tube that does not fit your wheels. Double-check valve type (Presta vs Schrader) and tube diameter before you pack it.
- Relying on one CO2 cartridge with no backup. One flat is manageable. Two flats with no pump is a very long walk.
- Packing the roll so tightly it takes two minutes to unroll at the roadside. Practice opening and repacking it at home so it becomes quick and easy.
- Assuming tubeless means you do not need a tube. Sealant handles small punctures, but cuts or large holes still require a tube as a last resort.
- Leaving the roll at home on short rides. Mechanicals do not respect distance. A 20-kilometre spin can produce a puncture just as easily as a 100-kilometre ride.
If You Are New to Carrying a Tool Roll
- Start with just the must-have items. Multi-tool, two levers, a tube, and a pump covers most situations.
- Practice changing a tube at home before you need to do it roadside under pressure with a group watching.
- Ask someone at your local bike shop to show you how to seat a tube and use tyre levers without pinching the tube.
- Choose a roll that is simple to open and close. Complicated closures are annoying when your hands are greasy.
- Ride with the roll attached for a few rides before you need it so you know how it sits and whether it rattles or moves.
For more foundational riding tips, have a look at our beginner cyclist resource section on Segment Club.
If You Have Packed a Tool Roll Before
- Review your kit against your current bike spec. A new groupset, cassette speed, or wheel size may mean your quick links or tube size are no longer correct.
- Consider adding tubeless plugs if you have moved to tubeless tyres and have not updated the roll yet.
- Replace any tyre levers that have cracked, bent, or feel brittle. They are cheap and are not worth breaking mid-repair.
- Think about adding a second tube if you regularly do rides longer than 80 kilometres or ride in areas with chip seal or gravel.
- Check that your CO2 inflator head is compatible with your current valve type, especially if you have changed wheel sets recently.
Frequently Asked Questions
Is a tool roll better than a saddle bag for group rides?
For most group riders, yes. A tool roll keeps tools organised, accessible, and in a predictable layout. It also transfers easily between bikes and sits neatly under the saddle or in a jersey pocket. A saddle bag can carry more, but for a core kit, a roll is lighter and faster to use at the roadside.
What is the minimum multi-tool spec I should carry?
At a minimum, look for a multi-tool with 3, 4, 5, and 6mm hex keys, a T25 Torx bit, and either a chain tool or a strong chain breaker. Flathead and Phillips screwdrivers are useful extras. Most quality compact multi-tools available at Australian bike shops cover these bases.
Should I carry CO2 or a mini pump on group rides?
Both have a place. CO2 is faster, which matters on a group ride. A mini pump works unlimited times and is not affected by heat or cartridge supply. Many riders carry one CO2 cartridge for speed and a small pump as a backup. For Australian summer rides in particular, having the pump as a fallback is smart.
Do I still need a tube if I run tubeless tyres?
Yes. Tubeless sealant handles small punctures well, but larger cuts, sidewall damage, or a tyre that loses sealant will still require a tube to get you home. Carry one tube even on a full tubeless setup. It is your last resort, and you will be glad it is there when you need it.
How heavy should my complete tool roll kit be?
A core kit covering the must-have items should come in under around 300 to 350 grams. Add the shouldhave items and you are looking at 400 to 500 grams depending on the specific tools. That is a sensible upper limit for most rides. Remote or very long rides justify going heavier, but for standard club rides, keep it lean.
Wrapping It Up
A well-packed tool roll is one of those small investments that pays off every time you head out for a group ride. It keeps you self-sufficient, contributes to the group, and takes the stress out of roadside mechanicals. Here is a quick summary to take away:
- Build your kit around the four non-negotiables: multi-tool, tyre levers, spare tube, and inflation device.
- Add a patch kit and quick links for most Australian riding conditions, especially on longer or more remote routes.
- Pack in reverse order of likely use so the items you need first are always easy to reach.
- Check and repack your roll before every ride. A flat spare tube or missing quick link is only discovered at the worst possible time.
- Being prepared on a group ride is as much about etiquette and respect as it is about self-sufficiency. Carry tools, share them when needed, and be the rider people want alongside them when things go wrong.
Have questions about building your kit or want a recommendation for your specific setup? Get in touch with the Segment Club team and we are happy to help you figure out what works best for your riding.
This is educational content, not financial advice.