A dirty chain is one of the most common and most expensive mistakes a cyclist can make. Grit and old lube grind away at your cassette, chainrings and jockey wheels with every pedal stroke, and the cost of replacing a full drivetrain is a lot steeper than a $20 bottle of degreaser.
By the end of this guide, you will know which chain cleaning tools are worth buying, which degreasers suit Australian conditions, and how to get the job done properly in under 15 minutes. You will also know what mistakes to skip so you are not doing the whole job twice.
Note for Australia:
- Australian conditions vary a lot. Inland and outback riding means fine red dust that packs into your chain fast. East coast trails around the Dandenong Ranges or Blue Mountains mean mud and moisture that accelerate wear.
- Coastal riders in Sydney, Brisbane and Perth deal with salt air, which speeds up corrosion on chain plates and cassette teeth if the chain is not kept clean and lubed.
- Most of the products mentioned in this guide are available from Australian retailers like Pushys and 99 Bikes, both online and in-store.
At a glance:
- A rotating chain cleaning device is the fastest and most practical option for most riders.
- Bio-degreasers work well for regular maintenance. Solvent-based degreasers are better for heavily soiled chains.
- Ultrasonic cleaners are thorough but expensive and not necessary for most club riders.
- Clean and re-lube frequency depends heavily on where and how often you ride in Australia.
Key takeaways:
- Regular chain cleaning extends the life of your entire drivetrain, saving real money over a season.
- The right tool and degreaser combination makes the job faster and more effective.
- Skipping the rinse or re-lubing too soon are the two most common mistakes that undo all your work.
Why Keeping Your Chain Clean Actually Matters
It is not just about having a nice looking bike. A clean chain runs more efficiently, shifts more precisely, and lasts significantly longer than a neglected one. Every kilometre you ride with a dirty chain is grinding metal against metal inside your cassette teeth and chainring.
Independent drivetrain testing, including data from Bicycle Rolling Resistance, consistently shows that a dirty or poorly lubricated chain increases friction losses measurably compared to a clean, well-lubed chain. The exact watt difference varies by conditions and lube type, but the direction is always the same. A dirty chain costs you efficiency.
How a Dirty Chain Wears Out Your Drivetrain Faster
Chain wear is often called chain stretch, but what is actually happening is that the inner workings of each link are wearing down. As the chain wears, it no longer sits correctly on the cassette sprockets and chainring teeth. Those components then start to wear unevenly and accelerate their own wear rate.
As the team at Sheldon Brown notes in his cycling reference, replacing a worn chain early is far cheaper than waiting until it has chewed through your cassette and chainring. A chain checker is a handy companion to your cleaning kit for exactly this reason. Keep the chain clean, measure it regularly, and replace it before it takes out more expensive parts.
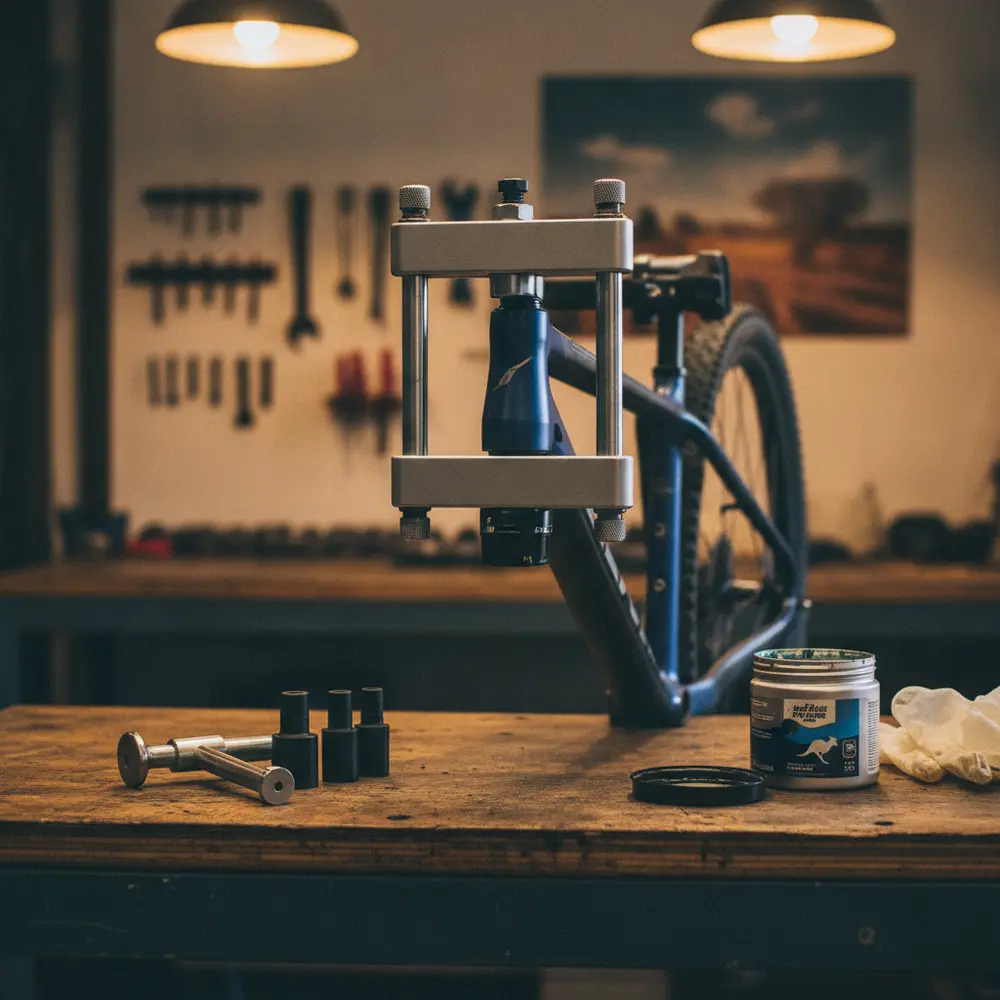
Types of Chain Cleaning Tools and What They Do
There are a few different approaches to cleaning your chain, and the right one depends on how dirty it is, how much time you have, and whether you want to do it on or off the bike. Here is a breakdown of the main options.
| Tool Type | Best For | Speed | Cost Range (AUD) |
|---|---|---|---|
| Rotating chain cleaning device | Regular on-bike cleaning | Fast (5-10 min) | $20 to $60 |
| Brush and pick kit | Spot cleaning and cassette work | Slower | $10 to $30 |
| Degreaser soak (jar or tub) | Off-bike deep clean | Medium | Minimal extra cost |
| Ultrasonic cleaner | Thorough deep clean off-bike | Hands-off (long cycle) | $100 to $400+ |
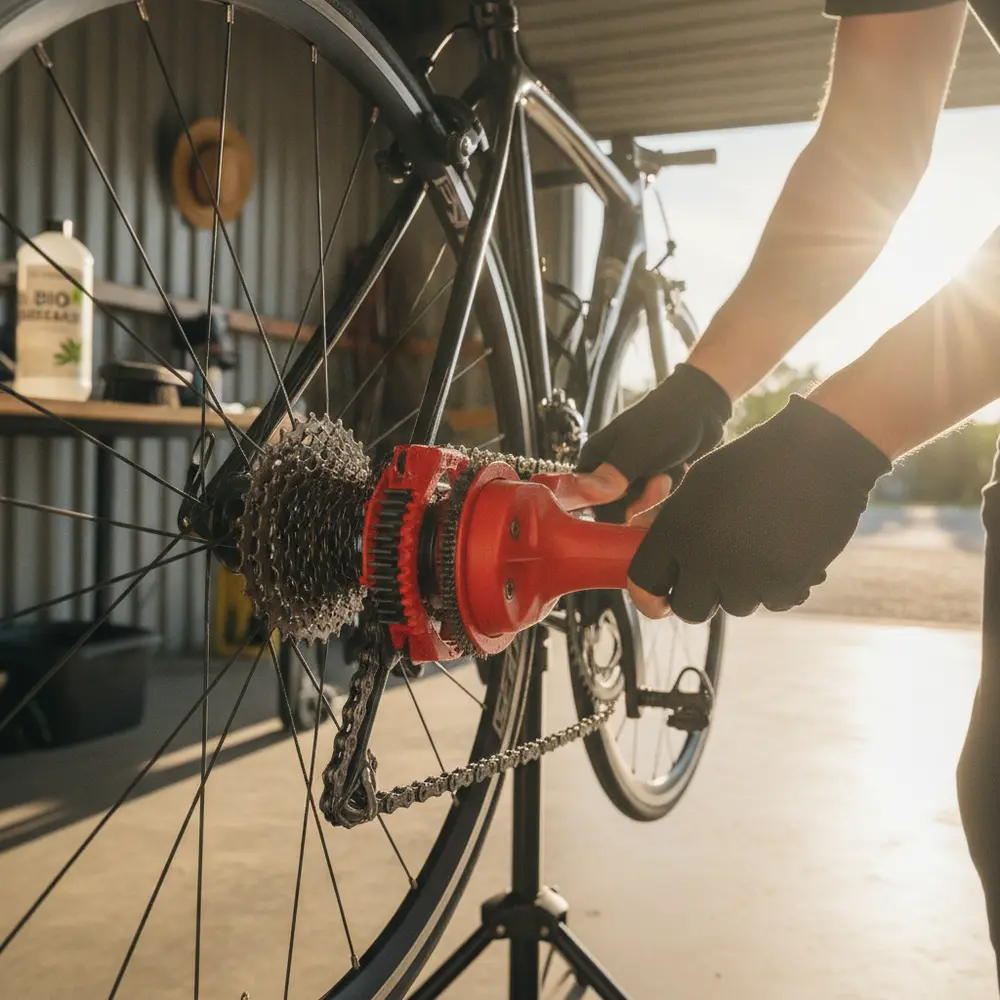
Chain Cleaning Devices - The Rotating Brush Machines
These are the plastic housing units you clip around your chain and fill with degreaser. You backpedal and the brushes inside scrub each link as it passes through. The Park Tool CM-5.3 is probably the most common one you will see in Australian workshops and garages. Pedro's Pig Pen is another solid option that is widely available here.
The main advantages are speed and convenience. You do not need to remove the chain, and the whole job can be done while the bike is in a stand or leaning against the wall. They are also easy to rinse and reuse. For most club riders doing regular maintenance, this is the tool you want.
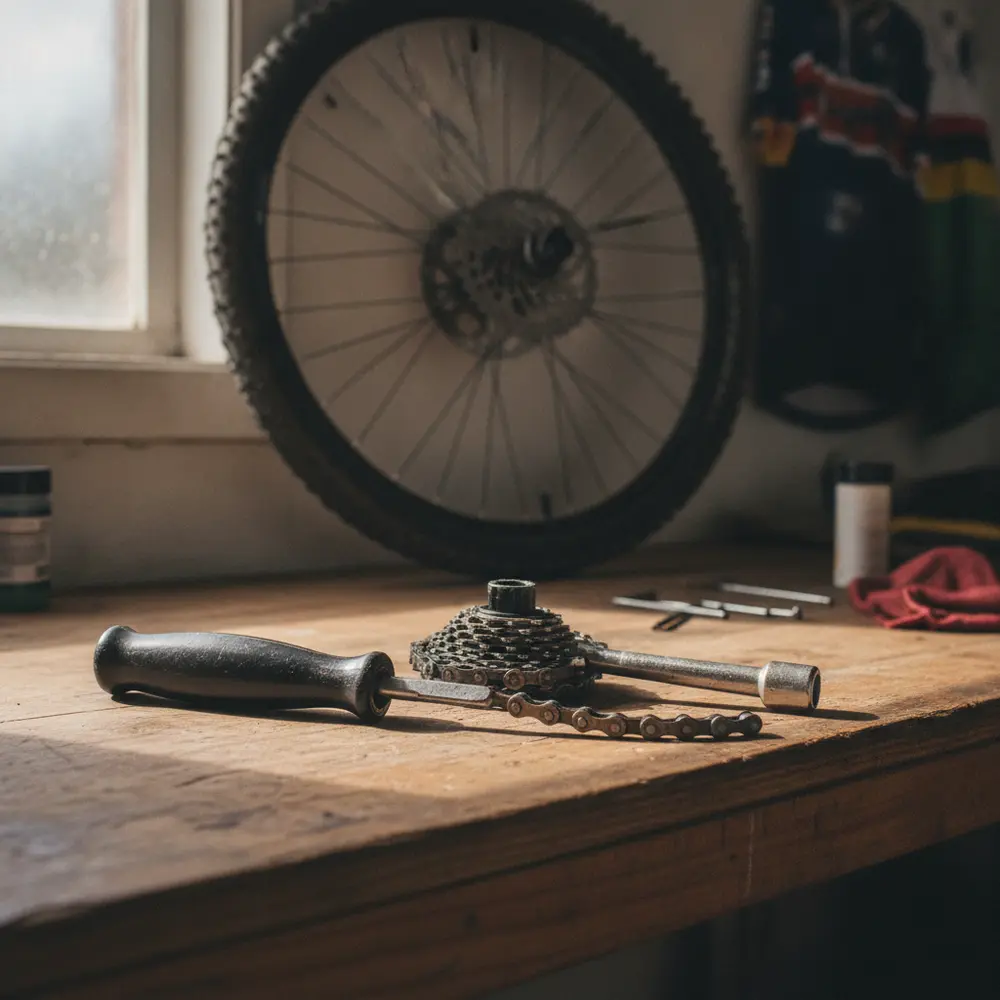
Brushes, Picks and Manual Cleaning Kits
A stiff bristle brush, a cassette cleaning brush, and a pick or thin flat tool for clearing packed gunk from between sprockets are all worth having in your kit. They are not going to replace a chain cleaning device for the chain itself, but they are essential for getting the cassette and chainring properly clean.
Most brush kits sold through Australian bike shops come with a combination of shapes designed to reach tight spots. They pair well with a chain cleaning device as part of a complete drivetrain clean.
Ultrasonic Cleaners - Are They Worth It?
Ultrasonic cleaners use high-frequency sound waves in a liquid bath to loosen and remove contamination from within the chain links. They do a genuinely thorough job and are popular with mechanics who service multiple bikes.
For most amateur and club riders, though, the cost is hard to justify. A decent ultrasonic cleaner capable of handling a bike chain starts at around $100 and goes well past $300 for better units. A rotating chain cleaning device with a good degreaser will get your chain clean enough for virtually all riding purposes at a fraction of the cost. If you are a home mechanic who loves the process and services a few bikes, it might make sense. For the average club rider cleaning one bike, it is probably overkill.
Degreasers Explained - What to Use and What to Avoid
Picking the right degreaser matters as much as picking the right tool. The wrong product can strip lubrication from parts you want to protect, or simply not cut through the muck effectively enough.
Solvent-Based vs Bio-Degreasers - Pros, Cons and Australian Availability
Solvent-based degreasers cut through heavy grease and old lube quickly and thoroughly. They are the go-to when your chain is genuinely filthy, like after a wet MTB ride through the Dandenongs or a gravel race on red dirt roads. The trade-off is that they are harsher on the environment and need careful handling.
Bio-degreasers are water-based and biodegradable, making them safer to use in a home setting and much better for the environment. Muc-Off Bio Drivetrain Cleaner is widely available in Australia and works well for regular maintenance cleaning. For chains that are only moderately dirty, a bio-degreaser is usually enough. Check the Muc-Off chain cleaning guide for product-specific tips.
One important note for MTB and gravel riders with O-ring or X-ring chains: aggressive solvent degreasers can damage the rubber seals on these chains. Always check the product label or the chain manufacturer's guidance before applying a solvent-based product to a sealed chain.
A quick summary of the trade-offs:
- Solvent-based: Fast cutting, effective on heavy grime, needs good ventilation and careful disposal.
- Bio-degreaser: Safer to use, eco-friendly, effective for regular cleaning and lightly soiled chains.
- Hardware store degreasers (e.g. from Bunnings): Some citrus-based options work reasonably well as a budget alternative, but check they are safe on rubber seals and rinse thoroughly. Purpose-made cycling degreasers are safer and more predictable.
Step-by-Step: How to Use a Chain Cleaning Device Properly
This is the method most riders will use most of the time. It works on the bike and gets the job done without a lot of fuss. Follow these steps in order and you will not need to redo it.
- Remove the excess muck first. Use a dry rag or stiff brush to wipe down the chain, cassette and chainrings before you introduce any liquid. Getting the big chunks off first means your degreaser works on the stubborn stuff, not the surface grime.
- Fill the cleaning device with degreaser. Pour your chosen degreaser into the reservoir of the chain cleaning device. Do not overfill. You want enough to coat the chain as it passes through the brushes.
- Clip the device onto the chain and backpedal. Clip the device around your chain at the lower run, hold it steady with one hand and turn the pedals backward slowly with the other. Do this for 20 to 30 seconds, then check the colour of the degreaser. If it is black with gunk, empty it, rinse the device, refill and repeat.
- Open the device and wipe the chain. Remove the cleaning device and run a clean rag along the full length of the chain to pull off the loosened grime. Fold the rag over the chain and backpedal again to get both sides.
- Rinse the chain thoroughly. This step is non-negotiable. Use clean water to rinse the chain, cassette and chainring. Leaving degreaser residue on the chain will prevent your lube from bonding correctly. As Park Tool's chain cleaning guide makes clear, rinsing before re-lubing is essential, not optional.
- Dry the chain properly. Backpedal while holding a dry rag against the chain to remove moisture. Leave the bike in a warm spot for a few minutes if you can. Do not re-lube a wet chain.
- Apply fresh lube. Apply one drop of lube per link on the inner part of the chain (the rollers, not the outer plates). Let it sit for a minute, then wipe off the excess with a clean rag. Excess lube on the outside of the chain attracts dirt and undoes your cleaning work.
On-bike tip: if your bike does not have a stand, lean it against a wall and work from the drivetrain side. Off-bike tip: removing the chain and soaking it in a jar of degreaser works well for a deeper clean, but the rotating device method above is fast enough for weekly or fortnightly maintenance.
How Often Should You Clean Your Chain in Australian Conditions?
There is no single right answer, but Australian conditions do push you toward cleaning more often than riders in some other parts of the world might. As a general rule, a visual and tactile check before each ride takes 10 seconds and tells you everything you need to know. If the chain looks black and gritty or feels dry and scratchy when you run your fingers along it, clean and lube it.
- Dry inland conditions (inland NSW, WA red dirt, SA): Fine dust gets into links quickly. Clean every 200 to 400 km or after any dusty ride.
- Wet trail riding (Dandenong Ranges, Blue Mountains, Tasmania): Mud and water wash lube out fast. Clean after every wet ride and re-lube before the next one.
- Coastal riding (Sydney, Brisbane, Perth): Salt air adds a corrosion risk. Wipe down and re-lube more frequently, even if the chain looks clean.
- Mostly road riding in mild conditions: Every 300 to 500 km is a reasonable starting point. Adjust based on how the chain looks and sounds.
The CyclingTips drivetrain maintenance guide is a solid local reference for understanding how different riding environments should shape your maintenance schedule.
Top Chain Cleaner and Degreaser Tool Picks Available in Australia
These are well-regarded options you can find through Australian retailers. This is not a ranked list or a paid endorsement, just a practical starting point based on what is commonly stocked and trusted by riders and mechanics.
- Park Tool CM-5.3 Chain Scrubber - the benchmark rotating chain cleaner. Solid build, easy to use, widely available.
- Pedro's Pig Pen Chain Cleaner - a good alternative to the Park Tool with a similar design. Check Pedro's chain cleaning product range for the full kit options.
- Muc-Off Bio Drivetrain Cleaner - a reliable bio-degreaser for regular maintenance use. Available at most Australian bike shops.
- Finish Line Speed Degreaser - a faster-acting solvent-based option for heavily soiled chains. Needs good ventilation.
- Pedro's Oranj Peelz Citrus Degreaser - a citrus-based option that sits between bio and solvent in terms of aggressiveness.
- A stiff cassette brush and pick set - any decent branded set will do. Buy them alongside your cleaning device and use them every time.
You can browse a wide range of these tools through chain cleaning tools available in Australia at Pushys or head into your local 99 Bikes store to check what they have on the shelf.
Mistakes That Make Chain Cleaning Take Longer Than It Should
Most of the time wasted on chain cleaning comes from doing steps in the wrong order or skipping a step and having to go back. Here are the common ones to avoid.
- Not wiping off the bulk grime first. Putting a cleaning device straight onto a very dirty chain just fills the degreaser reservoir with mud in seconds. A quick dry wipe first makes the degreaser work harder where it counts.
- Skipping the rinse. Degreaser residue left on the chain stops your lube from working properly. Always rinse with clean water and dry before lubing.
- Re-lubing too soon. Applying lube to a damp chain dilutes it and reduces its effectiveness. Wait until the chain is dry.
- Applying too much lube. More lube does not mean better protection. Excess lube on the outside of the chain collects dirt and creates the same gritty paste you just cleaned off.
- Only cleaning the chain and ignoring the cassette. The cassette and chainring accumulate grime too. A partially clean drivetrain just re-contaminates your clean chain within a few kilometres.
- Using the same dirty rag every time. Wiping your chain with a rag that is already saturated with old grease and grit just moves contamination around. Use a clean section of rag each time.
If You Are New to Chain Cleaning
- Start with a rotating chain cleaning device and a bio-degreaser. It is the safest and most manageable combination.
- Buy a chain checker at the same time so you can monitor wear from the start.
- Watch the degreaser colour in the device reservoir. When it turns black fast, you know how dirty your chain actually was.
- Do not worry about getting it perfect first time. Any cleaning is better than none.
- Check out the Bicycle Network basic bike maintenance guide for a broader introduction to keeping your bike in good shape.
If You Have Done This Before
- Consider keeping a solvent-based degreaser on hand for post-MTB or post-gravel rides when the chain is genuinely filthy, and a bio-degreaser for regular road or light trail maintenance.
- Look at your lube choice as carefully as your cleaning method. The right lube for your conditions makes cleaning easier next time.
- If you are servicing more than one bike regularly, a second cleaning device and a dedicated drivetrain brush set will save you time.
- Track how often you are replacing chains. If it is more than once every few thousand kilometres, your cleaning frequency probably needs to increase.
- For a deeper dive into bike maintenance tools and techniques, explore our full maintenance section on Segment Club.
Frequently asked questions
Can I use WD-40 to clean my bike chain?
Standard WD-40 is a water displacer and light lubricant, not a degreaser. It will shift some surface grime but is not effective at cleaning the inside of chain links where real contamination builds up. WD-40 does make a dedicated bike degreaser product that is a different formulation and more appropriate for chain cleaning. Use a purpose-made cycling degreaser for best results.
How do I know when my chain needs cleaning rather than just re-lubing?
If the chain looks visibly dirty, feels gritty when you run a finger along the links, or is making noise that does not go away with a fresh application of lube, it needs cleaning first. Lubing over a dirty chain just seals the grit in place and accelerates wear. When in doubt, clean it before you lube it.
Is it better to clean the chain on the bike or take it off?
For regular maintenance, on-bike cleaning with a chain cleaning device is faster and perfectly adequate. Removing the chain and soaking it in degreaser gives a more thorough clean and is worth doing a few times a year or after a very heavy ride. If your chain has a master link, removing it is straightforward. If it does not, on-bike cleaning is the practical approach.
Do I need to clean my chain differently for dry conditions versus wet mud?
Yes. After a wet, muddy ride, rinse the whole drivetrain with water first to remove the bulk of the mud before applying degreaser. In dry dusty conditions, a dry brush wipe first is more effective because wetting a dusty chain can turn the dust into a paste that is harder to shift. The cleaning steps are the same, but the prep differs based on the type of dirt.
Where can I get chain cleaning tools in Australia if I do not want to order online?
99 Bikes has physical stores across most Australian states and stocks a solid range of cleaning tools and degreasers. Local independent bike shops are also a great option and can give you hands-on advice. Pushys is the best online option for range and Australian delivery. For a broader look at the cycling tools worth having, check out our tools category on Segment Club.
Quick Summary
- A rotating chain cleaning device is the fastest and most practical tool for most Australian riders.
- Match your degreaser to the conditions. Bio for regular maintenance, solvent for heavy grime, and always check compatibility with sealed chains.
- The rinse and dry steps before re-lubing are non-negotiable. Skip them and you undo the work.
- Clean frequency depends on where you ride. Dusty inland and wet coastal conditions both demand more regular attention than mild road riding.
- A clean drivetrain lasts longer and saves you real money on cassettes, chains and chainrings over a season.
This is educational content, not financial advice.