A soft tyre is the most common and most preventable cause of poor ride feel, wasted effort, and flats on Australian roads. It takes less than five minutes to fix, and most riders skip it every single week.
By the end of this article you will know the right pressure for your bike and body weight, how Australian conditions change that number, and how to build a pre-ride check that actually sticks.
Note for Australia:
- Australian chip-seal and tar-seal road surfaces are rougher than smooth European asphalt. Slightly lower pressures often roll faster on these surfaces.
- Summer temperatures in QLD, SA, and WA regularly exceed 35 degrees Celsius. Heat increases tyre pressure, so always pump to your target pressure in the same ambient conditions you will ride in.
- Gravel riding in Victoria, WA, and the Adelaide Hills covers a wide range of surfaces. Tyre width and pressure choice matter more here than almost anywhere else.
At a glance:
- Check tyre pressure before every ride if you run latex tubes, or at least weekly for butyl tubes.
- Use the tyre sidewall PSI range as a starting point, then adjust for your weight and road surface.
- Wider tyres need lower pressures. A 28c tyre does not want the same PSI as a 23c tyre.
- Tubeless setups run 10 to 15 PSI lower than equivalent tubed setups and need sealant checks too.
Key takeaways:
- Tyre pressure is the single most impactful and most neglected basic maintenance task for any cyclist.
- Australian heat and rough road surfaces mean local riders need to adjust from generic international pressure guides.
- A floor pump with a good gauge is the only tool you really need. Use it regularly.
Why Tyre Pressure Is the Single Biggest Maintenance Win You Can Do
Of all the bike maintenance tasks on your list, tyre pressure is the one that costs nothing, takes almost no time, and makes an immediate difference to every ride. It affects rolling speed, puncture resistance, handling, and comfort. Nothing else on the bike touches all four at once.
Most riders pump their tyres up once, then forget about them for weeks or months. Butyl inner tubes lose pressure slowly but steadily. After seven days, a tyre that started at 90 PSI may have dropped noticeably, enough to change how the bike rides and to increase puncture risk. It is a slow enough drop that many riders never notice it happening.
What Happens When You Ride on the Wrong Pressure
Under-inflation is the leading cause of pinch flats on clincher setups. When a tyre does not have enough air, it can compress fully against the rim on impact, pinching the inner tube between the tyre and the rim edge. The result is a snakebite puncture with two small holes side by side. Understanding inner tube types and pressure loss helps explain why this happens and how to prevent it.
Over-inflation has its own problems. A rock-hard tyre on a rough Australian chip-seal road does not glide over surface texture. It bounces. That bouncing transfers energy away from forward motion and into vibration, which actually increases rolling resistance on rough surfaces. How tyre pressure affects rolling resistance is well documented, and the short version is: harder is not always faster.
- Too low: pinch flats, sluggish handling, poor cornering grip
- Too high: harsh ride, increased bounce on chip-seal, higher rolling resistance on rough roads
- Just right: efficient roll, predictable handling, appropriate puncture protection
Understanding PSI, Bar, and What the Numbers on Your Tyre Sidewall Actually Mean
Tyre pressure is measured in PSI (pounds per square inch) or Bar. Australian cyclists will see both on pump gauges and tyre sidewalls. One Bar equals roughly 14.5 PSI. Most floor pumps show both, so you can work in whichever unit you prefer.
The numbers printed on your tyre sidewall are maximum rated pressures, not targets. They are structural limits set by the manufacturer. Running your tyre at its maximum rating on rough chip-seal is rarely the right move. Think of the sidewall rating as the ceiling, and find your ideal pressure somewhere below it based on your weight and road surface. For a detailed breakdown, the tyre pressure guide for Australian cyclists at bicycles.net.au covers PSI and Bar ranges across bike types clearly.
Road, Gravel, and MTB - Pressure Ranges Are Not the Same
Different riding styles, tyre widths, and surfaces call for very different pressures. The table below gives a practical starting point. Use your rider weight and tyre width to find your range, then fine-tune from there.
| Bike Type | Tyre Width | Rider 60-75 kg | Rider 75-90 kg | Rider 90+ kg |
|---|---|---|---|---|
| Road | 23-25c | 85-95 PSI (5.9-6.6 Bar) | 90-100 PSI (6.2-6.9 Bar) | 95-105 PSI (6.6-7.2 Bar) |
| Road | 28-32c | 65-75 PSI (4.5-5.2 Bar) | 70-80 PSI (4.8-5.5 Bar) | 75-85 PSI (5.2-5.9 Bar) |
| Gravel | 35-45c | 35-45 PSI (2.4-3.1 Bar) | 40-50 PSI (2.8-3.4 Bar) | 45-55 PSI (3.1-3.8 Bar) |
| MTB (tubed) | 2.1-2.4 in | 25-30 PSI (1.7-2.1 Bar) | 28-33 PSI (1.9-2.3 Bar) | 30-35 PSI (2.1-2.4 Bar) |
| MTB (tubeless) | 2.1-2.4 in | 18-24 PSI (1.2-1.7 Bar) | 20-26 PSI (1.4-1.8 Bar) | 22-28 PSI (1.5-1.9 Bar) |
These are starting ranges. A lighter rider on wider tyres should be at the lower end. A heavier rider or one covering rough terrain should move toward the upper end of their range. Rider feel matters too. Start in the middle of your range and adjust by 5 PSI at a time until the bike feels right.
How Australian Conditions Affect Tyre Pressure
Temperature has a direct effect on tyre pressure. As air inside a tyre heats up, it expands and pressure increases. As it cools, pressure drops. The commonly cited estimate is roughly 1 to 2 PSI for every 10 degree Celsius change in temperature. That might not sound like much, but an Australian summer day that swings from a cool 18-degree morning to a 38-degree afternoon is a 20-degree shift. That is worth accounting for.
The practical takeaway here is straightforward. Always pump your tyres in the same conditions you will ride in, ideally in the shade at ambient temperature. Avoid pumping tyres that have been sitting in a hot garage or a sun-exposed car boot. For more on this, how temperature affects tyre PSI is covered well by CyclingTips.
Heat, Bitumen, and Dirt Roads - What Aussie Riders Need to Account For
Australian chip-seal and bitumen surfaces vary enormously. A freshly sealed road in suburban Brisbane feels different to a weathered chip-seal climb in the Dandenong Ranges, and both feel different to a loose gravel road in the WA wheatbelt. Each surface calls for a slightly different approach.
- Fresh smooth bitumen: you can run toward the higher end of your pressure range.
- Weathered chip-seal or tar-seal: drop 5 to 10 PSI from your smooth-road pressure for better roll and comfort.
- Hardpack gravel or fire road: stay in the mid-range for your tyre width and adjust for how loose the surface is.
- Loose gravel or corrugated dirt: lower pressure gives more contact patch and better traction. Go lower than you think.
In extreme heat above 35 degrees Celsius, some riders prefer to set pressure 2 to 3 PSI below their usual target to account for expansion during the ride. This is more relevant on long rides in full sun than on a cool morning group ride.
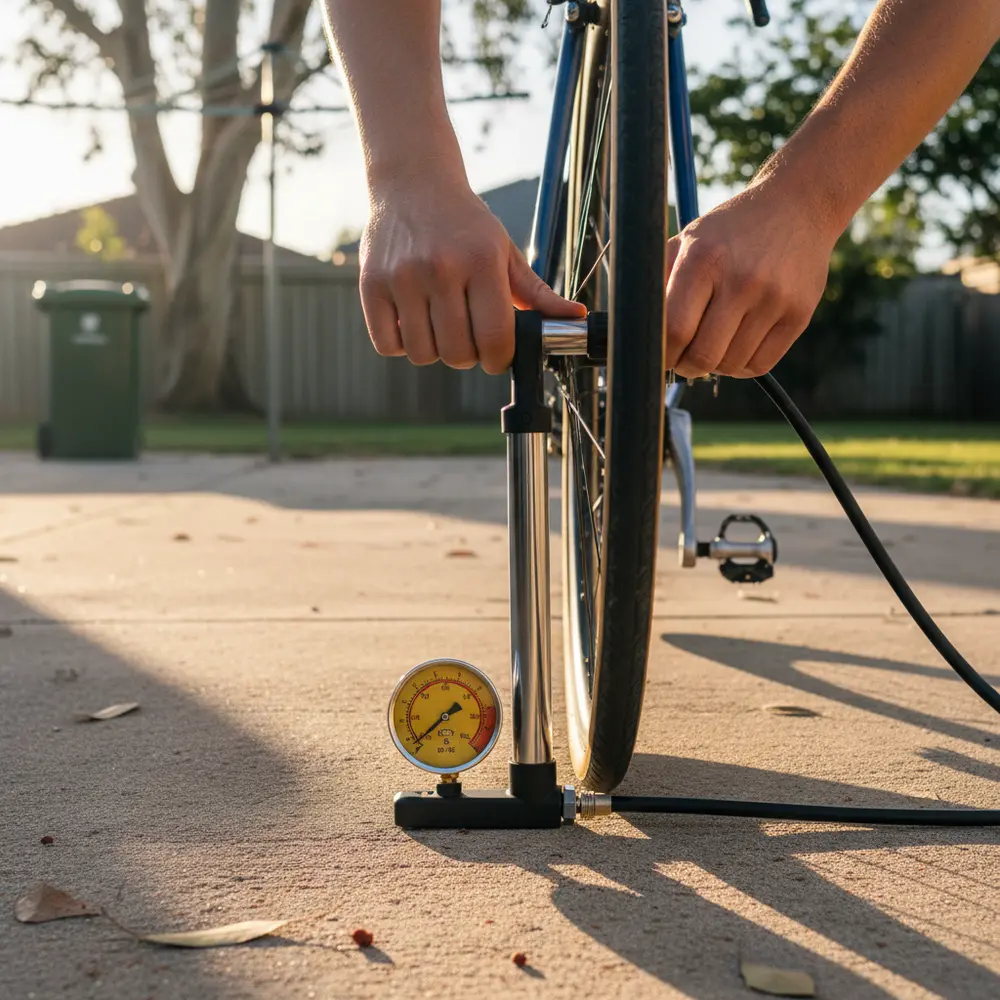
How to Check and Set Your Tyre Pressure Correctly
The process is simple but worth doing properly. A floor pump with a built-in gauge is the standard tool. Dedicated digital gauges are more precise but rarely necessary for most riders at typical cycling pressures. The gauge on a good quality floor pump is accurate enough for everyday use.
Choosing the Right Pump and Gauge for the Job
A quality floor pump is the only pump worth using for setting pressure at home. Mini pumps and CO2 inflators are emergency tools, not precision tools. If your floor pump gauge is old or inconsistent, consider replacing it or buying a standalone dial gauge for more accurate readings. For a full walkthrough on pump use and valve types, the how to check bike tyre pressure step by step guide from BikeExchange Australia is a solid reference.
A quick note on valves. Road bikes typically use Presta valves, which are the narrow ones with a small threaded nut at the top that you loosen before inflating. Hybrid and older bikes often use Schrader valves, which are the same as car tyres. If you are new to Presta valves, you need to unscrew the small nut at the top before attaching the pump head. It does not come off entirely. Just loosen it a turn or two, attach the pump, then retighten the nut after you are done.
Weekly Pre-Ride Tyre Pressure Checklist
This is the routine. Keep it next to your pump or stick it on the wall of your garage until it becomes second nature.
- Grab your floor pump. Make sure the gauge needle is at zero before you start.
- Check the tyre sidewall. Find the recommended PSI or Bar range printed on the side of the tyre.
- Note the temperature. If it is a hot day or the bike has been sitting in the sun, factor in a small pressure increase.
- Attach the pump to the valve. For Presta, loosen the valve nut first. Press the pump head on firmly and flip the lever to lock it.
- Inflate to your target pressure. Use the table above as your guide. Pump to the middle of your range and adjust as needed.
- Visually inspect both tyres. Look for cuts, embedded glass or gravel, and any uneven bulging or wear on the tread.
- Check the valve. Make sure it is seated properly and not leaking. For Presta, retighten the nut. Give the valve stem a quick look for any cracks or damage.
- For tubeless tyres. Shake the wheel gently and listen for sealant movement. If the tyre feels light and you cannot hear any sealant, it may be time to top up.
For latex inner tubes, do this check before every single ride, not just weekly. Latex loses pressure significantly faster than butyl and a tyre that was perfect yesterday may be noticeably soft today.
Tubeless Tyres and Pressure - A Few Extra Things to Know
Tubeless is now common across Australian gravel and MTB riding, and for good reason. Without an inner tube, you eliminate pinch flat risk entirely, which means you can run lower pressures with confidence. Tubeless setups generally run 10 to 15 PSI lower than equivalent tubed setups without any handling penalty.
The trade-off is sealant maintenance. Sealant dries out over time, and in Australian summer heat it dries faster than the manufacturer's stated interval suggests. Check your sealant every two to three months, and more frequently over summer. A tyre that has lost its sealant is not self-sealing anymore. For specific guidance on Australian trail conditions, the tubeless tyre pressure guide for Australian MTB riders at MTB Australia is worth a read.
- Run tubeless pressure at the lower end of the recommended range for your tyre width and weight.
- Check sealant levels every 8 to 12 weeks, or every 6 to 8 weeks in summer.
- If a small puncture does not self-seal within a few seconds, the sealant is likely dried out.
- Always carry a tubeless plug kit and a CO2 or mini pump on the road, just in case.
Making the Weekly Check a Habit - Fitting It Into Your Ride Routine
The riders who never have tyre problems are not lucky. They just pump their tyres regularly. The habit is easy to build if you attach it to something you already do. Put your floor pump next to where you store your helmet. When you grab your kit, pump your tyres. Five minutes, done.
If you are part of a club or group ride, it is worth connecting with other local riders to share tips on what pressures are working on the roads in your area. Conditions vary significantly across Australian states and even across different routes in the same city. Local knowledge is genuinely useful here.
For broader cycling maintenance tips and ride preparation advice, Bicycle Network Australia also publishes a solid set of resources for riders of all levels as part of their pre-ride checklist for Australian cyclists.
Common Mistakes
- Pumping to the maximum sidewall rating instead of an appropriate working pressure for your weight and surface.
- Never checking pressure at all until you get a flat, then blaming the road.
- Using a mini pump to set pressure at home. Mini pumps are for emergencies, not precision inflation.
- Forgetting that temperature changes pressure. Pumping in a hot garage and riding in cool morning air means starting your ride under-inflated.
- Running latex tubes on the same weekly check schedule as butyl. Latex needs daily or pre-ride checks.
- Ignoring the tyre sidewall during pressure checks. Cuts and embedded debris cause more flats than people realise.
If You Are New to Checking Tyre Pressure
- Start with a quality floor pump that has a gauge showing both PSI and Bar.
- Find the PSI range on your tyre sidewall and aim for the middle of that range as your first target.
- Learn the difference between your valve type. Presta valves need the top nut loosened before the pump will attach.
- Do not worry about being perfectly precise. Getting within 5 PSI of your target is fine when you are starting out.
- Check after your first few rides and note how the bike feels at different pressures. That feedback is more useful than any chart.
If You Have Checked Tyre Pressure Before
- Revisit whether your current pressure target still makes sense. Rider weight, tyre width, and road surface preferences may have changed.
- Consider whether your floor pump gauge is still accurate. Older gauges drift over time.
- If you have moved to wider tyres, drop your pressure accordingly. Many riders forget to adjust when they upgrade tyre width.
- If you ride tubeless, build a sealant check into your pressure routine rather than treating them as separate tasks.
- Experiment with dropping pressure by 5 PSI on your next chip-seal ride and see if the ride quality improves. It often does.
Frequently asked questions
How often should I check my bike tyre pressure?
For butyl inner tubes, a weekly check is sufficient under normal conditions. For latex inner tubes, check before every ride because latex loses pressure significantly faster than butyl. Tubeless tyres hold pressure well but should also be checked weekly, along with a sealant level check every couple of months.
What PSI should I run for road cycling in Australia?
For a standard road tyre in the 23 to 25c range, most riders sit between 85 and 100 PSI depending on their weight. For wider 28 to 32c road tyres, 65 to 85 PSI is a more appropriate range. Use the table in this article as a starting point and adjust for your weight and the surface you are riding on. On Australian chip-seal, leaning toward the lower end of your range often rolls better.
Does heat really affect tyre pressure that much?
Yes, noticeably. Approximately 1 to 2 PSI shifts per 10 degrees Celsius is a widely cited estimate based on gas law principles. On a hot Australian summer day with a 20-degree swing from morning to afternoon, that can mean a meaningful change in pressure from when you set it to when you are deep into a ride. The practical fix is to pump to your target in the conditions you will actually ride in.
What is the difference between Presta and Schrader valves?
Schrader valves are the wider type, the same as car tyres. They are common on hybrid bikes, older road bikes, and most MTBs at entry level. Presta valves are the narrow type found on most modern road and performance bikes. Presta valves have a small threaded nut at the top that you must loosen before inflating. Most quality floor pumps handle both valve types with a dual-head or a head that can be reversed.
Can I run tubeless tyres at the same pressure as tubed tyres?
No, and you should not. Tubeless setups eliminate the risk of pinch flats, which means you can safely run 10 to 15 PSI lower than an equivalent tubed setup. Running tubeless tyres at tubed pressures means you are not getting the ride quality or traction benefits of the tubeless setup. Drop the pressure and enjoy the difference, especially on gravel and rough roads.
Summary
- Check tyre pressure weekly for butyl tubes and before every ride for latex tubes.
- Use the tyre sidewall as a starting point but adjust for your weight, tyre width, and road surface.
- Australian heat and chip-seal roads mean local conditions should always factor into your pressure decision.
- Tubeless tyres run lower pressure than tubed setups and require regular sealant checks alongside pressure checks.
- A quality floor pump with a gauge is the only tool you need. Use it consistently and your tyres will almost never let you down.
This is educational content, not financial advice.