Sticky, sluggish shifting is one of those problems that sneaks up on you, and by the time you notice it mid-ride, it has already cost you a clean gear change on a climb that mattered. Nine times out of ten, the culprit is not your derailleur, your cassette, or even your cable. It is the housing those cables run through.
By the end of this article you will be able to inspect your cable housing, identify when it needs replacing, and work through the full replacement process yourself. You will also know how to set cable tension correctly afterwards so your shifting feels the way it should, not magic, just precise and reliable.
Note for Australian riders:
- UV exposure and high summer temperatures accelerate outer housing cracking faster here than in milder climates. Flex your housing regularly to check, because black outer casing hides UV damage until it is already bad.
- Red dirt and fine trail grit are a genuine issue for gravel and trail riders. Grit ingress through housing ends eats cables from the inside and shortens housing life significantly.
- Coastal and tropical riders should be aware that internally routed frames can trap moisture, speeding up corrosion inside the housing. Check entry and exit points at every service.
At a glance:
- Cable housing degrades from the inside, and it often looks fine until you actually replace it.
- Compressionless housing is the right choice for indexed shifting systems. Standard spiral housing is fine for brakes.
- 4mm outer diameter is standard for shift housing, 5mm for brake housing on most road and MTB setups.
- Replace housing at least every 12 to 18 months under typical Australian riding conditions, or whenever you replace cables.
Key takeaways:
- A dedicated cable cutter is not optional. A clean, square cut is what separates a good housing job from a frustrating one.
- Always fit ferrules at housing termination points. Skipping them damages frame stops and housing ends.
- Set barrel adjusters to mid-range before tensioning, then fine-tune after. Do not rush this step.
Why Cable Housing Is the First Thing to Check When Shifting Feels Off
When indexed shifting starts to feel slow or imprecise, most riders go straight to adjusting the barrel adjuster or blaming the derailleur. That is understandable, but it often leads you in circles. The housing is the foundation the whole system sits on, and if it is compromised, no amount of barrel adjuster tweaking will fix it properly.
Indexed shifting is sensitive to cable tension. If the housing is compressing, kinking, or creating friction, the cable cannot move cleanly and your derailleur cannot respond the way it should. As noted in cable housing types explained by VeloNews, housing quality has a direct and measurable impact on shift precision, and that effect is amplified on modern drivetrains with tighter tolerances.
How Housing Degrades Over Time (and Why Riders Miss It)
The outer casing of cable housing looks robust, but the inner liner is where things quietly fall apart. Polymer liners compress, dry out, and crack. Fine grit works its way in through housing ends and acts like sandpaper on the cable. Kinks form at frame stop entry points and restrict cable movement without being immediately obvious from the outside.
The signs to look for are:
- Cracks or splitting in the outer casing, especially near bends
- Visible kinks, even small ones, particularly at cable stops
- Fraying or corrosion where the cable enters or exits the housing
- Stiff or notchy feel when you pull the cable by hand with the housing free
- Shifting that gets worse after the bike has been sitting in the sun or heat
As Bicycling Australia's workshop cable maintenance guide points out, flexing the housing along its length is a quick way to find UV cracking that the colour hides. If it cracks or whitens as you bend it, it is done.
Types of Cable Housing and What Each Is Used For
Not all housing is the same, and using the wrong type in the wrong place is a surprisingly common mistake. There are two main construction types, and they are not interchangeable for indexed shifting applications.
| Housing Type | Construction | Best For | Not Ideal For |
|---|---|---|---|
| Standard Spiral | Coiled steel wire with polymer liner | Brake cables where minor compression is acceptable | Indexed shifting, where compression causes missed shifts |
| Compressionless | Longitudinal strands, polymer or PTFE liner | Shift cables, precise indexed systems | Tight-radius bends where longitudinal strands can buckle |
Compressionless vs Standard Spiral Housing: Which One Do You Need?
For shift cables, compressionless housing is the correct choice. It uses longitudinal strands rather than a coil, which means it resists compression along its length under cable load. Standard spiral housing compresses slightly every time you pull the lever, and on an indexed system, that slight movement is enough to throw your indexing out. Jagwire's cable housing basics guide explains this well if you want to understand the construction in more detail.
For brake cables, standard spiral housing is perfectly fine. Brakes are not indexed, so a small amount of compression under load does not cause the same precision problem. Do not mix housing types within a single cable run as this creates inconsistent tension and unpredictable results.
On the sizing front, 4mm outer diameter is standard for shift housing and 5mm for brake housing across most road and MTB groupsets. Check your Shimano dealer technical manual or the relevant manufacturer documentation for your specific components if you are unsure.
Tools and Parts You Need Before You Start
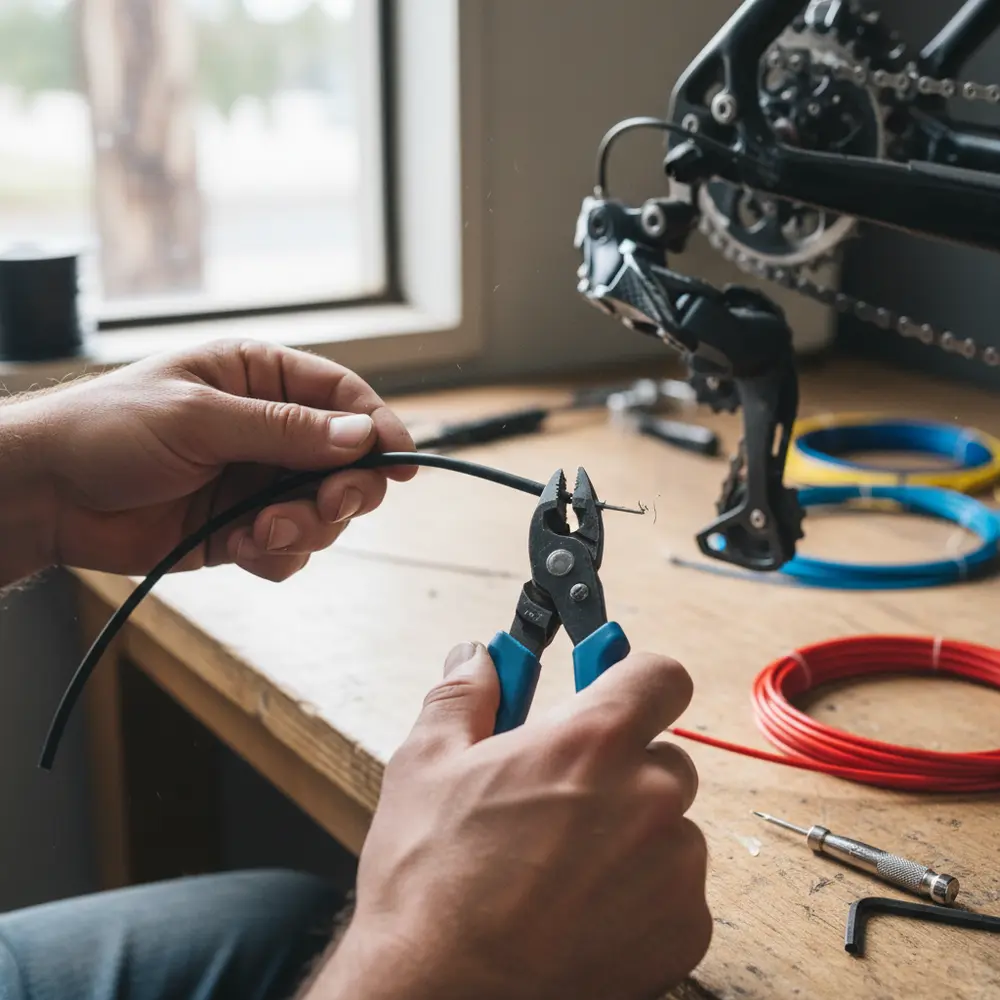
Getting the right tools together before you start saves a lot of frustration. The single most important item here is a dedicated cable cutter. Do not use standard wire cutters or scissors. A proper cable cutter cuts cleanly without deforming the housing end, and a deformed housing end restricts cable movement immediately.
- Dedicated bicycle cable cutters (non-negotiable)
- Cable reamer or awl (to open the liner after cutting)
- Replacement housing in the correct diameter and type
- Ferrules in the correct size for your frame stops
- Cable end caps
- A small amount of dry lube or compatible cable lubricant
- Phillips and flathead screwdrivers, and a set of hex keys
- Needle-nose pliers
Pick up a full cable and housing kit from your local bike shop if you are doing a complete service. It is better value than buying individually and ensures everything matches. Check our bike maintenance guides for more on what to keep in a home workshop kit.
Step-by-Step Cable Housing Replacement
Work through one cable at a time so you always have the other side as a reference for routing and length. This is especially useful on internally routed frames where getting the routing wrong is time-consuming to fix.
- Inspect the existing housing first. Before cutting anything, run your hand along the full length of each housing run. Feel for kinks, hard spots, or soft spots. Note where each piece terminates and how it is routed.
- Shift to the smallest sprocket at the rear and smallest chainring at the front. This releases tension on the cable and makes removal easier.
- Loosen the cable clamp bolt at the derailleur and pull the cable free. Remove the old housing section by section, keeping the ferrules if they are in good condition.
- Measure the new housing against the old piece. Line it up and mark it. Do not guess at length. Too long and the housing will bow and feel sluggish. Too short and it will bind or restrict steering on the front cable run.
- Cut the housing squarely with your cable cutters. One clean cut, straight across. If the end is not square, trim it again rather than trying to make it work.
- Ream the cut end. Use your awl or reamer to open the liner that the cutter has compressed. Poke it gently into the end and rotate. This is a step many riders skip and then wonder why the cable is hard to thread.
- Fit the ferrule. Slide it onto the housing end and press it firmly. Ferrules protect the housing end and the frame stop. Always use them at termination points, as confirmed in the Park Tool cable and housing service guide.
- Route the housing through the frame stops and guides. For full suspension MTB, make sure you have enough length to accommodate suspension travel without the housing pulling tight. Check through full travel after fitting.
- Thread the cable through the housing. Apply a small amount of dry lube to the cable before threading if your housing is not PTFE-lined. Do not over-lube.
- Set your barrel adjuster to mid-range before attaching the cable at the derailleur. This gives you adjustment room in both directions after tensioning.
- Pull the cable to correct tension at the derailleur clamp bolt and tighten. A good starting point is firm tension with the derailleur sitting at the smallest sprocket. Then shift through the range and use the barrel adjuster to fine-tune indexing.
- Stretch the cable. Pull the cable firmly by hand at a mid-point along its run, then re-check tension. New cables stretch slightly in the first few uses and pre-stretching speeds up the settling process.
- Confirm clean shifts across all gears before finishing. Run the bars through full steering lock to check for binding on the front housing run.
Measuring and Cutting Housing to the Right Length
The right length is the length of the old piece, unless the old piece was wrong to begin with. For a first-time replacement, use the original as your template. For internally routed frames, some workshop guides suggest using a piece of string or brake inner wire pushed through the frame first to confirm routing before committing to a housing length.
If in doubt, cut slightly long and trim back. You cannot add length once you have cut too short.
Fitting Ferrules, End Caps and Cable Tips Correctly
Ferrules go on every housing end that terminates into a frame stop or component. They are not optional. Skipping ferrules leads to the housing end mushrooming under load, which restricts movement and damages the frame stop over time.
Cable end caps go on the bare cable tail that sticks out past the derailleur clamp. Crimp them on with pliers. A frayed cable tail is both annoying and a potential finger hazard on tight trails.
Setting Cable Tension After Housing Replacement
New housing and cables need to settle, and getting the tension right at first install means you will need very little adjustment after the first few rides. Start with the barrel adjuster at mid-range, as mentioned above. Once the cable is clamped, shift up through the gears one at a time from the smallest sprocket.
If the chain hesitates to move to a larger sprocket, you need more tension. Turn the barrel adjuster anti-clockwise by half turns and test again. If the chain overshoots or shifts down unintentionally, you have too much tension. Turn the barrel adjuster clockwise to reduce it. The indexed shifting cable tension guide in the Shimano dealer technical manual is the reference point if you want component-specific tension values.
Do not rush this. Getting indexing right takes a few minutes of methodical testing, not a quick spin of the adjuster.
Common Mistakes and How to Avoid Them
- Using the wrong cutters. Standard wire cutters crush the housing end instead of cutting it cleanly. Buy a dedicated cable cutter and it will last years.
- Skipping the reaming step. The liner gets compressed by the cut. If you do not open it back up, threading the cable is difficult and friction increases immediately.
- Skipping ferrules. Frame stops take a beating without ferrules. It is a small part that does a real job.
- Cutting housing too short. Short housing pulls tight on steering or suspension movement and creates binding. If you are unsure, leave it a touch long.
- Mixing compressionless and spiral housing in the same cable run. This creates tension inconsistency and unpredictable shifting behaviour.
- Not pre-stretching the cable. Skipping this means your indexing drifts after the first few rides and you are back adjusting it again.
If You Are New to Cable Housing Replacement
- Start with an externally routed bike. Internal routing adds complexity that is easier to deal with once you have done the basics a couple of times.
- Take photos of the original routing before you remove anything. This is especially helpful for bikes with complex guide systems.
- Work slowly and measure twice before cutting. Housing length errors are easy to avoid with a bit of patience.
- Ask your local bike shop to show you the first cut and reaming step if you are unsure. Most mechanics are happy to demonstrate quickly.
- Check out GCN Tech's shift cable and housing replacement video for a visual walkthrough that complements this guide well.
If You Have Replaced Cables Before
- Check whether you replaced the housing last time or just the cables. If it has been two or more cable replacements since the last housing change, it is overdue.
- Use this service as an opportunity to upgrade to PTFE-lined compressionless housing if you are still running stock. The difference in cable pull feel is noticeable, particularly in hot or dusty conditions.
- On full suspension MTB, double-check housing length through full travel. Suspension stroke changes the effective length of the cable run and this is easy to get wrong if you are not thinking about it. The Singletracks mountain bike cable housing guide covers this in detail.
- If your bike has internal routing, consider threading a thin piece of wire or pull-cord through the frame before removing the old housing, to guide the new piece through without a fight.
When to Replace Housing vs When to Replace the Cable Too
If you are already pulling the housing off, replace the cable at the same time. It costs very little extra and you have already done the hard work of disassembly. The only exception is if you recently replaced the cables and the housing has genuinely failed early due to an isolated cause, like a kink from a crash or a frame guide that has worn through the outer casing.
Under typical Australian conditions, aim for a full cable and housing replacement every 12 to 18 months for regular riders. If you are riding dusty trails, gravel, or coastal routes more frequently, lean towards the shorter end of that window. Bicycling Australia's cable maintenance guidance for Australian conditions supports this interval as a practical minimum for our climate.
Keep an eye on our bike maintenance section for more servicing guides, or get in touch with us if you have a specific question about your setup.
Frequently asked questions
How do I know if it is the housing causing my sticky shifting and not the derailleur?
Remove the cable from the derailleur clamp and pull it through the housing by hand. If there is significant friction or stiff spots, the housing is the issue. A clean cable through good housing should move with very little resistance.
Can I replace just one section of housing rather than the whole run?
Yes, if only one section is damaged you can replace just that piece. Make sure the replacement is the same type and diameter, and fit ferrules at both ends of the new section. That said, if the rest of the run is old, you are better off doing the lot while you are at it.
Does compressionless housing actually make a noticeable difference for an intermediate rider?
Yes, particularly on indexed systems with tighter tolerances. The difference in shift precision is real and most riders notice it when upgrading from standard spiral housing. It is a worthwhile investment when doing a full cable service.
How often should I replace cable housing in Australian conditions?
Every 12 to 18 months for regular riders is a sensible target. If you ride in dusty or coastal environments, or leave your bike in the sun regularly, check more frequently and replace at the first sign of cracking or stiffness.
Do I need a special lubricant inside the housing?
For standard polymer-lined housing, a small amount of dry lube applied to the cable before threading is sufficient. PTFE-lined housing generally needs no additional lubrication. Avoid wet or heavy grease inside housing as it attracts dirt and can actually increase friction over time.
Summary
- Cable housing is the most commonly overlooked cause of sticky, imprecise shifting on Australian bikes.
- Use compressionless housing for shift cables and standard spiral for brakes. Do not mix types in the same run.
- A clean cut, a reamed end, and fitted ferrules are the three steps most often skipped and most often responsible for a poor result.
- Replace housing every 12 to 18 months in Australian conditions, or sooner if you ride in heat, dust, or coastal environments.
- Getting cable tension right after installation is methodical, not difficult. Work in half-turn increments and test each shift before moving on.
This is educational content, not financial advice.