Your bike chain is the hardest-working part on your bike, and it is almost certainly the most neglected. When it wears out quietly in the background, it takes your cassette and chainrings with it, turning a cheap fix into a very expensive one.
By the end of this article, you will know exactly how to check your chain for wear at home, what the numbers mean, and when to act. No special experience needed, just a bit of time and the right information.
Note for Australian riders:
- Queensland red dust, coastal salt air in Sydney and Melbourne, and wet Victorian winters all accelerate chain wear faster than milder climates.
- Bike components and workshop labour generally cost more in Australia than in the US or UK, making preventative chain replacement an even smarter investment here.
- Australian riders span a huge range of terrain, from sealed road to gravel to muddy MTB trails. Your chain lifespan will vary significantly depending on where and how you ride.
At a glance:
- Replace your chain at 0.5% wear to protect your cassette and chainrings.
- Do not wait past 0.75% wear or you risk needing a full drivetrain replacement.
- Check your chain every 500 to 1,000 km, or more often in dirty conditions.
- A chain checker tool is the easiest method, but a 30 cm ruler works fine too.
Key takeaways:
- Chain wear is caused by pin and roller erosion, not actual metal stretching.
- Higher-speed drivetrains (11-speed, 12-speed) wear faster and need more attention.
- The right lubricant for your conditions is one of the biggest factors in chain longevity.
Why Your Bike Chain Is the First Thing You Should Be Checking
Most riders think about tyres, brakes, and gears. The chain sits there doing its job quietly until something goes wrong. The problem is that by the time you notice a chain skipping under load or shifting poorly, the damage to your drivetrain is usually already done.
A chain is a consumable part. It is designed to wear out so that more expensive components behind it do not have to. Replace it on time and you protect your cassette and chainrings. Ignore it and you pay for all three at once.
In Australia, Australian bike mechanic advice on chain wear consistently points to the same pattern: riders who check their chain regularly spend far less on drivetrain repairs over time. It is the simplest form of preventative maintenance on the bike.
How a Bike Chain Actually Wears Out
The term "chain stretch" gets used everywhere, but it is a bit misleading. The metal links are not literally stretching. What is actually happening is that the internal pins and rollers are wearing down, and as that material is lost, the chain grows longer overall.
According to the bicycle chain technical guide on Sheldon Brown, wear occurs primarily at the pin-to-inner-plate interface. Each link flexes thousands of times per ride, and without adequate lubrication, that metal-on-metal contact grinds away tiny amounts of material with every pedal stroke.
The Science Behind Chain Wear and Drivetrain Damage
As your chain elongates, the spacing between its pins no longer matches the tooth spacing on your cassette cogs and chainrings. Instead of sitting cleanly on each tooth, the chain starts to ride up and dig in at wrong angles. This is what causes cassette wear, and once that happens, a new chain will skip on the worn cassette rather than run smoothly.
The consequence is straightforward: a worn chain damages your cassette and chainrings over time, and if you leave it too long, you have to replace all three at the same time. In Australia, where a quality cassette alone can cost $80 to $300 or more depending on your drivetrain, that is a bill worth avoiding.
How Long Should a Bike Chain Last in Australia?
There is no single honest answer to this question. Anyone who gives you an exact kilometre figure without knowing your conditions, riding style, lube habits, and drivetrain is guessing. That said, some general ranges are a useful starting point.
| Riding type | Typical chain lifespan | Key factors |
|---|---|---|
| Road bike, clean conditions | 2,000 to 3,000 km | Regular lube, dry roads, sealed terrain |
| Road bike, wet or coastal | 1,500 to 2,000 km | Salt air, rain, wet roads accelerate wear |
| MTB, gravel, or dusty trails | 1,000 to 1,500 km | Grit and mud are very abrasive |
| Urban commuter | 1,500 to 2,500 km | Varies widely with lube frequency |
| 1x drivetrain (MTB or gravel) | Slightly less than 2x | Single chainring puts more load per link |
These are rough guides only. The biggest variable is almost always lubrication and cleaning frequency, not the kilometres themselves.
Factors That Affect Chain Lifespan in Australian Conditions
Australia throws a lot at a bike chain. Here is what shortens chain life most in local conditions:
- Red dust (inland Queensland, WA, NT): Fine abrasive particles get into the chain and grind the pins down fast. Chains ridden in dusty inland conditions need more frequent cleaning and checking.
- Coastal salt air (Sydney, Melbourne, Gold Coast): Salt accelerates corrosion and can cause chains to seize if left without lube. Rinse and re-lube after salt-air rides.
- Wet Victorian winters and Queensland wet season: Wet riding strips lube quickly. Wet lube is better in these conditions, but chains still need more frequent attention.
- Rider weight and power output: Heavier riders and those who push big gears put more force through the chain on every stroke.
- Drivetrain speed: Narrower chains on 11-speed and 12-speed systems wear faster than wider 8 or 9-speed chains. If you are running a modern high-speed drivetrain, check your chain more often.
- Lube type: Using the wrong lube for your conditions accelerates wear. A chain lubrication guide for Australian conditions explains how wet, dry, and wax lubes each suit different environments.
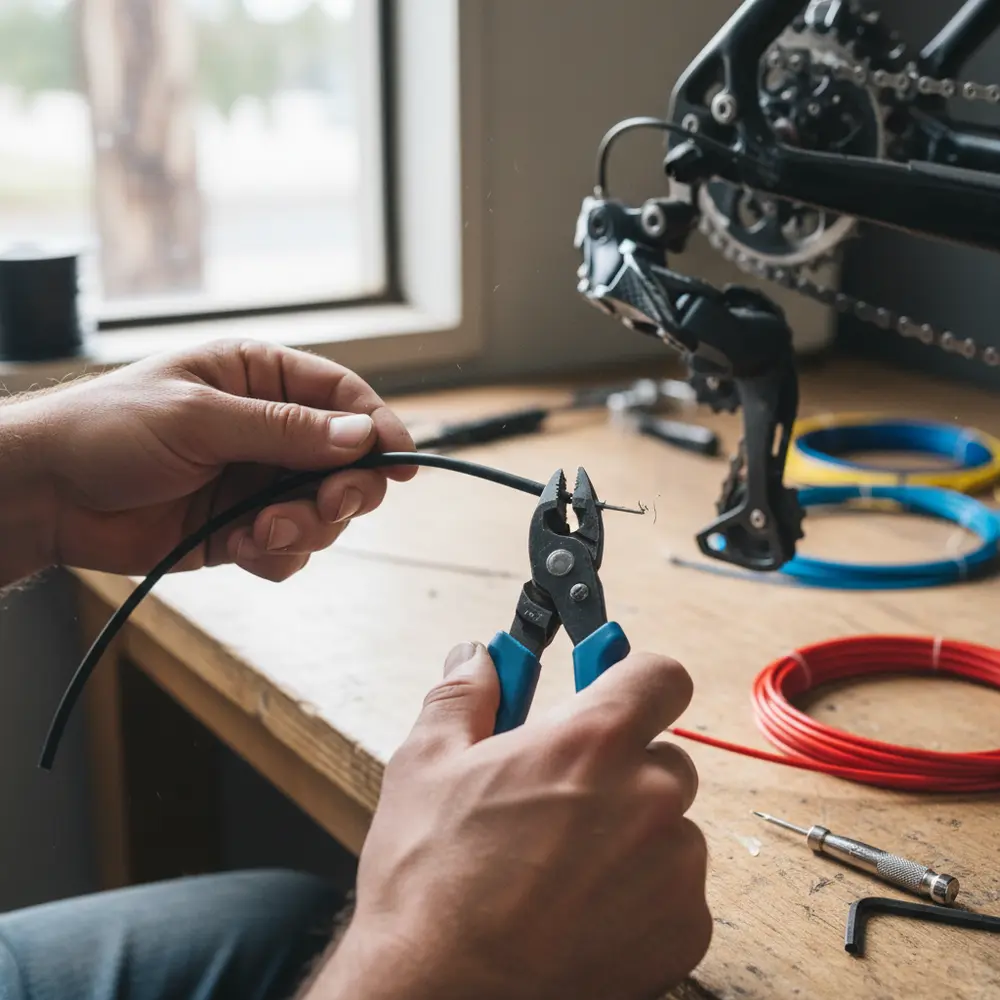
How to Check Your Chain for Wear
Checking chain wear is genuinely easy. You do not need to be a mechanic. You just need to do it regularly, ideally every 500 to 1,000 km, or whenever conditions have been particularly harsh.
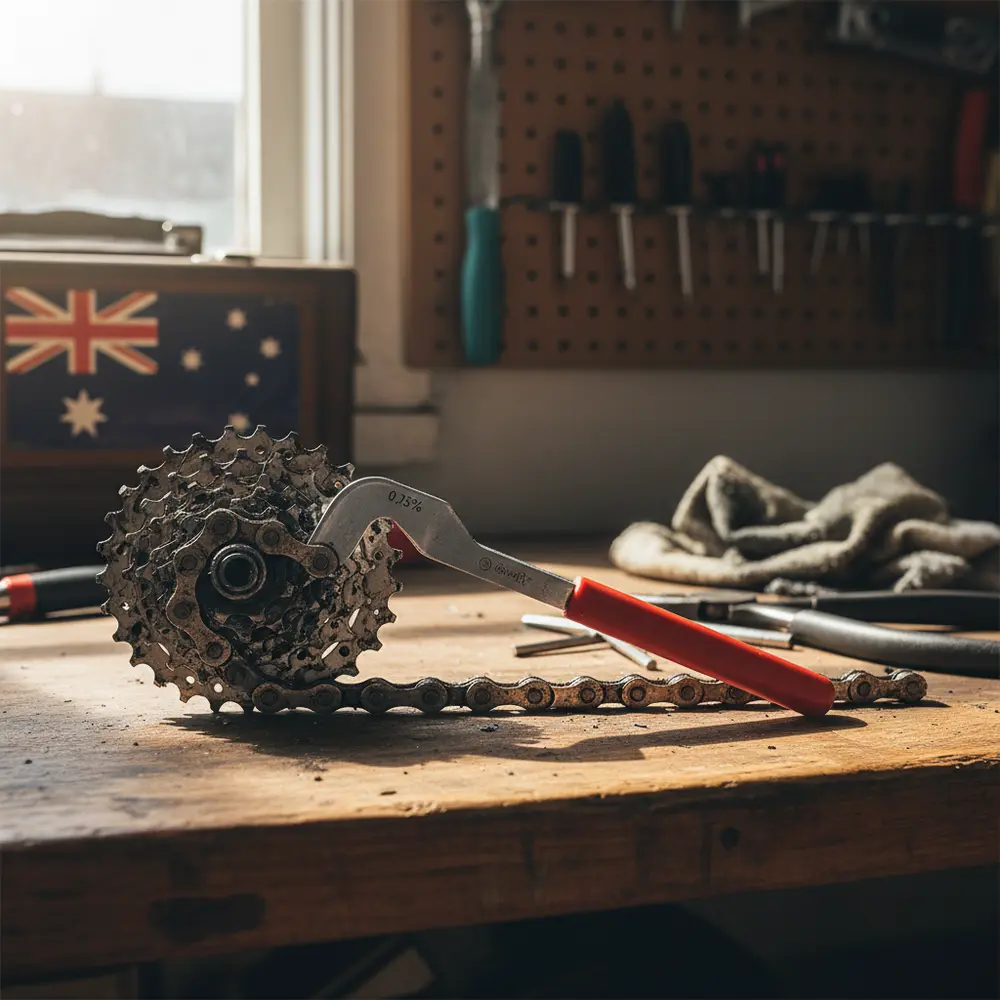
Using a Chain Wear Indicator Tool
A chain checker tool is the quickest and most reliable method. They cost around $15 to $40 at most Australian bike shops and are worth every cent. Here is how to use one:
- Shift to the big chainring and a middle cog so the chain is under light tension.
- Drop one end of the chain checker tool into a chain link from the top of the chain.
- Allow the other end to drop into place. The tool will either sit flush or not.
- If the 0.5 end drops in fully, your chain has reached 0.5% wear. Time to replace it.
- If the 0.75 end drops in, you are at 0.75% wear or beyond. Replace immediately and check your cassette.
The chain wear measurement guide from Park Tool recommends replacing at the 0.5 mark to protect your cassette and chainrings. Waiting to 0.75 is the absolute latest you should go.
The Ruler Method If You Do Not Have a Tool
No chain checker tool? No problem. A standard 30 cm ruler works fine as a DIY check. Here is how:
- Place your ruler along the top of the chain with the zero mark sitting on the centre of a pin.
- Count along until you reach 12 inches (30.5 cm) from that pin centre.
- On a new chain, the pin at 12 inches will sit exactly on the 12-inch mark.
- If the pin falls more than 1/16 inch (1.5 mm) past the mark, your chain is at approximately 0.5% wear.
- If the pin falls more than 1/8 inch (3 mm) past the mark, you are at 0.75% wear or beyond.
According to Bicycling Magazine's chain wear guide, a new chain has a pitch of exactly 0.5 inches per link, so over 24 links (12 inches), any elongation is a direct indicator of wear. The ruler method is a reliable backup when you do not have a dedicated tool.
What Your Result Means and What to Do Next
| Wear reading | What it means | Action |
|---|---|---|
| Under 0.5% | Chain is in good condition | Keep riding. Re-check at next interval. |
| At 0.5% | Wear is starting to affect fit | Replace chain now. Cassette likely still fine. |
| At 0.75% | Significant wear, drivetrain at risk | Replace chain immediately. Check cassette closely. |
| At 1.0% or beyond | Chain and cassette both worn | Replace chain and cassette together. Check chainrings. |
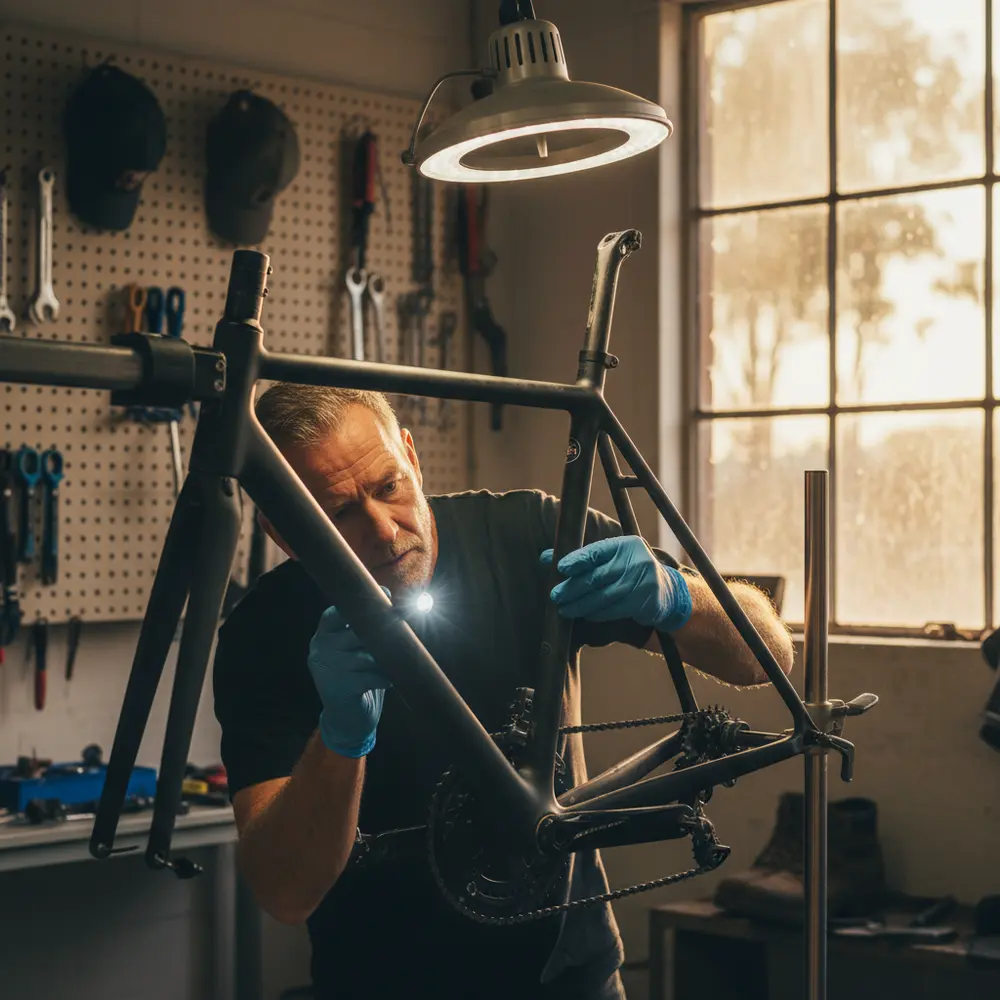
When Is It Too Late? Signs You Have Also Worn Out Your Cassette
If you have let your chain go too long, fitting a new chain may not solve the problem. A worn cassette has teeth that have shaped themselves to the worn chain, and a new chain will skip and jump rather than running cleanly.
Signs your cassette may also be worn include:
- A new chain skipping under load, especially when pedalling hard
- Shark-fin shaped cassette teeth (visible when you look closely at the cogs)
- Poor shifting that does not improve after a cable adjustment
- Chain slipping on specific gears only
If you see these signs, take the bike to your local shop for a drivetrain assessment. An experienced mechanic can tell you quickly whether the cassette needs replacing alongside the chain. It is worth getting this right before you invest in a new chain.
Chain Replacement Cost in Australia
Here is the economic reality. A quality replacement chain in Australia typically costs between $20 and $80 depending on your drivetrain speed and brand. Workshop fitment is usually straightforward and inexpensive if you are having other work done at the same time.
Compare that to replacing a chain plus a cassette, which can run anywhere from $120 to $500 or more for higher-end drivetrains. Add chainring replacement and you are looking at a significant bill. The maths on preventative replacement is simple.
If you are unsure what chain suits your drivetrain, check the compatibility information for your specific groupset. Shimano, SRAM, and Campagnolo all produce chains for specific speed ranges, and fitting the wrong chain can cause shifting and wear problems. You can check your drivetrain type and explore related maintenance topics in our bike maintenance guides section.
Quick Tips to Make Your Chain Last Longer
You cannot stop a chain from wearing out, but you can slow the process down significantly. Here is what makes the biggest practical difference:
- Lube regularly and correctly: Use dry or wax-based lube in dusty and dry Australian conditions, wet lube for wet and muddy riding. Apply to the inner links, not the outside plates. Less is more.
- Clean before you lube: Applying fresh lube over dirty chain just traps grit inside the links. Wipe the chain down and degrease properly before re-lubing.
- After wet or muddy rides: Clean and re-lube the same day if possible. Leaving a wet chain overnight accelerates corrosion and wear.
- After coastal rides: A rinse with clean water and a fresh coat of lube after salt-air rides is a simple habit that pays off over time.
- Check wear on a schedule: Set a reminder every 500 km. Consistent checking catches wear early and saves money.
- Match lube to conditions: Wax-based lubes have become popular with Australian riders for their cleanliness and effectiveness in dry climates. They require more frequent reapplication but keep the drivetrain very clean.
Common Mistakes to Avoid
- Waiting until the chain skips before checking it. By then the cassette is likely already worn.
- Using wet lube in dusty conditions. It picks up grit and acts like grinding paste inside your chain.
- Applying lube without cleaning the chain first. You are just sealing dirt in place.
- Assuming all chains are the same. A 12-speed chain is not compatible with an 8-speed drivetrain. Always match chain to drivetrain speed.
- Buying a new chain and fitting it to an already-worn cassette. The new chain will skip immediately.
- Skipping chain checks because the bike "feels fine". Chain wear is gradual and often not noticeable until it is well past the ideal replacement point.
If You Are New to Bike Maintenance
- Start with the ruler method. You do not need to buy a chain checker tool right away, a 30 cm ruler from your desk is enough to get a read on chain wear.
- Check your chain every month if you ride regularly. Even just a visual check and a quick ruler measurement takes under two minutes.
- Ask your local bike shop to show you the first time. Most mechanics are happy to walk you through it in a few minutes when you bring the bike in.
- Write down your chain replacement date and kilometre reading. It gives you a useful benchmark for how quickly your chain wears under your specific conditions.
- Do not stress about getting it perfect. Even a rough check every 500 km is far better than no check at all.
You can also explore more beginner-friendly maintenance topics in our bicycle maintenance section for step-by-step help on other common tasks.
If You Have Replaced a Chain Before
- Consider moving to a wax-based lube if you ride in dry Australian conditions. The upfront cost is higher but chain life tends to improve noticeably.
- At your next chain replacement, take note of the cassette tooth profile. If teeth look hooked or asymmetric, replace the cassette at the same time.
- If you run a 1x drivetrain, check your chain more frequently than with a 2x setup. Single chainring systems concentrate more load per link and wear faster.
- Track your chain wear readings over time. A chain hitting 0.5% at 1,200 km is useful data that tells you whether your lube routine needs adjustment.
- Consider keeping a spare chain on hand if you are a high-volume rider. Swapping quickly keeps your schedule on track and gives you a chance to clean the old chain before assessing it.
Frequently asked questions
How often should I check my bike chain for wear?
Check every 500 to 1,000 km as a general rule. In harsh conditions like dusty inland trails, coastal salt air, or wet winter riding, check more often. Consistent checks are more valuable than any single kilometre target.
Can I replace just the chain, or do I need to replace the cassette too?
If you catch wear at 0.5%, you can usually replace just the chain and keep the existing cassette. If you have let the chain reach 0.75% or beyond, inspect the cassette closely for hooked teeth. A new chain skipping on an old cassette is a clear sign both need replacing.
Does it matter what lubricant I use?
Yes, it matters a lot. The wrong lube for your conditions accelerates wear. Dry and wax-based lubes are better for Australian summer dust. Wet lube suits wet, muddy, or coastal conditions. Never apply new lube over a dirty chain without degreasing first.
Do 11-speed and 12-speed chains wear out faster?
Yes. Higher-speed drivetrains use narrower chains with less material at the pin and roller interfaces. They wear faster than older 8 and 9-speed chains and benefit from more frequent checks and quality lubrication. If you are running a modern high-speed groupset, do not push chain wear past 0.5%.
What does it actually cost to replace a bike chain in Australia?
A replacement chain typically costs between $20 and $80 depending on drivetrain speed and brand. Compare that to a chain plus cassette replacement, which can cost $120 to $500 or more. Replacing the chain on time is almost always the cheaper option by a significant margin.
To wrap up
- Check your chain every 500 to 1,000 km using a chain checker tool or a 30 cm ruler.
- Replace at 0.5% wear to protect your cassette. Do not wait past 0.75%.
- Australian conditions, including dust, salt, and wet weather, accelerate chain wear and make regular checks even more important here.
- Use the right lube for your riding conditions and always clean the chain before re-lubing.
- Preventative chain replacement is consistently cheaper than replacing a full drivetrain.
If you have questions about your specific setup or are not sure where to start, get in touch with us and we are happy to point you in the right direction.
This is educational content, not financial advice.