Two of the most overlooked components on any bike are also two of the hardest working. Your pedals and bottom bracket spin under load every single ride, exposed to grit, water, and heat, yet most cyclists never touch them until something goes wrong.
By the end of this guide you will know how to inspect, service, and where needed replace both components yourself, understand when to take the job to a shop, and have a clear six-month maintenance schedule you can actually stick to.
Note for Australia:
- Coastal riders in places like Sydney, Melbourne, and Brisbane face salt air and humidity that accelerates bearing corrosion faster than most other climates.
- Inland and gravel riders dealing with red dirt roads, particularly in WA, SA, and Queensland, push fine abrasive particles into bearing seals with every ride.
- Summer heat across most of Australia can thin out bearing grease more quickly, making a mid-year service especially worthwhile before the hot months hit.
At a glance:
- Service pedals and bottom bracket every 6 to 12 months depending on riding frequency and conditions.
- The left pedal has a reverse (left-hand) thread. Always loosen it clockwise.
- Threaded BSA bottom brackets are beginner-friendly for home servicing. Press-fit types are best left to a shop.
- A creaking or grinding drivetrain is your signal to stop waiting and act now.
Key takeaways:
- Regular servicing protects your frame, crankset, and bearings from expensive damage.
- Most home mechanics can handle a threaded BB and pedal service with basic tools.
- Australian conditions genuinely accelerate wear, so local riders should lean toward the shorter end of service intervals.
Why Your Pedals and Bottom Bracket Need Regular Attention
Your bottom bracket sits inside the frame where the two chainstays meet, called the bottom bracket shell. It houses the bearings that allow your crankset to spin smoothly. Every pedal stroke passes force directly through it.
Your pedals take that same force from your feet and transfer it to the cranks. Both components are packed with small bearings that rely on clean grease to function. Ride after ride, that grease slowly breaks down, picks up contamination, and stops doing its job.
The result is increased friction, rougher pedalling, and eventually bearing failure. When bearings fail they can damage the surrounding metal, which means a worn bottom bracket left too long can score or crack the BB shell in your frame. That is an expensive fix.
What Happens When You Ignore Them
Most cyclists notice a creak or grinding sensation first. That noise is metal-on-metal contact or contaminated bearings under load. Left alone it gets worse and starts affecting the BB shell threads or the pedal axle spindle.
- Creaking or clicking under pedalling load
- Rough or notchy feel when spinning the cranks by hand
- Lateral play or wobble in the cranks
- Pedals that feel stiff or have sideways movement
- Visible corrosion or pitting on bearing races
How Often Should You Service Pedals and Bottom Bracket in Australia
A general six-month service interval is a solid baseline for most recreational and club cyclists riding two to four times per week. According to the bike maintenance schedule guide from Bicycles.net.au, bearing service every 6 to 12 months is the recommended range depending on riding frequency and conditions.
If you are riding fewer than 100 kilometres per week on sealed roads in dry conditions, a 12-month interval may be fine. If you are clocking up serious kilometres, riding gravel, or dealing with wet or coastal conditions, six months is the right call.
How Australian Conditions Affect Your Service Schedule
| Riding Context | Recommended Interval | Why |
|---|---|---|
| Sealed road, dry climate, moderate riding | Every 12 months | Lower contamination risk, bearings stay cleaner longer |
| Coastal riding, salt air or humidity | Every 6 months | Salt accelerates corrosion inside bearing races |
| Gravel or dirt roads | Every 4 to 6 months | Fine grit bypasses seals and grinds bearings faster |
| High-volume training, 200km+ per week | Every 4 to 6 months | Higher load and mileage wears grease down faster |
| Wet weather riding | Every 6 months | Water ingress flushes grease and promotes rust |
For a broader look at how to build a full bike maintenance routine, we have more detail on the site to help you plan ahead.
What Is a Bottom Bracket and What Does It Actually Do
The bottom bracket (BB) is the set of bearings housed inside the BB shell at the very bottom of your bike frame. The crankset spindle passes through it. When you pedal, the spindle rotates inside those bearings. Good bearings mean smooth, efficient power transfer. Worn bearings mean wasted energy and eventual damage.
Most bottom brackets use either loose ball bearings packed in grease or sealed cartridge bearings, which are self-contained units with the bearing already housed inside a metal cartridge. Cartridge bearings are the most common type on modern bikes and are generally what you will find when you pull a BB out today.
Common Bottom Bracket Types You Will Find on Australian Bikes
Understanding which type of BB your bike has is the first step before any service. The two main categories are threaded and press-fit. For a deeper technical breakdown, Sheldon Brown's bottom bracket standards guide is the definitive reference.
- BSA Threaded (English thread): The most common type on road and hybrid bikes in Australia. The right-side cup threads in clockwise, the left-side cup threads in counter-clockwise. Beginner-friendly for home servicing.
- Italian Threaded: Less common but found on some older or European frames. Both cups thread in clockwise, which trips people up if they expect BSA convention.
- Press-Fit (PF30, BB86, BB92): No threads at all. The BB cups are pressed directly into the frame shell. Common on many carbon road and mountain bikes. More prone to creaking and much harder to service at home without a dedicated press and removal tool.
If you are not sure which type you have, check your bike's manual or take a photo of the BB shell and ask at your local shop. Getting this wrong before you start will cost you stripped threads or a cracked frame shell.
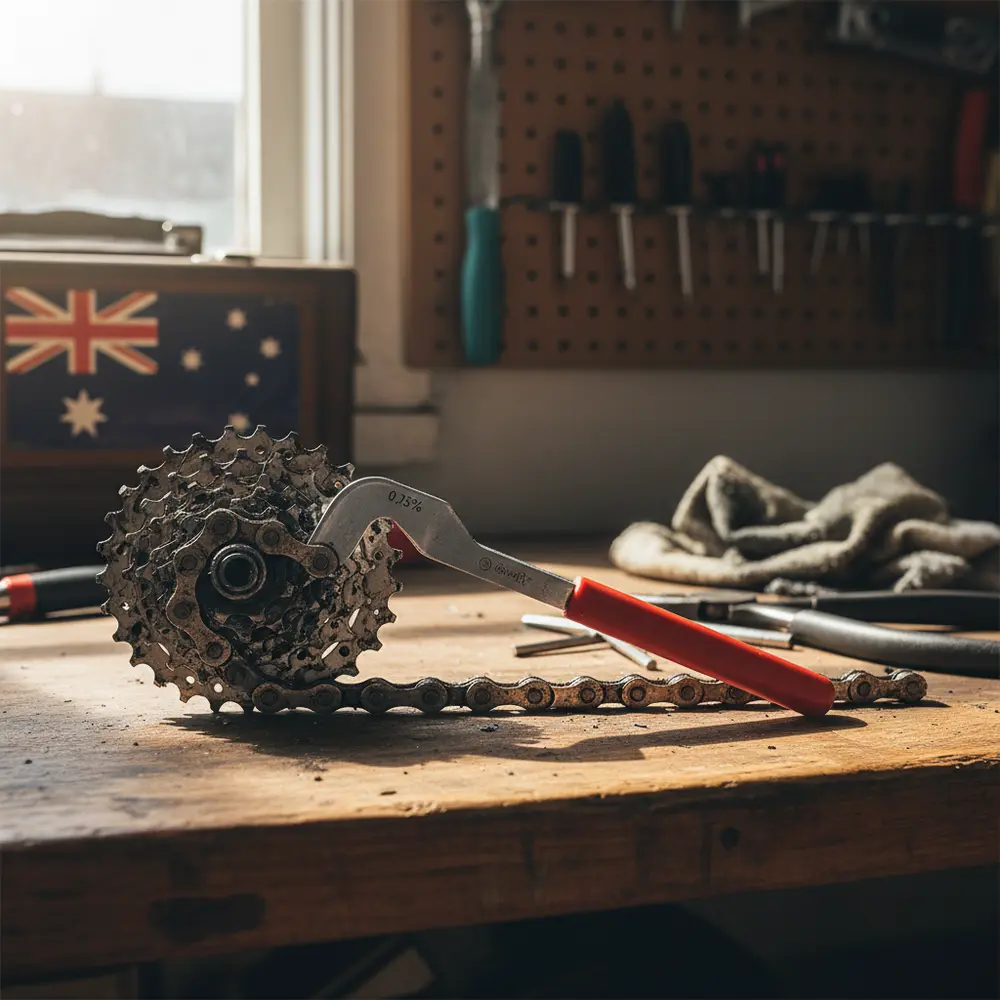
What Is Involved in a Pedal Service
A pedal service covers removing the pedals from the cranks, cleaning and inspecting the pedal axle and bearings, re-greasing, and reinstalling. For clipless pedals (the type that clip to cycling shoes), you should also clean and inspect the cleat engagement mechanism.
Some pedals use serviceable loose ball bearings that can be fully stripped and repacked. Others use sealed cartridge bearings that are technically non-serviceable and need to be pressed out and replaced when worn. Cycling Weekly has a solid pedal bearing service guide covering both systems if you want more detail on the internal stripping process.
For most beginners, the practical service is: remove, clean the axle threads, inspect for play or roughness, apply fresh grease to the threads, and reinstall correctly.
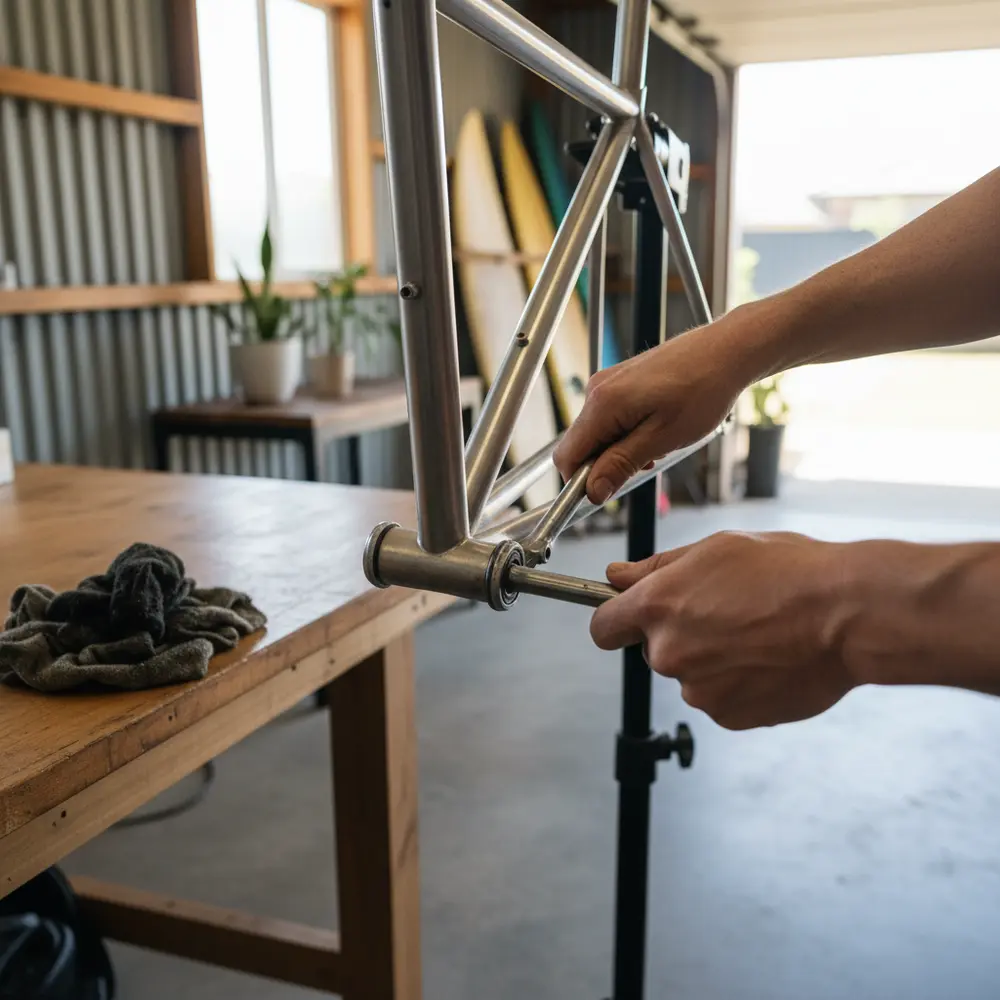
What Is Involved in a Bottom Bracket Service
A BB service means removing the crankset, pulling out the bottom bracket, cleaning the shell, inspecting the BB for wear, and either re-greasing and reinstalling or replacing the unit entirely. For threaded BSA BBs this is a very achievable home job. For press-fit BBs, take it to a shop unless you have the right press tools.
The Park Tool bottom bracket service guide is the gold standard reference for this job, covering tool requirements and torque specifications for all major BB types.
When to Service vs When to Replace
- Service: Grease is dry or dirty but bearings spin smoothly with no notching or play.
- Replace: Bearing races feel rough, gritty, or notchy when spun by hand.
- Replace: There is lateral play in the crankset that cannot be adjusted out.
- Replace: Visible pitting, rust, or cracks on bearing surfaces.
- Service or replace: Persistent creaking after checking all other possible causes (pedals, cleats, saddle, stem). The BB is often the culprit on press-fit bikes.
Tools You Will Need for the Job
Having the right tools before you start saves a lot of frustration. The exact tools depend on your BB type, but here is what most beginners working on a BSA threaded BB will need.
- 15mm pedal spanner or 8mm hex key (pedal removal)
- Crank extractor tool (to remove the crankset from the spindle)
- Appropriate BB tool, usually a Shimano or SRAM splined tool for cartridge BBs
- Torque wrench (strongly recommended, not optional if you want to do this properly)
- Clean rags and a degreaser
- Quality waterproof bearing grease, such as Phil Wood or a Shimano-compatible grease
- Thread prep or anti-seize compound for the BB shell threads
Do not use general-purpose automotive grease. A proper bearing grease with good water resistance is worth the small extra cost, especially in Australian conditions.
Step-by-Step Guide to Servicing Your Pedals and Bottom Bracket
- Remove the pedals. Use a 15mm spanner or 8mm hex key. The right pedal loosens counter-clockwise (normal). The left pedal loosens clockwise because it uses a reverse thread. Getting this backwards is the number one beginner mistake. Park Tool's pedal installation and removal guide covers this in full detail.
- Inspect the pedal axles. Spin the pedal body around the axle by hand. It should spin smoothly with no roughness or side-to-side play. Clean the axle threads with a rag and degreaser.
- Remove the crank arms. Use a crank extractor tool appropriate for your crankset type. Refer to your crankset manufacturer's guide for the correct process.
- Remove the bottom bracket. Fit the correct BB tool to your drive side cup and loosen it counter-clockwise. The non-drive side cup on a BSA BB loosens clockwise (reverse thread). If you get this wrong you will strip the thread.
- Clean the BB shell. Use a rag and degreaser to clean out the shell threads thoroughly. Inspect the shell for any damage, corrosion, or stripped threads.
- Inspect the bottom bracket. Spin the bearings by hand. Replace if rough, notchy, or loose. If they spin cleanly and just need fresh grease, re-grease and reinstall.
- Apply grease and reinstall. Apply a thin layer of grease or anti-seize to the BB shell threads before installing. Reinstall the BB by hand first to avoid cross-threading, then torque to the manufacturer's specification using your torque wrench. A typical BSA BB torque range is in the region of 35 to 50 Nm but always confirm this against your specific component's documentation.
- Reinstall cranks and pedals. Apply fresh grease to pedal threads before reinstalling. Torque pedals to the manufacturer's specification, typically around 35 Nm. Remember: right pedal tightens clockwise, left pedal tightens counter-clockwise.
If this is your first time, take it slowly. Cross-threading is easy to do and hard to fix. Always thread in by hand for the first few turns before applying any tool.
Common Mistakes
- Loosening the left pedal counter-clockwise (it has a reverse thread, loosen it clockwise).
- Going the wrong direction on the non-drive side BB cup and stripping the shell thread.
- Skipping the torque wrench and either under-tightening (components loosen mid-ride) or over-tightening (stripped threads).
- Using the wrong BB removal tool for your BB standard and damaging the splines.
- Not cleaning the BB shell before reinstalling, trapping grit in the threads.
- Assuming a creak is the BB when it is actually the pedals, cleats, saddle rails, or stem bolts.
If You Are New to This
- Start with a pedal service only on your first attempt. It is simpler and lower risk than a full BB service.
- Watch a video walkthrough specific to your BB type before touching anything.
- Buy or borrow a torque wrench before you start. It is not optional for this job.
- Have your local bike shop check your first attempt if you are unsure. Most shops are happy to cast an eye over your work for a small fee or for free if you are a regular customer.
- Keep press-fit BB jobs for the shop until you are confident. The risk of damaging the frame shell is real.
If You Have Done This Before
- Consider upgrading to a higher-quality replacement BB if your current one is on its third or fourth service.
- Check for any play in the headset and wheel hubs while you have the bike on the stand. Everything wears together.
- Note the date of the service on a small sticker inside the chainstay or in a maintenance log. It makes the next interval easier to track.
- If you ride gravel or coastal routes regularly, shift your interval to every four months and inspect bearings at three.
Want more tips on keeping your whole drivetrain in shape? Our bike maintenance tips section has guides on chain care, cable replacement, and more to help you build a full home workshop routine.
When to Take It to a Bike Shop
Not every job belongs in the home workshop and there is no shame in that. For a broader guide on bike maintenance basics tailored to Australian cyclists, Bicycling Australia lays out a clear picture of what is reasonable for home mechanics and what is not.
- Press-fit bottom bracket removal and installation (requires a dedicated press and removal tool).
- Stripped or damaged BB shell threads (requires a thread repair tool or helicoil insert).
- Any creak that persists after a full service and inspection of all components.
- Carbon frame bikes where incorrect torque can cause irreversible damage.
- If you are unsure of any step and do not have someone experienced to check your work.
A professional pedal and BB service at an Australian bike shop typically costs between $40 and $100 depending on the work involved and whether parts are needed. That is excellent value compared to the cost of a replacement crankset or frame repair caused by a neglected BB. If you have any questions or want advice on whether your bike needs attention, get in touch with us and we will point you in the right direction.
Frequently asked questions
How do I know if my bottom bracket needs servicing or replacing?
Spin the cranks by hand with the chain off. If the movement is smooth and quiet, a service with fresh grease may be all that is needed. If you feel roughness, notching, or any lateral wobble in the cranks, it is time to replace the BB unit.
Does the left pedal really have a reverse thread on all bikes?
Yes, on the vast majority of bicycles the left (non-drive side) pedal uses a left-hand reverse thread. This applies to flat pedals and clipless pedals alike. You loosen it by turning clockwise and tighten it by turning counter-clockwise. This convention exists to prevent the pedal from unscrewing itself under pedalling load.
Can I service a press-fit bottom bracket at home?
Technically yes, but it requires a dedicated press tool for installation and a removal tool for extraction. Without these you risk damaging the bearing cups or the frame shell. For most beginners, a press-fit BB service is a job best left to a bike shop.
What grease should I use for pedals and bottom bracket bearings in Australia?
A quality waterproof bearing grease is the right choice. Brands such as Phil Wood Waterproof Grease and Shimano Preset Grease are widely available in Australia and work well in our conditions. Avoid light general-purpose lubricants. For the BB shell threads, a thin layer of anti-seize or copper-based compound is also recommended to prevent galling.
How much does a professional bottom bracket service cost in Australia?
Prices vary by shop and location, but expect to pay roughly $40 to $100 for a professional pedal and BB service including labour. Parts are extra if replacement is needed. Doing the job yourself costs the price of grease and tools, which pay for themselves quickly if you maintain your bike regularly.
Wrapping up
- Service your pedals and bottom bracket every 6 to 12 months. Lean toward six months in Australian coastal, gravel, or high-mileage conditions.
- Always confirm your BB type before starting. A BSA threaded BB is a solid home job. Press-fit is a shop job for beginners.
- Never skip the torque wrench. It protects your threads and keeps components secure under load.
- The left pedal has a reverse thread. Loosen it clockwise. Write it on your hand the first time if you need to.
- A small amount of regular maintenance now saves a significant repair bill later. Your frame and crankset will thank you.
This is educational content, not financial advice.