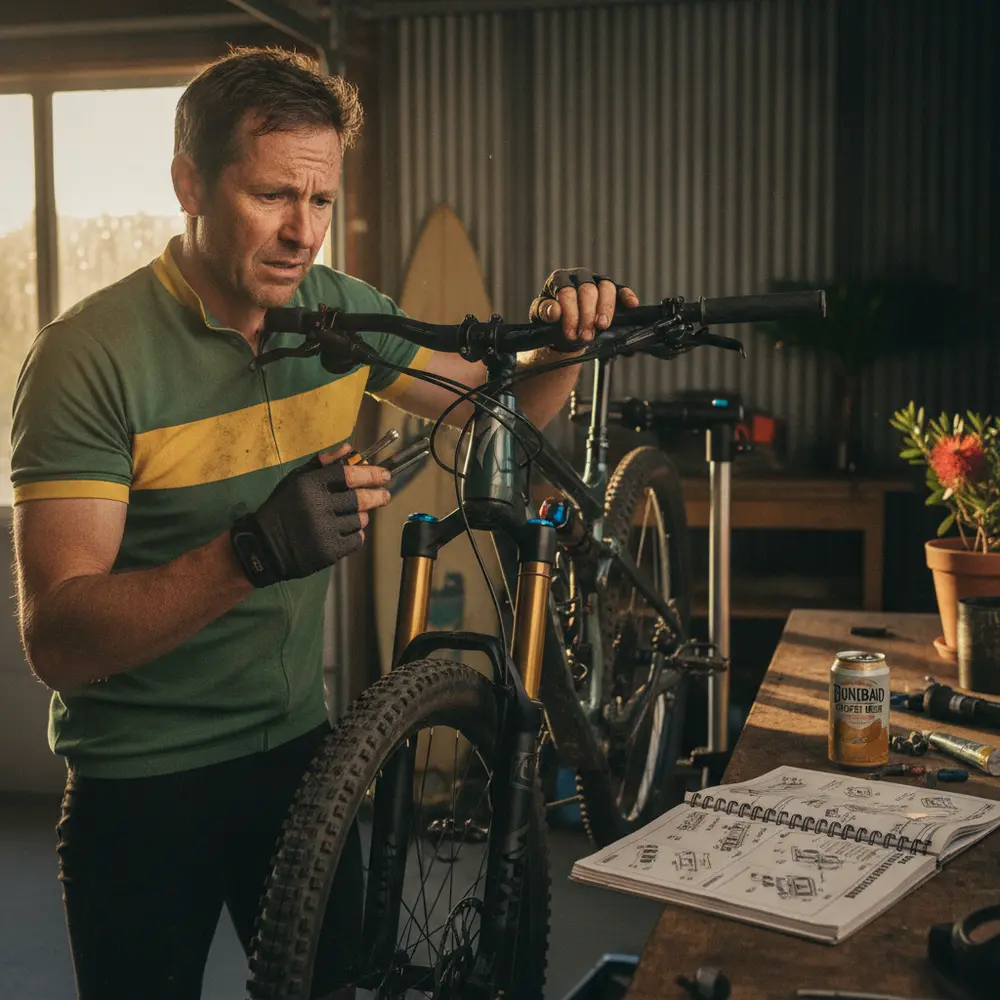
A creak under load or a subtle wobble in your steering are two of the most common reasons Australian cyclists end up in the bike shop. Left unchecked, worn bottom bracket or headset bearings can turn a small service into a costly frame repair.
By the end of this article you will be able to diagnose the symptoms, understand which bearing standards you are dealing with, and make a confident call on whether to sort it yourself at home or hand it over to a cycling mechanic.
Note for Australian riders:
- Coastal salt air, red dust inland, and wet southern state winters all accelerate bearing wear faster than typical global service recommendations assume.
- Parts availability for less common bottom bracket standards can be limited outside major metro areas, so knowing your standard before you shop saves a wasted trip.
- Warranty considerations on newer bikes may affect your decision to DIY. If your bike is under warranty, check with your retailer before pulling anything apart.
At a glance:
- A creak under pedalling load is not always the bottom bracket. Rule out pedals, cleats, seatpost and chainring bolts first.
- Headset play is diagnosable at home in under two minutes. Basic adjustment only needs a hex key.
- Press-fit bottom brackets are a genuine trap for home mechanics without the right tools. Damaging a carbon frame shell to save on tool hire is not a good trade.
- Professional bottom bracket or headset service at an Australian workshop typically ranges from around $40 to $120 depending on the standard and parts required.
Key takeaways:
- Threaded bottom brackets and integrated headset preload adjustment are the most DIY-friendly tasks. Press-fit bottom bracket work almost always belongs in a workshop.
- Australian riding conditions mean you should inspect bearings every three to six months, not just when something feels wrong.
- A good cycling mechanic will often spot developing issues you have normalised or overlooked.
What Do the Bottom Bracket and Headset Actually Do?
Bottom Bracket - The Engine Room of Your Drivetrain
The bottom bracket sits inside the frame's bottom bracket shell and houses the bearings that allow your crankset to spin. Every watt of power you push through the pedals passes through these bearings. When they are running smoothly, you will not notice them. When they are not, you will hear about it immediately.
The bottom bracket connects your crank arms to the frame and transfers pedalling force to the chain. It takes continuous load, rotational stress, and in Australian conditions, plenty of grit and moisture. That is why it wears.
Headset - The Pivot Point of Your Steering
The headset sits at the top and bottom of the head tube and allows the fork to steer smoothly within the frame. It consists of bearings, cups, and a top cap arrangement that controls preload on the bearing stack. A correctly adjusted headset feels invisible. A loose or worn one feels unsettling, especially at speed on rough roads.
Unlike the bottom bracket, the headset also affects handling safety directly. Riding with significant play in the headset is worth addressing promptly.
Warning Signs Your Bottom Bracket Needs Attention
Creaks, Clicks and Rough Pedalling - What Each Sound Could Mean
A creak that appears under pedalling load is the most common symptom riders associate with a failing bottom bracket. The frustrating truth is that common causes of creaking under pedalling load are frequently found at other contact points entirely. Before you pull the bottom bracket, check these first:
- Pedals and cleats - dry threads or worn cleat interfaces are the most common impersonator of a BB creak.
- Seatpost - a dry or incorrectly torqued seatpost creak is rhythmic under load and sounds very similar to a bottom bracket.
- Chainring bolts - loose chainring bolts tick and creak under power, especially on the drive side.
- Saddle rails and clamp - can produce a creak that travels through the frame and appears to come from below.
If you have ruled out all of the above and the creak persists, particularly if it is accompanied by rough or gritty rotation when you spin the cranks by hand, the bottom bracket bearings are the likely culprit. Rough pedalling feel, lateral movement in the cranks, or visible corrosion around the BB shell are all signs it is time to act.
Warning Signs Your Headset Needs Attention
Play, Looseness and Steering That Feels Off
The standard field check is simple. Squeeze the front brake lever firmly, place your other hand on the head tube, and gently rock the bike forward and back. Any knocking or clunking sensation through your hand means there is play in the headset. This test is reliable and takes about thirty seconds. For more detail on the process, how to check your headset bearing is a solid step-by-step reference.
Other symptoms to watch for include:
- A clunking noise on rough road surfaces or during hard braking
- Steering that feels vague or slightly loose at speed
- A notchy or grinding sensation when you slowly rotate the bars through the steering arc
- Visible pitting or roughness when you remove the bearings for inspection
A loose headset left unaddressed will cause progressive wear to the head tube and fork steerer over time. Caught early, it is a quick adjustment. Left for months, it can become a bearing replacement job, and in the worst case, a head tube that needs workshop attention.
The Different Standards and Why They Matter
This is where a lot of riders get caught out. Not all bottom brackets and headsets are the same, and the standard your bike uses determines exactly what tools and parts are required. Getting this wrong costs money and time.
Threaded vs Press-Fit Bottom Brackets - A Quick Guide
Threaded bottom brackets (most commonly BSA, which stands for British Standard) screw directly into the frame shell. They are the most home-mechanic-friendly option because removal and installation only requires the correct splined cup tool and a torque wrench. For a full breakdown of bottom bracket standards and tools explained, Park Tool's reference is the industry standard.
Press-fit bottom brackets (BB86, BB92, PF30 and others) are pressed directly into an unthreaded frame shell. They are common on mid-to-high-end road and gravel bikes sold in Australia. Installation requires a dedicated press to avoid damaging the frame shell, and incorrect installation is a well-documented cause of recurring creak. For more on bottom bracket standards in Australia, Bicycling Australia covers the local landscape well.
| Standard | Thread or Press? | DIY Friendly? | Tools Required |
|---|---|---|---|
| BSA Threaded | Threaded | Yes, with right tools | Cup tool, torque wrench |
| T47 | Threaded | Yes, with right tools | T47 cup tool, torque wrench |
| BB86 / BB92 | Press-fit | No. Workshop recommended | Dedicated bearing press |
| PF30 | Press-fit | No. Workshop recommended | Dedicated bearing press |
Threaded, Integrated and Zero-Stack Headsets Explained
Most modern road, gravel and mountain bikes use an integrated headset, where the bearings sit directly in machined recesses in the head tube with no separate cup pressed in. Preload adjustment is done via the top cap bolt and stem clamp bolts, which only requires a hex key. This is the most accessible service task for a home mechanic.
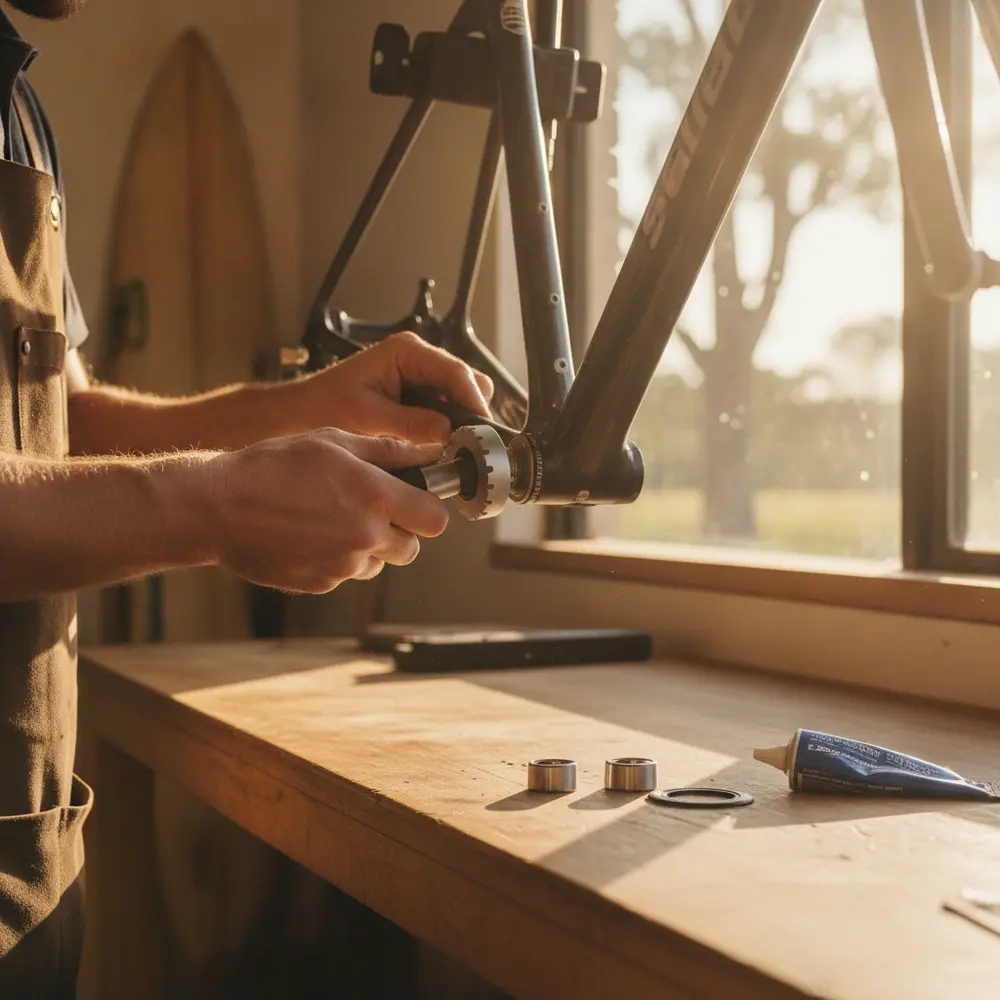
Zero-stack (also called IS or internal headsets) use cups that are pressed into the head tube. The bearings then sit inside those cups. Removing and replacing the cups requires a headset press and a headset cup remover, neither of which is standard home workshop equipment. For a clear explanation of all the variants, headset standards explained on 99 Spokes is worth bookmarking.
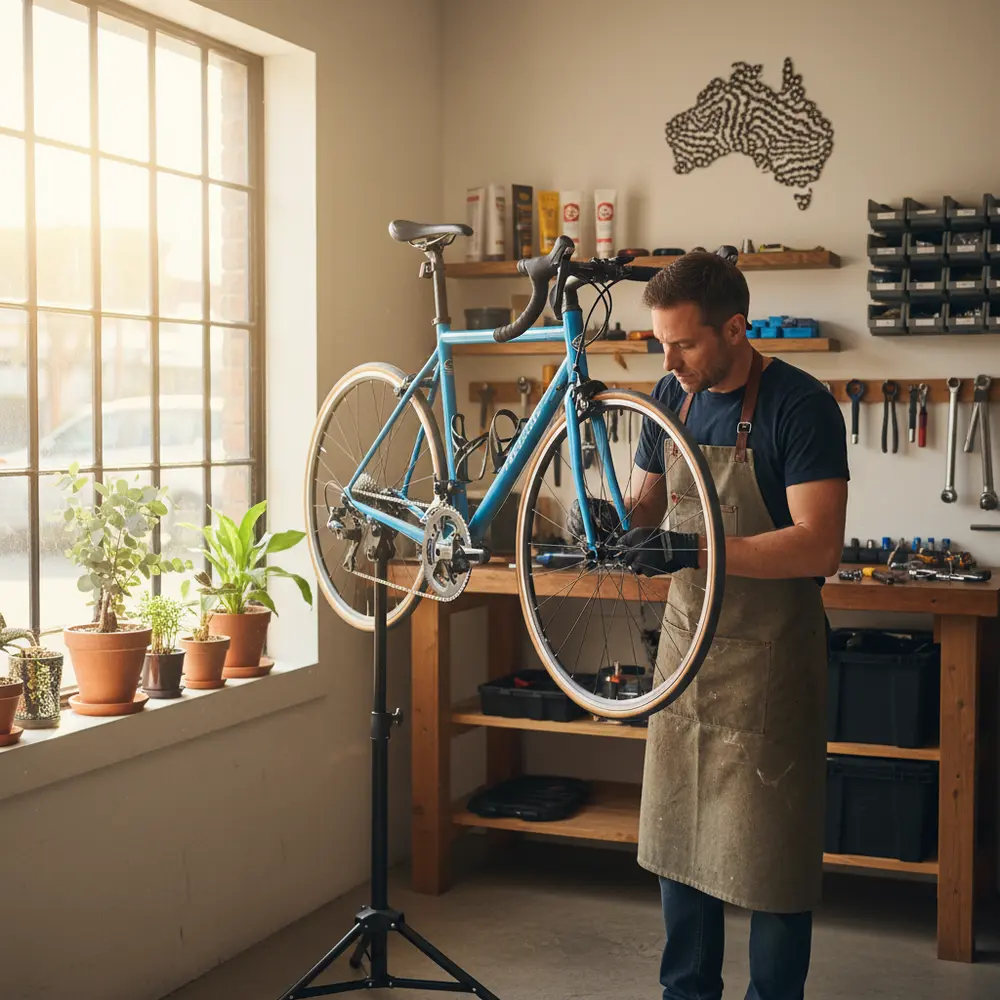
What a Service Actually Involves
For a threaded bottom bracket, service means removal, inspection of the bearing surfaces, re-greasing or replacement if the bearings are pitted or rough, and reinstallation to the correct torque. Many modern cartridge-style threaded units are sealed and not designed to be repacked with grease. If the bearings feel rough, the unit is replaced rather than serviced.
For a headset, service at the basic level means checking and adjusting preload via the top cap. If play persists after correct adjustment, the bearings need replacing. Cup removal and pressing back in is a workshop job.
DIY vs Seeing a Cycling Mechanic - How to Make the Call
Tools You Actually Need and What They Cost
Being honest about tool costs is important here. The right tool for a threaded bottom bracket is not hugely expensive and is a worthwhile investment if you ride regularly. A press-fit bottom bracket is a different story. A quality bearing press capable of installing press-fit BBs without damaging the frame costs significantly more, and a poor-quality substitute is worse than no tool at all on a carbon frame shell.
- Threaded BB cup tool - relatively affordable and widely available. A good addition to any home workshop.
- Torque wrench - essential for correct installation on both BB and headset stem bolts. Not optional.
- 4mm or 5mm hex key - sufficient for integrated headset preload adjustment. You almost certainly already own one.
- Headset press - required for cup removal and installation. A workshop tool. Not worth buying for a one-off job.
- Press-fit BB press - specialist tool. Rental from some bike shops is possible but not universal across Australia.
When the Job Is Beyond a Home Workshop
Be straight with yourself on this one. If your bike has a press-fit bottom bracket and you do not have access to a proper press, take it to a trusted cycling mechanic. Saving fifty dollars on a tool by using a DIY workaround and damaging a carbon frame shell is not a win. The same applies to pressing headset cups into or out of a frame.
A creaking press-fit bottom bracket that keeps coming back after DIY attempts is also a strong signal to hand it over. Correct installation, correct preload and correct torque are the three things that prevent press-fit creak, and getting all three right consistently requires the proper equipment.
Troubleshooting Flow - Bottom Bracket and Headset
Bottom Bracket Branch
- Do you hear a creak under pedalling load? If no, no immediate action needed. Keep monitoring.
- If yes, have you checked pedals, cleats, seatpost and chainring bolts? If not, check those first before assuming it is the BB.
- After ruling out other sources, does the creak persist? If yes, spin the cranks by hand. Does it feel rough or gritty?
- If rough: remove and inspect the bottom bracket. If threaded and you have the tools, service or replace at home. If press-fit, take it to a cycling mechanic.
- If smooth but still creaking: re-check torque on BB cups and crank bolts. If still unresolved, book it in with a mechanic.
Headset Branch
- Apply front brake and rock the bike. Do you feel any play or knocking? If no, check for roughness by slowly turning the bars. If smooth, no action needed.
- If play is present, attempt preload adjustment: loosen stem clamp bolts, tighten top cap bolt by small increments, re-clamp stem bolts, re-test.
- Does the play resolve after adjustment? If yes, you are done. Re-check after your next few rides.
- If play persists after correct adjustment, the bearings are likely worn. Bearing replacement needed.
- If bearings need replacing and the headset uses pressed cups, take it to a cycling mechanic.
Common Mistakes
- Replacing the bottom bracket before checking other creak sources. Pedals and cleats are responsible for a significant proportion of creaks blamed on the BB.
- Using the wrong tool on press-fit cups. Improvised tools risk ovaling the frame shell, especially on carbon.
- Over-tightening the headset top cap. The top cap sets preload only. It should not be cranked tight. Finger tight plus a small turn is the starting point, with the stem clamp bolts doing the clamping.
- Ignoring a loose headset because the bike still rides. Progressive wear to the head tube is a real outcome of riding with persistent play.
- Buying replacement parts before confirming the standard. BB and headset bearing sizes vary significantly. Confirm your standard before ordering.
- Skipping torque specifications. Both bottom bracket cups and stem bolts have specified torque values. Guessing by feel is a common source of recurring creak and premature wear.
If You Are New to Bearing Services
- Start with the headset preload check and adjustment. It is the simplest bearing service task on any bike and only needs a hex key.
- Learn to identify your bottom bracket standard before doing anything else. A quick search of your frame model and a look inside the BB shell will tell you whether it is threaded or press-fit.
- Use the elimination method on creaks. Work through pedals, cleats, seatpost and saddle before assuming the BB is at fault.
- Read the bike maintenance basics guide on Segment Club before diving into bearing work for the first time.
- When in doubt, book a professional check. A good mechanic can inspect the whole bike and tell you what actually needs attention.
If You Have Done Basic Maintenance Before
- If you have a threaded BB and the right cup tool, a full removal, inspection and reinstall is a reasonable home job. Use a torque wrench and fresh grease on the threads.
- For a Shimano Hollowtech II crank setup, pay attention to left crank arm preload adjustment. It is a common DIY error point and incorrect preload causes both creak and premature bearing wear.
- Consider a threaded insert conversion if you have chronic press-fit creak and your frame supports it. Some workshops in Australia can do this conversion and it resolves the problem permanently for many riders.
- Even if you handle your own basic maintenance, a periodic professional inspection is worth the cost. A mechanic will often pick up something you have tuned out or missed entirely.
- Check the workshop tips section on Segment Club for practical guides on BB and headset work at home.
What to Expect When You Take It to a Bike Shop in Australia
A bottom bracket or headset service at an Australian bike shop typically involves inspection, bearing replacement if needed, and correct installation with proper tooling. Based on available Australian workshop data, costs generally range from around $40 to $120 depending on the standard, the parts required, and whether you are in a metro or regional area. Parts costs are on top of labour for replacement units. For more context on when to service your bike in Australia, Velofix Australia outlines what professional service typically covers.
When you drop the bike in, tell the mechanic exactly what you are experiencing. Describe the sound, when it happens, and what you have already checked. The more specific you are, the faster they can diagnose it. If you are not sure what to expect from a visit, the team at Segment Club can point you in the right direction.
How Often Should These Parts Be Serviced?
There is no single kilometre figure that applies to all riders and all conditions. Shimano recommends periodic inspection rather than a fixed interval, and that is sensible advice. In Australian conditions, particularly if you ride in coastal areas, through dust or in wet winters, inspecting bearing feel and headset play every three to six months is a practical starting point.
If you ride year-round in mixed conditions, or you commute daily through winter, lean toward the shorter end of that range. Heat and humidity cycles in particular accelerate grease breakdown in bearings. Riders in Queensland and coastal WA often report faster bearing wear than those in drier inland climates.
Regular inspection matters more than a fixed schedule. Get into the habit of a quick headset rock test and a hand-spin of the cranks every month or so. Catching wear early is far cheaper than dealing with the consequences of ignoring it.
Frequently asked questions
Is a creak under pedalling always a sign the bottom bracket needs replacing?
Not at all. Creaks that sound like they come from the bottom bracket are frequently caused by dry pedal threads, worn cleats, a dry seatpost, or loose chainring bolts. Work through an elimination-based diagnosis before touching the bottom bracket. If all other sources are ruled out and the BB feels rough when you spin it by hand, then investigate further.
Can I service a press-fit bottom bracket at home?
Technically yes, but it requires a dedicated bearing press for correct installation. Without one, you risk damaging the frame shell, particularly on carbon frames. A poorly installed press-fit BB is also the primary cause of recurring creak. For most home mechanics, a press-fit BB job is best left to a workshop with the right equipment.
How do I know if my headset adjustment has actually fixed the play?
After adjusting the top cap preload and re-clamping the stem bolts, repeat the front brake rock test. There should be zero knocking or movement through the head tube. Then check that the bars steer smoothly with no binding. If play persists after two or three adjustment attempts with correct technique, the bearings are likely worn and need replacing.
Are ceramic bottom bracket bearings worth the extra cost for Australian riders?
For most recreational and club-level riders, the real-world benefit of ceramic over quality steel bearings is marginal. Ceramic bearings do offer reduced rolling resistance, but the difference is measurable rather than transformative for riders who are not racing at elite level. In wet conditions, quality steel bearings can outlast ceramic alternatives. The money is generally better spent on correct installation and regular servicing of whatever bearing you already have.
How much should I expect to pay for a bottom bracket or headset service in Australia?
Based on available local workshop data, a bottom bracket or headset service at an Australian bike shop generally falls in the range of $40 to $120 all up, depending on the standard, whether parts need replacing, and your location. Regional areas may vary. Always ask for a quote before leaving the bike, and confirm whether the estimate includes parts or is labour only.
Summary
- Diagnose creaks with an elimination approach. Check pedals, cleats, seatpost and chainring bolts before assuming it is the bottom bracket.
- Headset preload adjustment is within reach of most intermediate riders with a hex key. Do the rock test first and adjust from there.
- Know your standard before you start. Threaded BB and integrated headset preload work are home-mechanic-friendly. Press-fit BB and cup pressing are workshop jobs.
- Australian conditions accelerate bearing wear. Inspect every three to six months and do not wait for something to fail before checking.
- A periodic professional inspection is worthwhile even if you handle your own basic maintenance. A good cycling mechanic will often catch what you have normalised.
This is educational content, not financial advice.