Getting your first puncture 20 kilometres from home with no tools is one of those lessons you only need to learn once. Owning a basic set of cycling tools is not about becoming a full-time bike mechanic. It is about being self-sufficient enough to handle the most common problems before they ruin a ride.
By the end of this article, you will know exactly which 10 tools to buy first, what each one does, and which ones to carry on the bike versus keep at home. You will also find a simple checklist you can refer back to whenever you need it.
Note for Australian riders:
- Australian summers can be brutal. Heat affects tyre pressure, so check your tyres before every ride rather than once a week.
- Wet lube suits humid coastal conditions in Queensland and NSW. Dry lube works better in dusty inland and outback environments. Match your lube to your riding region.
- Most of the tools in this list are readily available from local bike shops, Bicycles Online, BikeExchange, and international retailers like Chain Reaction Cycles that ship to Australia in AUD.
At a glance:
- 10 tools cover everything a beginner needs for roadside and home repairs.
- Five tools should be carried on every ride. Five live in the garage.
- A full basic kit can be built for a reasonable budget without buying premium brands from day one.
- Some tools on this list (spoke key, cable cutters) are honest borderline calls. We flag them clearly.
Key takeaways:
- Tyre levers, a mini pump, and a patch kit are non-negotiable for every ride.
- A track pump and chain maintenance tools are the most valuable home workshop investments for a beginner.
- You do not need to buy everything at once. Build your kit in stages.
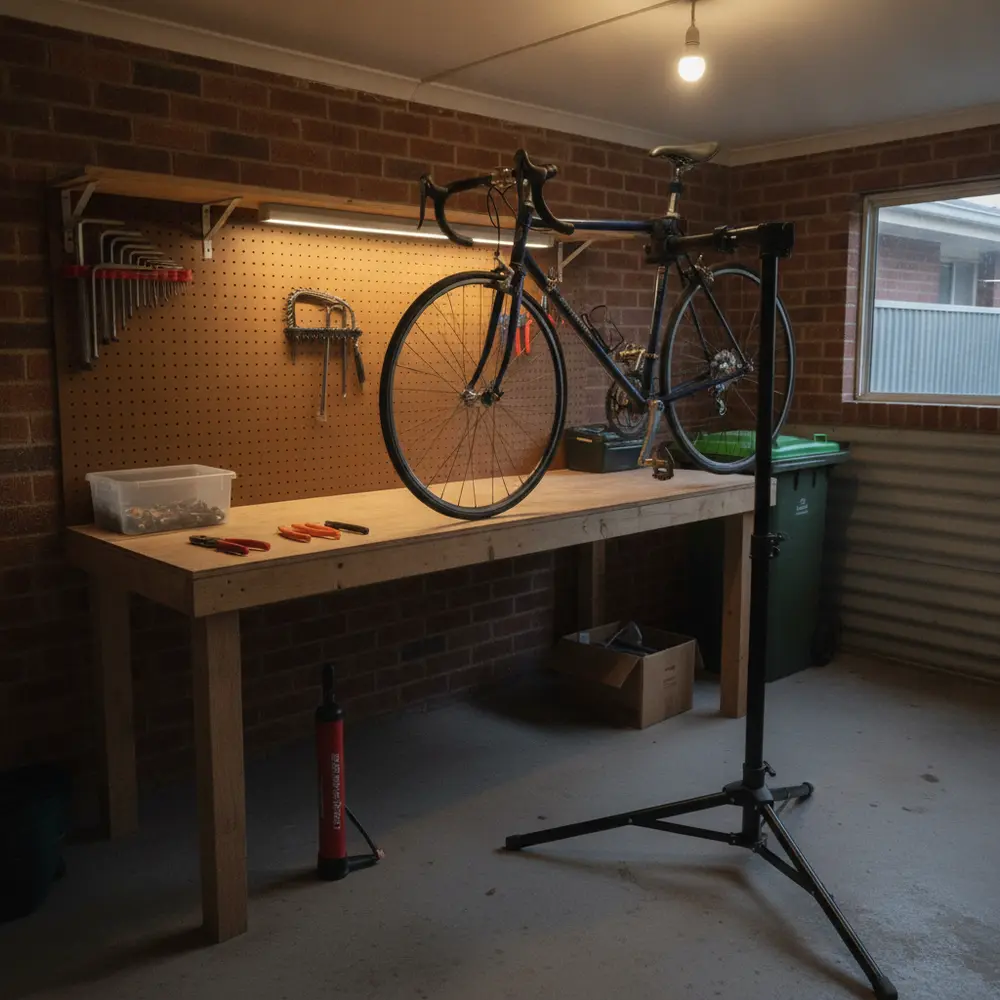
Why every beginner cyclist needs their own tool kit
Most beginner cyclists assume their local bike shop will handle every mechanical issue. That works fine for big jobs like a full service or brake bleed. It does not work when you are halfway through a Saturday morning ride and your tyre goes flat.
Owning even a basic set of bike repair tools for beginners means you spend less time stranded and more time riding. It also builds confidence. Once you can fix a flat and adjust your saddle height without asking for help, everything else feels less intimidating.
The cost of relying on a bike shop for every fix
Bike shops charge labour rates for a reason. Their mechanics are skilled and their time is valuable. But paying a shop to replace a tube or re-tension a brake cable every time it is needed adds up quickly, especially when these are jobs you can learn to do yourself in under 15 minutes with the right tools.
As Cycling Australia notes in their beginner maintenance guide, building basic self-sufficiency with your bike is one of the most practical steps a new rider can take. The tools pay for themselves quickly.
The essential 10 cycling tools for beginner riders
These 10 tools cover the vast majority of problems a beginner will encounter on the road, the trail, or in the garage. Every tool on this list earns its place. We have been honest where a tool is slightly advanced for a true beginner.
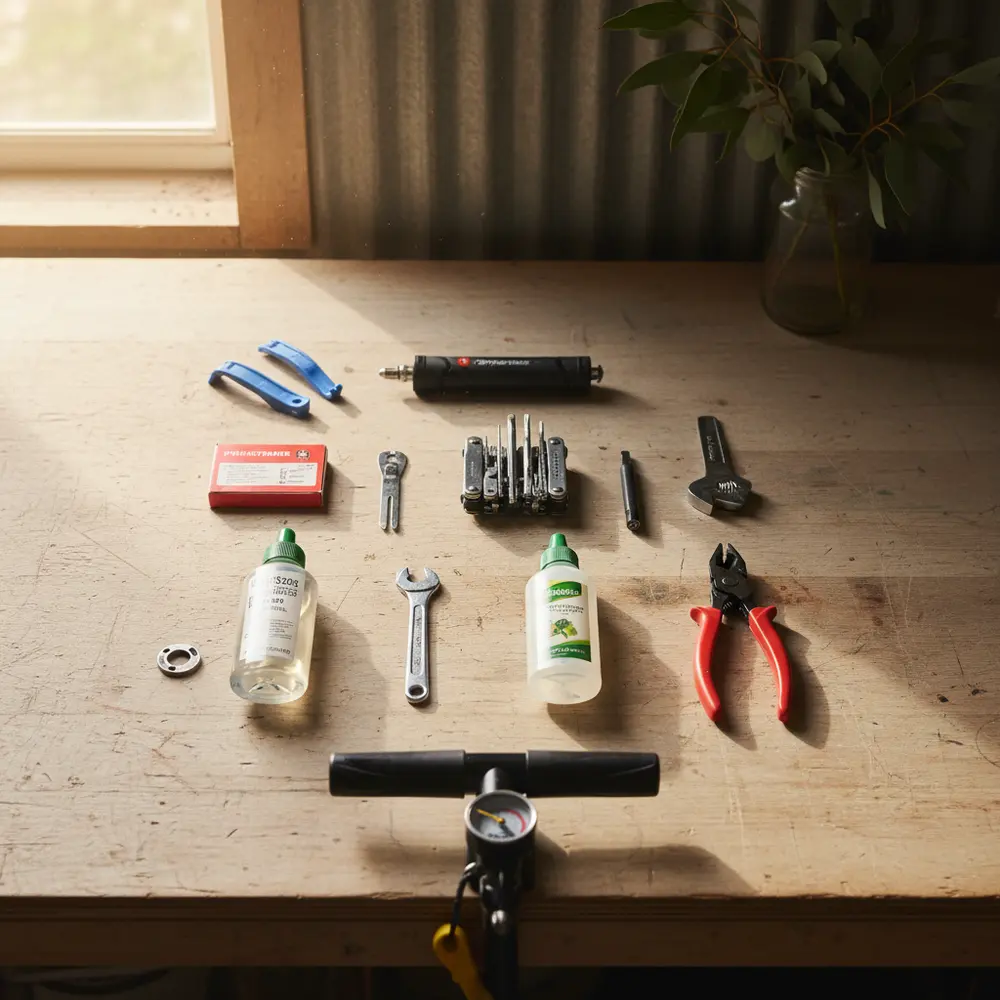
1. Tyre levers
Tyre levers are small plastic tools that help you pop a tyre off the rim without pinching the inner tube. They are the first tool you will reach for during a flat repair. Buy a set of three. Plastic levers are preferred over metal as they are far less likely to damage your rim or tube. Learn how to fix a flat tyre step by step and these will make immediate sense in your hands.
2. Portable mini pump (or CO2 inflator)
A mini pump attaches to your frame or fits in a jersey pocket and lets you inflate a tube after a repair. It takes effort and time compared to a track pump, but it gets you home. CO2 inflators are faster and smaller, which makes them popular with road riders. The honest trade-off is that CO2 cartridges are single-use and beginners can sometimes over-inflate or waste a cartridge through an accidental release. Start with a mini pump and consider CO2 as an upgrade once you are comfortable with flat repairs.
3. Patch kit
A patch kit lets you repair a punctured tube rather than replacing it entirely. It is a backup for when you have already used your spare tube or when you get a second puncture on the same ride. Modern self-adhesive patches are beginner-friendly and reliable. Keep one in your saddle bag at all times and check that the patches have not dried out every few months.
4. Multi-tool (Allen keys and more)
A cycling multi-tool is the Swiss Army knife of the tool kit. It typically includes several Allen key (hex) sizes, a Phillips head screwdriver, and a flathead. The Allen key sizes most commonly needed on a beginner bike are 4mm, 5mm, and 6mm, and any decent cycling multi-tool sold in Australia will cover these. Use it for saddle height adjustments, handlebar position tweaks, and minor bolt checks. For more on setting up your bike correctly, check out our beginner bike setup guide.
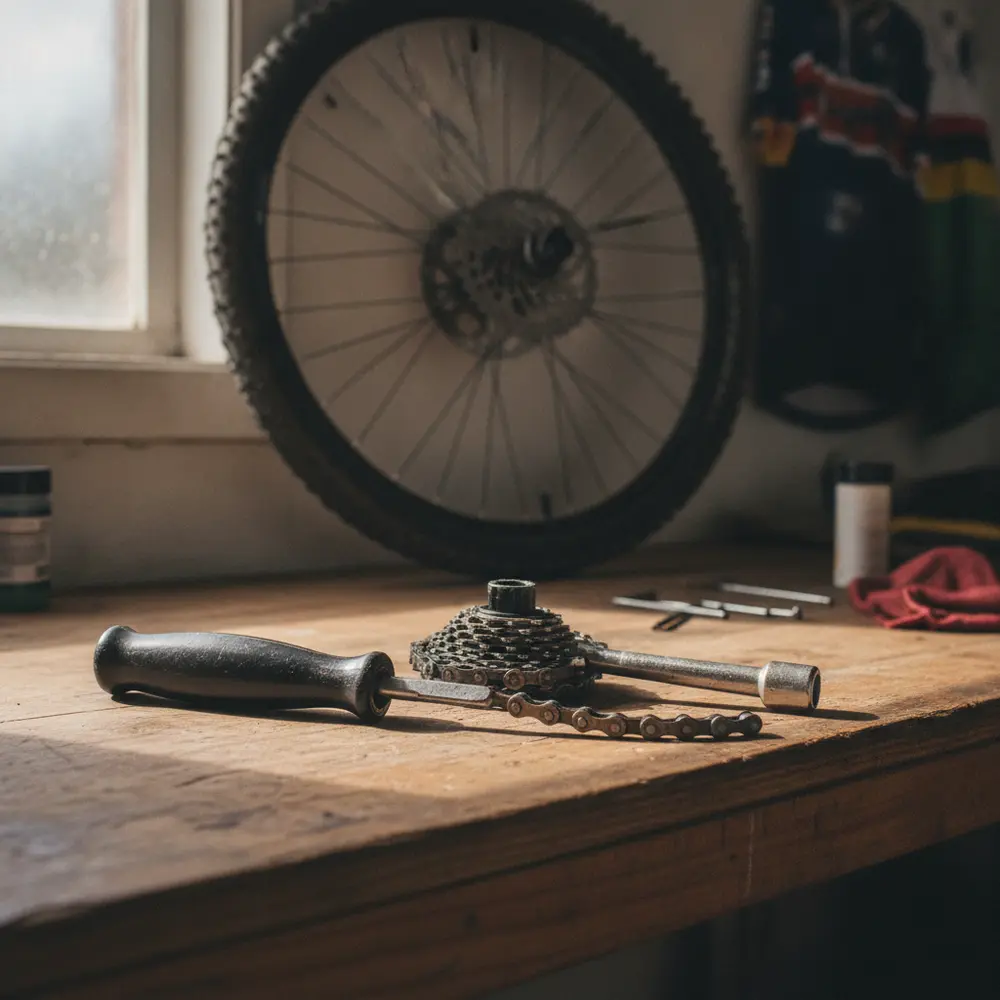
5. Chain checker
A chain checker is a small gauge that tells you how much your chain has stretched through use. Chains wear out over time and a worn chain accelerates wear on your cassette and chainrings, which are far more expensive to replace. Checking your chain regularly and replacing it before it wears too far is one of the best maintenance habits you can build early. It is a simple tool to use and well worth the modest cost.
6. Chain lube
Chain lube keeps your drivetrain running quietly and efficiently. A dry, unlubricated chain wears faster and sounds terrible. As mentioned in the Australian callout above, wet lube suits humid coastal climates while dry lube is better for dusty or dry conditions. Apply a drop to each link, let it soak in, and wipe off the excess. Overlubricating attracts dirt and makes things worse, not better. For a deeper look at chain care, our chain maintenance guide covers the full process.
7. Adjustable spanner or pedal wrench
Pedals use a 15mm thread and most multi-tools do not include a 15mm spanner, so you need a dedicated tool for pedal installation and removal. An adjustable spanner can work in a pinch. A dedicated pedal wrench is longer, which gives better leverage and is worth the small extra cost if you plan to swap pedals or travel with your bike. Remember that the left pedal has a reverse thread so it tightens counter-clockwise.
8. Cable and housing cutters
Cable cutters are designed to cut brake and gear cables and their housing cleanly. Standard pliers or scissors leave a frayed or crushed end that makes reassembly difficult and affects cable performance. Honest assessment: this is the most borderline tool on this list for a true beginner. If you are not planning to replace cables yourself in your first year, this can wait. But if you want a complete home workshop from the start, good cable cutters are worth having. According to BikeRadar's guide to beginner bike tools, clean cable cuts make a noticeable difference to shifting and braking quality.
9. Spoke key
A spoke key lets you adjust spoke tension to true a wheel that has developed a slight wobble. It is genuinely useful but also the easiest tool on this list to misuse. Overtightening or unevenly tensioning spokes can make a wheel worse rather than better. If your wheel is significantly out of true, take it to a shop for a proper wheel true. A spoke key is worth owning for minor tweaks once you have watched a few how-to videos and understand the basics, but approach it with patience.
10. Track pump with pressure gauge
A floor track pump stays at home and makes it quick and easy to inflate your tyres to the correct pressure before every ride. The built-in pressure gauge removes the guesswork. Correct tyre pressure improves rolling efficiency, handling, and puncture resistance. This is one of the highest-value tools on the list relative to its cost and the difference it makes to your riding experience. Check your tyre sidewall for the recommended pressure range and aim for the middle of that range as a starting point.
Tools to keep at home vs. tools to carry on a ride
Not every tool needs to go with you on every ride. Splitting your kit into two groups keeps your on-bike setup light and organised.
| Carry on every ride | Keep in the garage |
|---|---|
| Tyre levers | Track pump with gauge |
| Mini pump or CO2 inflator | Chain checker |
| Patch kit and spare tube | Chain lube |
| Multi-tool | Adjustable spanner or pedal wrench |
| - | Cable and housing cutters |
| - | Spoke key |
A compact saddle bag or top tube bag is the easiest way to carry your on-ride tools without weighing down your jersey pockets. Keep the roadside essentials packed and ready so you are not scrambling before every ride.
Where to buy cycling tools in Australia
Local bike shops vs. online retailers
Local bike shops (LBS) are the best first stop for tools when you are just starting out. Staff can show you how a tool works in person, and you leave the shop with it that day. The trade-off is that prices are sometimes higher than online alternatives.
Online options that are well-known in the Australian market include Bicycles Online's tool guide for reference, as well as retailers like Chain Reaction Cycles AU, which ships to Australia with AUD pricing. For a broader overview of what is available, BikeExchange's home maintenance tools guide is a useful starting reference for Aussie riders.
If you are unsure about something or want a recommendation before buying, feel free to get in touch with us at Segment Club and we are happy to point you in the right direction.
How to build your kit without blowing your budget
You do not need to buy all 10 tools at once. Build your kit in stages based on what you are most likely to need first.
Stage 1 - Start here (roadside essentials):
- Tyre levers (usually sold as a set, low cost)
- Mini pump
- Patch kit and a spare tube
- Multi-tool
Stage 2 - Home workshop basics:
- Track pump with gauge
- Chain lube
- Chain checker
Stage 3 - Rounding out the kit:
- Adjustable spanner or pedal wrench
- Spoke key
- Cable and housing cutters
Mid-range tools from reputable brands available in Australia will serve a beginner well without the premium price of top-end workshop kit. Avoid the cheapest unbranded tools where possible, particularly for items like cable cutters where poor quality shows immediately. As a rough guide, a solid Stage 1 kit can be assembled for well under $100 AUD, and a complete 10-tool kit for somewhere in the $150 to $250 AUD range depending on brand and source.
Common mistakes beginners make with their tool kit
- Not carrying tools on a ride. Having tools at home does not help when you are 30km out. Pack your saddle bag before every ride.
- Using the wrong lube for their conditions. Wet lube in dry dusty conditions builds up grime fast. Check your local climate and match the lube type accordingly.
- Over-tightening bolts with a multi-tool. Multi-tools give less leverage than workshop tools, which is actually a good thing. Snug is enough. Cranking bolts too tight can strip threads on carbon or aluminium components.
- Ignoring chain wear until it is too late. A worn chain costs a few dollars to replace. A worn chain that has also chewed through your cassette costs significantly more. Check it regularly.
- Not practising flat repair at home first. Do a practice run in your lounge room before you need to do it roadside in the rain. It makes a real difference to how calm and efficient you are when it counts.
- Buying a spoke key and immediately trying to fix a badly buckled wheel. A spoke key is for minor tweaks. Major wheel issues belong at the shop.
If you are brand new to cycling
Start simple and do not overwhelm yourself. Here is where to focus first:
- Buy Stage 1 tools before your first long ride outside your suburb.
- Learn to fix a flat tyre at home before you need to do it roadside. Practice makes it quick.
- Ask your local bike shop to show you how to use a chain checker and a track pump on your first visit.
- Do not worry about cable cutters or a spoke key yet. Those can wait until you are more comfortable with the basics.
- Check tyre pressure before every ride. It is the simplest habit with one of the biggest payoffs.
If you have some experience already
If you have been riding for a while and already own the Stage 1 tools, here is what to focus on next:
- Add a chain checker and track pump if you have not already. These two tools alone will save you money over a season.
- Learn to replace a cable and housing. It is a satisfying job and the cable cutters will earn their place.
- Start checking spoke tension when you notice a wheel wobble rather than immediately heading to the shop.
- Consider a bike stand for home servicing. It is not on this beginner list but makes everything easier once you are doing more regular maintenance.
- Check out our intermediate bike maintenance guide when you are ready to take the next step.
Your beginner cycling tool kit checklist
Use this as a quick reference before heading out or when stocking your garage.
Carry on every ride:
- Tyre levers - used to remove the tyre from the rim during a flat repair
- Mini pump or CO2 inflator - re-inflates your tube after a repair
- Patch kit - repairs a punctured tube when you have no spare
- Spare inner tube - faster than a patch for getting back on the road
- Multi-tool - handles saddle, handlebar, and minor bolt adjustments on the go
Keep in the garage:
- Track pump with pressure gauge - inflates tyres accurately before every ride
- Chain checker - monitors chain wear to protect your drivetrain
- Chain lube - keeps the drivetrain running cleanly and quietly
- Adjustable spanner or pedal wrench - needed for pedal swaps and installation
- Cable and housing cutters - for clean cable cuts during brake and gear cable work
- Spoke key - minor wheel truing adjustments (approach with care as a beginner)
Nice to have when you are ready to upgrade:
- Bike work stand - makes home servicing far more comfortable
- Torque wrench - essential if you have carbon components that require precise bolt torque
- Chain cleaning device - speeds up drivetrain cleaning on heavily used bikes
Frequently asked questions
What cycling tools should I buy first as a complete beginner?
Start with tyre levers, a mini pump, a patch kit, a spare tube, and a multi-tool. These five items cover the most common roadside problems and can be assembled for well under $100 AUD. Everything else can follow once you have these sorted.
Is a CO2 inflator better than a mini pump for beginner riders?
CO2 inflators are faster and more compact, but each cartridge is single-use and it is easy to waste one as a beginner. A mini pump is more forgiving, reusable, and does not leave you without options if you make a mistake. Start with a mini pump and try CO2 once you are confident with tube repairs.
Does chain lube type really matter for Australian conditions?
Yes, it does. Wet lube is more durable in wet and humid conditions, such as along the Queensland and NSW coasts. Dry lube is better in dusty and dry environments common inland. Using the wrong type leads to either a gummed-up drivetrain or one that dries out too quickly. Match your lube to where and how you ride.
Is a spoke key safe for a beginner to use?
With caution, yes. A spoke key is fine for correcting a very minor wobble. Incorrect use, such as overtightening or unevenly tensioning spokes, can make wheel issues worse. If your wheel has a noticeable wobble or has taken an impact, have it looked at by a mechanic rather than attempting a fix yourself without guidance.
How much should I budget for a beginner cycling tool kit in Australia?
A practical Stage 1 kit covering roadside essentials can be put together for roughly $50 to $80 AUD. A complete 10-tool beginner kit, including a track pump, will typically run somewhere between $150 and $250 AUD depending on brand and where you buy. Mid-range tools from established cycling brands offer the best balance of quality and cost for a beginner.
Wrapping up
Building a basic cycling tool kit is one of the smartest investments you can make as a new rider. Here is the short version:
- The five carry tools (tyre levers, pump, patch kit, spare tube, multi-tool) are non-negotiable for any ride beyond your local streets.
- A track pump, chain checker, and chain lube are the most valuable home workshop tools for a beginner.
- Build your kit in stages. You do not need everything on day one.
- Be honest about which tools require a little skill, like the spoke key. Use them carefully or ask for help first.
- Correct maintenance habits, starting with tyre pressure and chain care, will keep your bike running well and save you money over time.
This is educational content, not financial advice.