Getting your bike size wrong is one of the most common and costly mistakes a new rider makes. A bike that is even slightly too big or too small will be uncomfortable, harder to control, and can cause real injury over time.
By the end of this article, you will know exactly how to measure yourself at home, how to read a size chart, and what to expect when you walk into an Australian bike shop. You will leave with the confidence to pick the right size, whether you are buying in store or online.
Note for Australia:
- Australian bike shops stock major brands like Trek, Giant, Specialized and Merida, and sizing can vary between brands even in the same category.
- Many Australians buy bikes online through retailers like Pushys or BikeExchange. Online sizing carries extra risk, so read this guide carefully before you click buy.
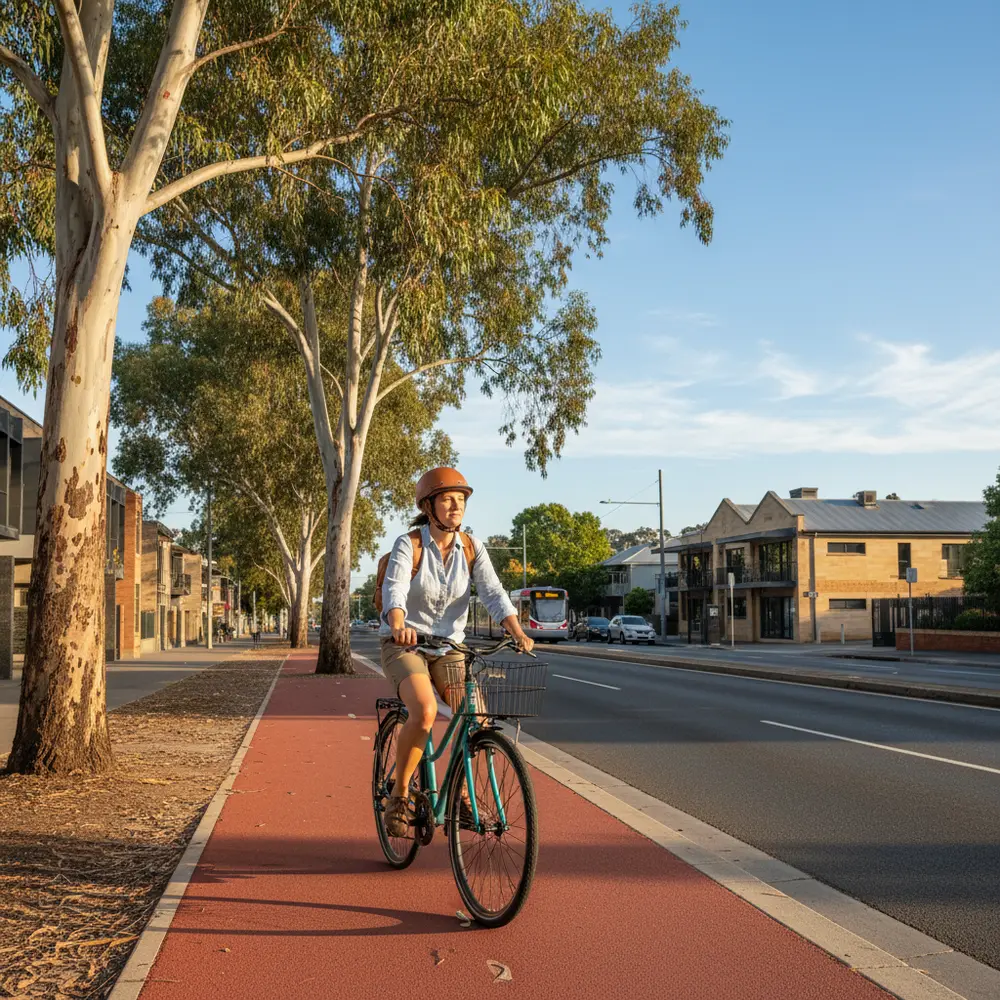
- Most local bike shops (LBS) in Australia are genuinely helpful. Do not be intimidated. Walking in with your measurements ready makes the whole process faster and easier.
At a glance:
- Measure your inseam and height at home before visiting any shop or browsing online.
- Use a size chart as a starting point, not a final answer. Individual body proportions matter.
- Road bikes use centimetre sizing. Mountain bikes and hybrids typically use S, M, L labels.
- Always do a test ride before you commit. If a shop will not let you, that is a red flag.
- A professional bike fit is useful but not essential for most beginners on a budget.
Key takeaways:
- Your inseam and overall height are the two most important starting measurements for any bike type.
- Sizing is not standardised across brands, so always check the specific brand chart for the bike you are considering.
- Getting the frame size right first, then fine-tuning saddle height, is the correct order of operations.
Why Getting Your Bike Size Right Matters
The consequences of riding the wrong size
Riding a bike that does not fit properly is not just uncomfortable. It puts your body under unnecessary stress on every single pedal stroke. Over time, that stress adds up.
A saddle that sits too low is linked to pain at the front of the knee. A saddle that is too high can cause strain at the back of the knee and into the lower back. Reach that is too long puts pressure on the lower back, neck and shoulders, as sports medicine research on cycling knee pain consistently confirms.
Beyond injury, a poor fit just makes riding less enjoyable. You will feel like you are fighting the bike rather than working with it. Getting the size right from the start is the single best thing you can do for your long-term riding.
The Better Health Channel notes that correct bike setup is a key factor in reducing overuse injuries and improving the health benefits of regular riding. It is worth taking the time to get it right.
How Bike Sizing Works
Road bike sizing in centimetres
Road bikes are sized in centimetres and the number refers to the length of the seat tube, which is the tube running from the bottom bracket up to where the seat post enters the frame. A 54 cm road bike has a 54 cm seat tube. Common adult road bike sizes run from roughly 47 cm up to 62 cm, depending on the brand.
Your height and inseam together will point you toward a starting size. If your numbers sit between two sizes, your torso and arm length become the deciding factor. A longer torso usually means sizing up. Shorter limbs relative to your height can mean sizing down.
Mountain bike and hybrid sizing using S, M, L
Mountain bikes and most hybrid bikes are labelled Small, Medium, Large and Extra Large rather than centimetres. This is simpler on the surface, but it hides a real problem: S, M and L are not standardised across brands. A Medium from Trek may fit differently to a Medium from Giant or Merida.
Always check the specific brand size chart for the model you are looking at, not just a generic chart. Most major brands stocked in Australian shops publish their own size guides online. As Trek Australia's bike size guide shows, falling between sizes is common, and the right choice often comes down to rider preference and riding style.
Mountain bike geometry is generally more forgiving of sizing variance than road bike geometry. You have a bit more room to move, but that is not a reason to skip checking the chart.
How to Take Your Key Body Measurements at Home
Measuring your inseam, torso and arm reach
You will need a tape measure, a hardcover book, and ideally a friend to help. Take off your shoes and stand on a flat floor. Here is how to do each measurement correctly.
- Inseam: Stand with your back against a wall and feet about 15 to 20 cm apart. Slide the book spine-up between your legs and press it firmly upward, as if it were a bike saddle. Measure from the top of the book spine down to the floor. This is your inseam.
- Height: Stand flat against the wall without shoes and measure from the floor to the top of your head. Have your friend mark the wall and measure down.
- Torso length: Sit on the edge of a chair with your back straight. Measure from the seat of the chair up to the base of your neck at the collarbone. This gives you a rough torso length.
- Arm reach: Stand with arms relaxed at your sides. Measure from the base of your neck to your wrist. This helps assess whether a bike frame will be too long or too short in the reach.
- Map to a size chart: Take your inseam and height and plug them into the size chart for the specific brand and bike type you are considering. Use it as your starting point, then confirm with a test ride.
The 99 Bikes sizing guide walks through this measurement process clearly and includes size charts across bike categories, which is a handy reference once you have your numbers ready.
Approximate Frame Size Guide by Rider Height
The table below gives a general starting point. Remember that individual proportions and brand differences mean you should always cross-reference with the specific brand chart before making a decision.
| Rider Height | Road Bike (cm) | Mountain Bike | Hybrid Bike |
|---|---|---|---|
| 155 - 162 cm | 47 - 50 cm | XS - S | XS - S |
| 163 - 170 cm | 51 - 53 cm | S - M | S - M |
| 171 - 178 cm | 54 - 55 cm | M | M |
| 179 - 186 cm | 56 - 58 cm | M - L | M - L |
| 187 - 193 cm | 58 - 61 cm | L - XL | L - XL |
| 194 cm+ | 62 cm+ | XL | XL |
These ranges are approximate and for general guidance only. Always check the manufacturer's sizing chart for the specific model you are buying, as geometry varies between brands.
Using a Bike Size Chart
How Australian brands and shops present size charts
A size chart gives you a starting point. It is not a guarantee. Two riders who are both 175 cm tall can have very different inseam lengths, arm lengths and torso proportions. Those differences can shift you one size up or down from what the chart suggests.
Australian retailers like 99 Bikes and Pushys publish their own sizing charts, and major brands like Trek, Giant and Specialized each have their own charts tailored to their specific geometry. Check the chart for the actual bike model you are considering, not just the brand in general.
If you are buying online, the Pushys bike sizing guide is a solid starting point for understanding standover height and reach as secondary checks after you have confirmed a frame size. Also check the retailer's returns policy before purchasing. Buying the wrong size online and then dealing with a return is a headache worth avoiding.
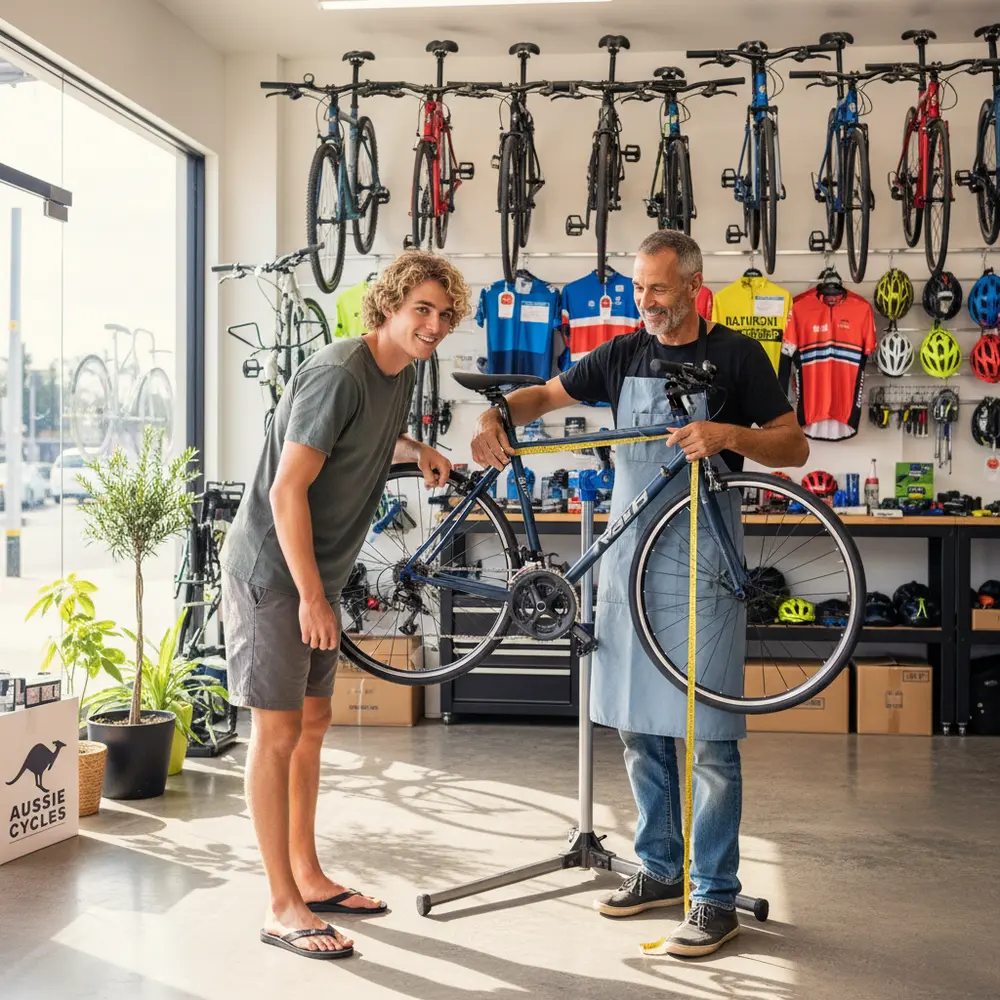
What to Expect at an Australian Bike Shop
What a good in-store fit looks like
A good bike shop will not just point you at a bike and tell you it looks right. They will ask about your riding goals, how far you plan to ride, and whether you have had any injuries. They will check your height and ideally your inseam before pulling bikes off the rack.
They will adjust the saddle height on the spot and ask you to sit on the bike. Most good shops will take you outside or around the car park for a short test ride. That test ride is important. How a bike feels in motion tells you far more than how it looks standing still.
Questions to ask the staff and red flags to watch for
Walk in with your measurements written down and ask these questions:
- Is this the right frame size for my inseam and height?
- Can I test ride this bike before deciding?
- What adjustments can be made if the fit is slightly off?
- Does this brand run large or small compared to other brands you stock?
- What is your return or exchange policy if the size is not right after a few rides?
Red flags include staff who skip the measurement conversation, push you toward the most expensive option without asking about your riding needs, or refuse a test ride entirely. Most Australian bike shops are genuine and helpful. If one is not, there are plenty of others. Check out our bike types overview if you are still deciding what style of bike suits you best.
Common Mistakes When Sizing a Bike
- Using height alone without measuring inseam. Height is a starting point, not the whole picture.
- Assuming sizing is the same across all brands. A Medium from one brand is not a Medium from another.
- Buying online without checking standover height and reach, not just frame size.
- Choosing a bike that feels comfortable standing still but never taking a test ride.
- Ignoring the difference in sizing conventions between road bikes (centimetres) and mountain or hybrid bikes (S/M/L).
- Skipping the conversation with shop staff because you feel intimidated. They want to help you get the right bike.
If You Are New to Buying a Bike
- Start by measuring your inseam and height at home before going anywhere near a shop or website.
- Pick one bike type to focus on first. Road, mountain and hybrid bikes all size differently. Read about road bikes or check our breakdown of mountain bike types if you are unsure which suits you.
- Visit a local bike shop before buying online. Even if you end up buying online, the in-store experience will teach you what to look for.
- Do not buy a bike because it looks good or because it is on sale. Size and fit come first, then price.
- Ask the shop staff for a test ride. If you feel awkward asking, remember that they want you to be happy with the purchase. A return is more work for them too.
If You Have Bought a Bike Before
- Check whether your previous bike size was actually right for you. Many riders discover years later they were on the wrong size.
- Use your inseam and height measurements to cross-reference against the new brand's chart. Do not assume your old size transfers directly.
- Pay attention to reach and stack if you are moving from a casual hybrid to a road bike. The riding position is significantly different.
- If you experienced knee pain or back pain on your last bike, note where the pain was. That information will help shop staff identify what went wrong with the previous fit.
- Consider asking for a professional bike fit if you are upgrading to a more serious bike and want to get dialled in properly from day one.
Fine-Tuning the Fit After You Have the Right Frame
Once you have the right frame size, the next step is saddle height. This is the single most impactful adjustment you can make to a bike. A saddle that is even a centimetre too low or too high will affect your pedalling efficiency and comfort over longer rides.
A simple starting point is the heel-on-pedal method. Sit on the saddle and place your heel on the pedal at its lowest point. Your leg should be fully straight at this position. When you move to the ball of your foot on the pedal, your knee will have a slight bend, which is roughly where it should be. This is a practical starting point, but a professional fitter will refine this further using your specific biomechanics.
Reach and handlebar height are the next adjustments. A stem that is too long or too short affects how much weight sits on your hands and how comfortable your lower back feels. Most bikes have some adjustment range built in. Your local bike shop can swap stems or adjust spacers without much fuss. For more detail on bike components and how they affect your ride, our bike components guide is worth a read.
When to Consider a Professional Bike Fit
What a professional bike fit costs in Australia and what you get
A professional bike fit in Australia typically costs somewhere in the range of $150 to $350 depending on the type of fit, the studio and your location. Some shops offer a basic fit as part of a bike purchase. Others run full sessions with video analysis and detailed reporting.
A professional fit goes well beyond frame size. It covers saddle height, saddle tilt, cleat position if you are using clipless pedals, handlebar height and reach. Some studios use motion-capture technology. Specialized dealers in Australia, for example, offer the Retul bike fit system, which uses 3D motion capture to generate a detailed fit report.
For most beginners, a professional fit is not essential right away. Get the frame size right, ride the bike for a few weeks, and then consider a fit if you are experiencing discomfort or planning to ride long distances regularly. A fit is much more useful once you have some time in the saddle and know where your discomfort actually comes from. For a broader look at what a professional fit involves, Bicycling Australia's bike fit guide covers it well.
Frequently asked questions
Is inseam or height more important for bike sizing?
Both matter, and using them together gives you the best starting point. For road bikes, inseam is particularly important because it directly relates to standover height and saddle position. For mountain and hybrid bikes, overall height is often the primary reference on size charts. Measure both and use the specific brand chart for the bike you are considering.
Do Australian bike shops use a standardised sizing system?
No. Sizing is not standardised across brands. Trek, Giant, Specialized, Merida and other brands stocked in Australian shops all use their own geometry, which means a Medium from one brand can feel quite different to a Medium from another. Always check the chart for the specific brand and model, not just a generic guide.
Is it safe to buy a bike online without visiting a shop?
It is possible, but it carries more risk. If you buy online, take accurate measurements of your inseam and height, use the retailer's size chart carefully, and check standover height and reach in addition to frame size. Check the returns policy before purchasing. Resources like the BikeExchange sizing guide are helpful for online buyers, especially if you are considering a second-hand bike.
Does a saddle that is too low actually cause knee pain?
Yes. A saddle set too low is associated with pain at the front of the knee, because the knee is forced to bend too much through each pedal stroke. A saddle set too high tends to cause pain at the back of the knee and can also lead to lower back strain. Getting saddle height right is one of the most important adjustments after you have the correct frame size.
Do I need a professional bike fit as a beginner?
Not necessarily. Most beginners will get a very workable fit by measuring themselves correctly, using a size chart, visiting a good local bike shop, and taking a test ride. A professional fit becomes more valuable if you are experiencing persistent pain, upgrading to a performance-oriented bike, or planning to ride long distances regularly. It is worth investing in after you have ridden your bike for a few weeks and have a clearer sense of what is and is not comfortable. If you have questions about what is right for your situation, feel free to get in touch with us.
Summary
- Measure your inseam and height at home before shopping. These are your two most important numbers.
- Road bikes use centimetre sizing. Mountain bikes and hybrids use S, M, L labels that vary by brand.
- Size charts are a starting point. Individual body proportions and brand differences mean a test ride is essential.
- Australian bike shops are generally helpful and a good local shop is your best asset when buying your first or second bike.
- A professional bike fit is useful but not compulsory for beginners. Get the frame size right first, ride it, and then assess from there.
This is educational content, not financial advice.