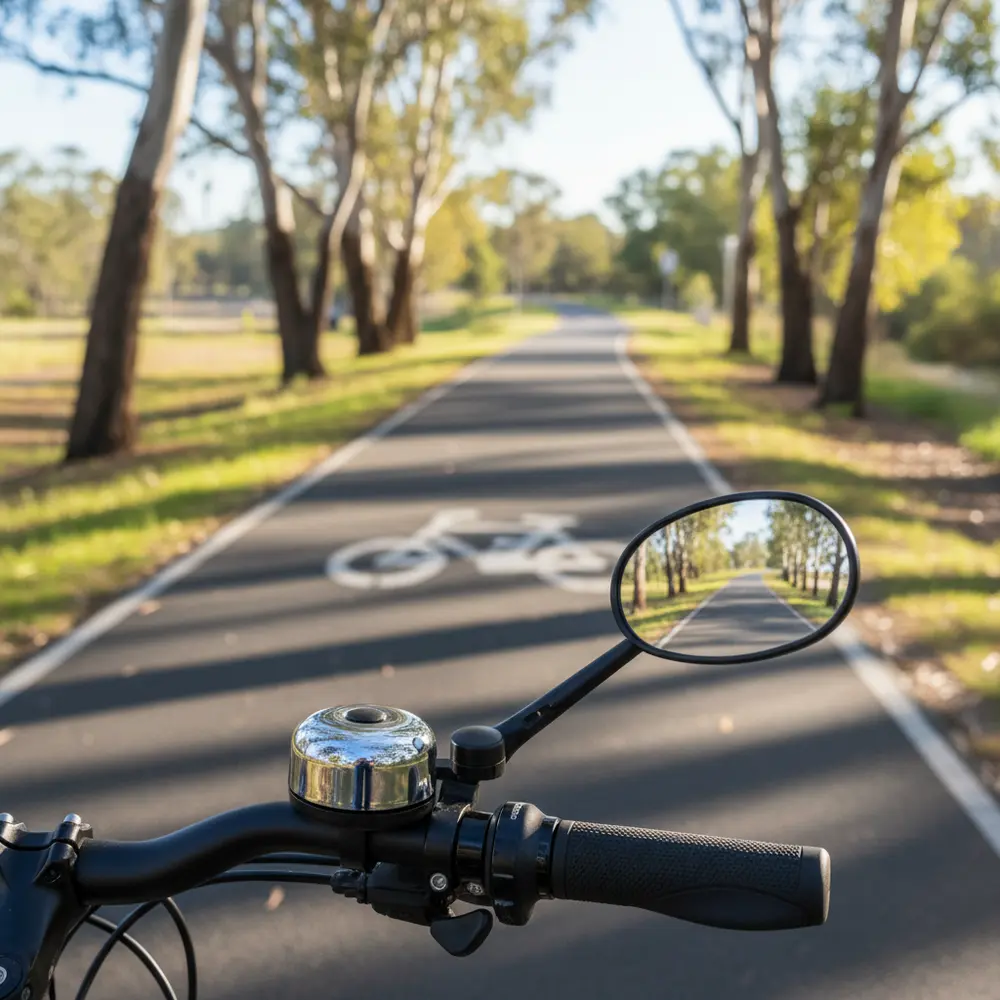
Getting your rack and pannier setup wrong is one of the most common ways to turn a great touring trip into a miserable one. A poorly balanced or badly mounted load can make a bike feel squirrely, wear out your gear prematurely, and in a remote location like the Munda Biddi or Heysen Trail, that is a real problem.
By the end of this article you will know how to choose the right rack for your bike, select panniers that suit Australian conditions, balance your load properly, and run a pre-tour check that actually catches problems before you leave the driveway.
Note for Australian cyclists:
- Many bikes sold in Australia, including popular gravel and road bikes, do not have rack eyelets, so clamp-based mounting solutions are more relevant here than they might be overseas.
- Australian touring conditions range from sealed highway shoulders to rough red-dirt gravel, creek crossings, and extreme heat, and your gear choice needs to reflect that.
- Routes like the Munda Biddi Trail in WA, the Heysen Trail in SA, and the Great Victorian Rail Trail each place different demands on your setup, so a one-size-fits-all approach rarely works.
At a glance:
- Rack choice depends on your frame type and whether you have mounting eyelets.
- Steel racks are generally tougher on rough terrain. Aluminium racks are lighter but can fatigue faster on corrugated gravel.
- Panniers marketed as waterproof vary a lot. Roll-top with welded seams offers the most reliable protection.
- Load distribution matters. Heavier items should sit low and central, with more weight at the front than most riders expect.
Key takeaways:
- A three-point mounted rear rack is more stable under load than a two-point system.
- Check heel clearance before you ride. Your heel should not clip the pannier on the downstroke.
- Pack smart. A well-distributed 18 kg load handles better than a poorly packed 14 kg load.
Why Rack and Pannier Setup Matters More Than You Think
Most cyclists underestimate how much a loaded bike changes handling. You are adding kilograms to a machine that was designed to be ridden unloaded, and where you put that weight makes a real difference to how the bike steers and corners. Get it wrong and the bike feels nervous, especially at higher speeds on descents.
The good news is that this is a solvable problem. The fundamentals of a solid rack and pannier setup are not complicated once you understand what you are working with.
How a Poor Setup Can Affect Handling and Safety
A rear-heavy load shifts the bike's centre of gravity back and up, which makes the front wheel feel light and reduces steering precision. On a gravel descent, that can become genuinely sketchy. Adding weight to the front rack as well, and keeping heavy items low in both sets of panniers, brings the handling back toward something predictable.
Panniers that are not properly secured to the rack are another hazard. A pannier that shifts or drops into the rear wheel mid-ride is not a minor inconvenience. Check hook tension and security before every loaded ride.
Choosing the Right Rack for Your Bike
The first question is always: does your bike have rack mounts? Look for threaded eyelets on the rear dropouts and along the seat stays. If they are there, you have the easiest path forward. If they are not, you are not out of options, but you need to choose carefully. For a solid overview of what is available, this rear and front rack comparison from CyclingAbout is worth reading before you spend any money.
Material is the other key decision. Here is a quick comparison to help you decide:
| Rack Material | Best For | Watch Out For |
|---|---|---|
| Steel (chromoly) | Rough gravel, heavy loads, long tours in remote areas | Heavier than aluminium. Can rust if coating is damaged. |
| Aluminium | Sealed roads, lighter loads, weight-conscious tourers | More prone to fatigue cracking on rough corrugated roads over time. |
| Composite/Carbon | Ultralight setups, mostly sealed roads | Expensive and not ideal for heavy or off-road use. |
For most Australian touring, especially anything involving gravel or mixed terrain, steel or a quality aluminium rack from a reputable brand will serve you well. If you are planning something like the Munda Biddi, a steel rack is the safer long-term bet.
Eyelets, Clamps and Mounting Solutions for Bikes Without Rack Mounts
If your bike has no eyelets, P-clamps (also called braze-on alternatives) are the most common solution. These clamp around the seat stay tube and provide a mounting point for the rack struts. They work, and many tourers use them successfully on long tours, but the quality of the clamp and the fit to your tube diameter matters a lot. A poorly fitted P-clamp on a rough road is a failure waiting to happen.
Seat-post mounted racks are another option for bikes without eyelets, but they have a lower weight limit and can flex under heavier loads. They are better suited to day rides or light overnight trips than fully loaded multi-day touring. For a practical rundown on what is available for Australian bikes, this bike rack compatibility guide from Pushys covers the main options stocked locally.
Key things to check if you are using clamp-based mounts:
- The clamp diameter matches your seat stay tube size exactly.
- Use thread-locking compound on rack bolts to prevent vibration loosening.
- Inspect the clamp contact points after the first loaded ride and again every couple of days on a long tour.
- Carry two or three spare M5 bolts and matching washers in your toolkit.
Front Racks vs Rear Racks - Do You Need Both?
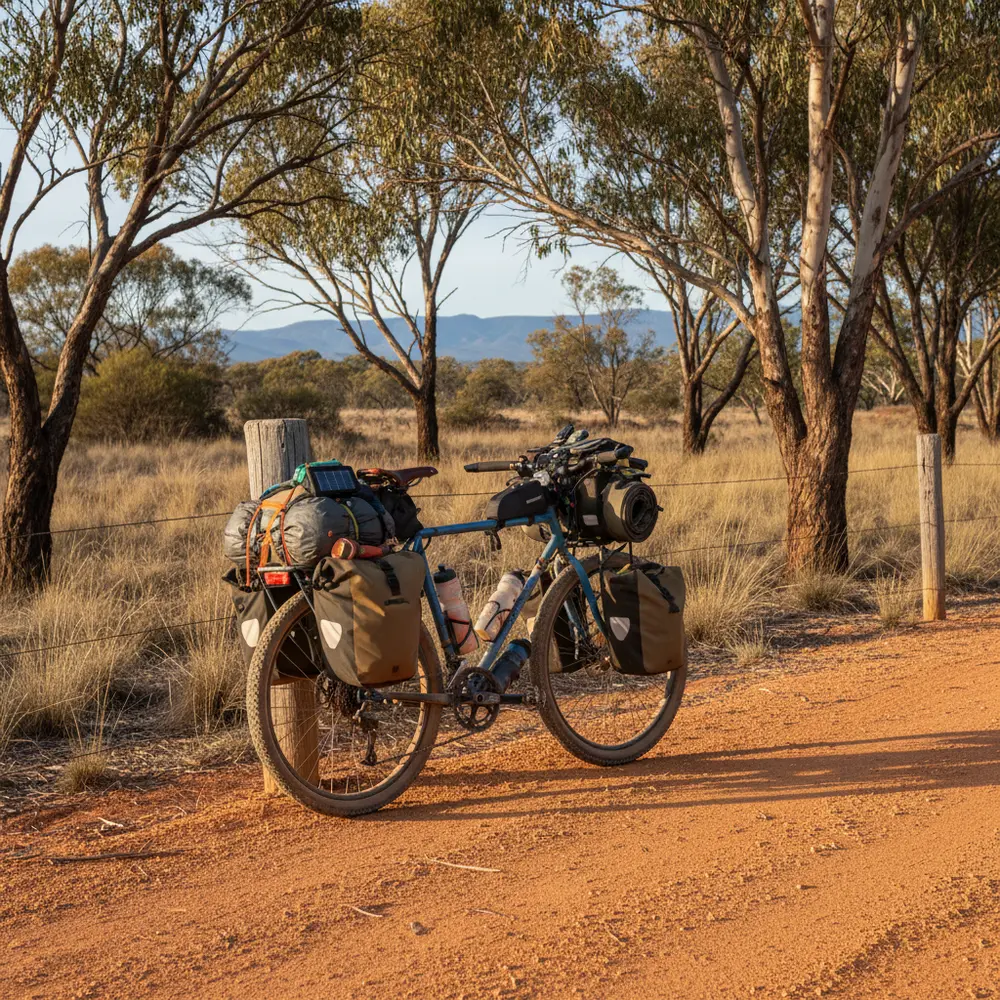
Most tourers start with a rear rack only. That is fine for shorter tours with lighter loads. But once your total carry weight starts climbing, front panniers change the way the bike handles for the better. Spreading weight across four panniers rather than two keeps the load lower and more central overall.
Experienced tourers often talk about a front-low, rear-low loading priority, meaning the heaviest items go in the lower sections of both front and rear panniers rather than on top of the rack. If you are doing a longer self-supported route, the Munda Biddi Trail gear recommendations give you a realistic sense of what a full setup needs to carry for remote Australian conditions.
Selecting the Right Panniers for Australian Touring Conditions
The pannier market ranges from budget options that will disappoint you in the rain to premium bags that outlast multiple bikes. For Australian touring, where a summer storm can appear out of nowhere and red dust gets into everything, the quality of your panniers genuinely matters. The Adventure Cycling Association has a solid waterproof pannier selection guide that explains the difference between water-resistant and truly waterproof construction.
Waterproofing, Durability and Heat Considerations
The term waterproof is used loosely across the pannier market. Roll-top closures with welded seams offer the most reliable waterproofing in genuine downpour conditions. Zip-closure panniers, even those marketed as waterproof, tend to let water in over time as the zip coating wears. For Australian touring, where a sealed bag might also spend hours baking in 40-degree sun, look for bags made from materials that handle UV exposure and heat without degrading quickly.
Attachment hook quality is another thing worth checking before you buy. Budget panniers often use lightweight plastic hooks that can crack or release unexpectedly on corrugated roads. Premium systems use reinforced hooks with a tensioning mechanism that grips the rack rail securely. Once you have rattled down a corrugated dirt road with a full load, you will understand why this matters.
Things to look for when buying panniers for Australian conditions:
- Roll-top closure with welded or heat-taped seams for genuine waterproofing.
- Reinforced hook and tensioning system compatible with standard rack rails.
- UV-resistant outer fabric or coating, not just the inner liner.
- Reflective panels or strips for visibility in low light.
- A carrying handle that is comfortable to use when loading and unloading at camp.
On the bikepacking vs panniers question: bikepacking bags are lighter and handle better on technical singletrack, but they offer less total capacity and can be fiddly to pack for multi-day trips. For most Australian road and mixed-terrain touring, a well-set-up pannier system is the more practical choice. If you want a thorough breakdown of both systems, this panniers vs bikepacking bags comparison from CyclingAbout is the most detailed resource available from an Australian touring perspective.
Load Distribution - How to Pack and Balance Your Panniers
How you pack is just as important as what you pack. The goal is a low, central centre of gravity with even weight side-to-side. A bike that is 2 kg heavier on the right than the left will pull noticeably on long rides.
Follow these principles when loading up:
- Heaviest items (tent, food, water, tools) go low in the panniers, close to the wheel axle height.
- Lighter items (clothing, sleeping bag) go on top or in the upper section of the bag.
- Distribute weight evenly left to right. Hold each pannier before clipping it on to feel the difference.
- If running front and rear panniers, put slightly more weight at the rear, but keep the front panniers meaningfully loaded so the front wheel has good ground contact.
- Avoid strapping bulky items high on top of the rear rack if you can put them inside a pannier instead.
There is no universally agreed magic number for total touring load, but keeping your total loaded bike weight manageable for your fitness level is the practical guide. The heavier the load, the more important correct distribution becomes.
Common Rack and Pannier Modifications Worth Making
Once you have the basics sorted, a few targeted modifications can make a real difference on tour.
Adding Extra Attachment Points, Dry Bags and Accessory Mounts
Most rear racks have a flat deck on top, and many tourers add a dry bag or roll-top bag there using rack straps. This is fine for light, bulky items like a sleeping mat or tent poles. Just be careful not to stack weight high on the rack deck, as this raises your centre of gravity.
Common modifications worth considering:
- Add a handlebar bag or frame bag for items you need quick access to, like snacks, phone, or a first aid kit.
- Fit a small dry bag to the rack deck using a single rack strap for overflow gear.
- Use cable ties or Velcro straps to tidy up any loose accessory cables or straps that could catch in the wheel.
- Consider a rear-rack-mounted light bracket if your standard light mount does not work with a loaded rack.
- Add reflective tape to pannier sides if your bags lack built-in reflective strips.
Maintenance Tips to Keep Your Rack and Panniers Tour-Ready
Racks work hard on tour and they need regular attention. A bolt that vibrates loose on day two of a remote tour is not a fun problem to solve. Build a quick rack and pannier check into your morning routine.
Ongoing maintenance to keep on top of:
- Check all rack bolts for tightness every two to three days on tour, daily on corrugated roads.
- Inspect the rack struts and welds for any cracking or deformation, especially after rough sections.
- Clean and dry pannier attachment hooks and check for cracking or wear after wet or muddy days.
- Rinse panniers with fresh water after creek crossings or beach sections to prevent salt or mineral damage.
- Store panniers out of direct UV when not in use to extend the life of the fabric and closures.
If you are planning your first multi-day tour and want to connect with other Australian riders doing similar things, Bicycle Network Australia runs a range of organised touring events where you can get a feel for the loaded riding experience before heading out on your own.
If You Are New to Touring
- Start with a rear rack and two rear panniers before adding a front setup.
- Do a loaded shakedown ride of at least 30 km before your first overnight trip.
- Practise attaching and removing panniers until you can do it quickly and confidently.
- Keep your first tour load under what you think you need. You will learn fast what you actually use.
- Check our cycling accessories guides for more beginner-friendly gear advice.
If You Have Toured Before
- Revisit your load distribution setup. Most experienced tourers find they can drop weight and improve balance after a few tours.
- Consider upgrading your rack if you are still using a two-point mount system. A three-point rear rack is noticeably more stable under load.
- Test your panniers in a bucket of water before a long tour to confirm the waterproofing is still intact, especially on older bags.
- Look at adding a front rack if you are carrying more than around 15 kg total. The handling difference is worth the investment.
- Check out the touring section on Segment Club for route ideas and gear discussions from other Australian tourers.
Common Mistakes to Avoid
- Loading all the heavy gear into rear panniers and leaving the front light. This makes the front wheel feel floaty and steering imprecise.
- Using a seat-post rack for a fully loaded tour. These are designed for light loads, not 10 kg of camping gear.
- Assuming a pannier labelled waterproof will handle a full day of rain without issue. Test it before you need it.
- Forgetting to check heel clearance. Your heel should pass the rear pannier comfortably throughout the full pedal stroke. Test this before the ride, not during.
- Not carrying spare rack bolts and a small adjustable spanner. Rack bolts vibrate loose, especially on gravel roads.
- Over-tightening pannier hooks to the point where the hook mechanism cracks or the rack rail gets deformed.
Pre-Tour Rack and Pannier Checklist
Run through this before every loaded tour. It takes five minutes and can save a miserable roadside repair session.
- Rack bolt torque: Check all mounting bolts are tight. Use thread-locking compound if you have it.
- Three-point mounting check: Confirm all three mounting points on a rear rack are secure and not flexing.
- Pannier hook condition: Inspect hooks and tensioning systems for cracks, wear, or looseness.
- Heel clearance check: Sit on the bike with panniers loaded and pedal slowly. Confirm no heel contact with the pannier.
- Wheel and tyre clearance: Check that no pannier material or strap can contact the tyre or spokes.
- Load weight and distribution: Heavy items low and central. Roughly even side to side. Front panniers meaningfully loaded if fitted.
- Waterproofing integrity: Confirm roll-top closures seal correctly. Check seam condition on older bags.
- Reflective visibility: Ensure reflective strips are visible and clean on both panniers.
- Loose straps secured: All rack straps and excess webbing tucked away from wheels and drivetrain.
- Spare hardware packed: A small zip-lock bag with spare M5 bolts, washers, and a nut or two in your toolkit.
Frequently asked questions
Can I fit a rack to a bike that has no mounting eyelets?
Yes, you can. P-clamps attach around the seat stay tubes and create a mounting point for the rack struts. Seat-post mounted racks are another option but have lower weight limits and are better suited to light touring. Make sure any clamp-based system is the correct diameter for your tubes and check the mounting points regularly on rough roads.
How much total weight should I carry on a touring bike?
There is no single right answer, as it depends on your fitness, terrain, and the length of your tour. A common practical target is to keep your total loaded bike weight, including water, manageable enough that you can control the bike comfortably on descents. Many experienced tourers aim to keep their total load, not including the bike itself, in the range of 15 to 20 kg for extended tours. Lighter is almost always better for handling and enjoyment.
What is the difference between water-resistant and waterproof panniers?
Water-resistant panniers use treated fabrics or coatings that repel light rain but will eventually soak through in sustained heavy rain. Truly waterproof panniers use roll-top closures with welded or heat-taped seams that prevent water entry even when submerged briefly. For Australian touring where storms can be intense, waterproof construction is worth paying for.
Are aluminium racks reliable for rough Australian gravel roads?
Quality aluminium racks work well for most touring, including mixed terrain. However, aluminium can be more susceptible to fatigue cracking over time on consistently rough corrugated roads compared to chromoly steel. If you are planning extended remote off-road touring, a steel rack from a reputable brand is the more conservative choice for durability. Check welds and struts regularly on any rack used on rough terrain.
Do I need front panniers as well as rear panniers?
Not necessarily for shorter or lighter tours. But if you are carrying a full camping and cooking setup over multiple days, adding front panniers improves load distribution and handling significantly. A bike loaded only at the rear can feel front-light and difficult to steer at speed. Front panniers are a meaningful upgrade once your total load pushes past around 12 to 15 kg.
Wrapping Up
Getting your rack and pannier setup right is one of the highest-value things you can do before a tour. It affects how the bike handles, how your gear survives the conditions, and how much you enjoy the riding itself. Here is what matters most:
- Match your rack to your frame type and choose steel for rough or remote terrain.
- Prioritise genuinely waterproof panniers with quality attachment hooks, especially for Australian conditions.
- Distribute your load low and evenly, front and rear, not just piled into rear panniers.
- Run through the pre-tour checklist every time, not just before your first tour.
- If you have questions about your specific setup or want advice before buying, get in touch with the Segment Club team and we are happy to help point you in the right direction.
This is educational content, not financial advice.