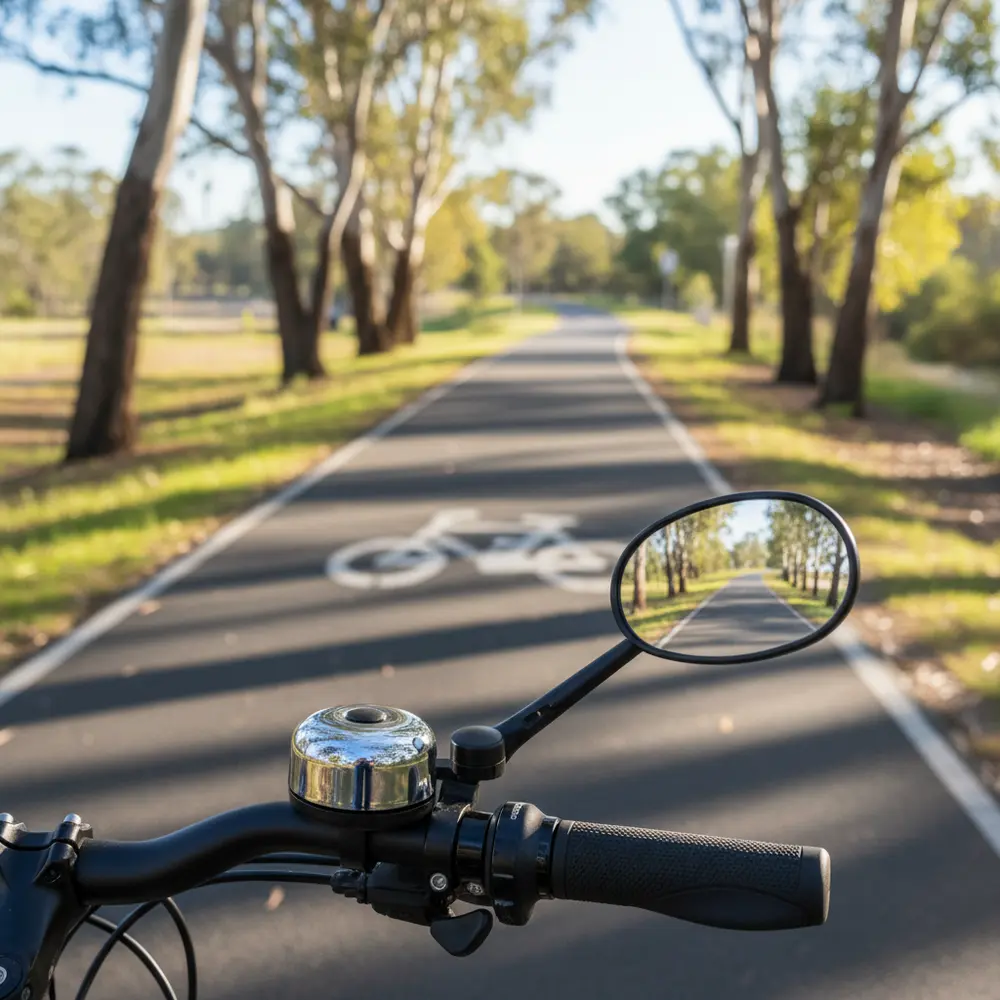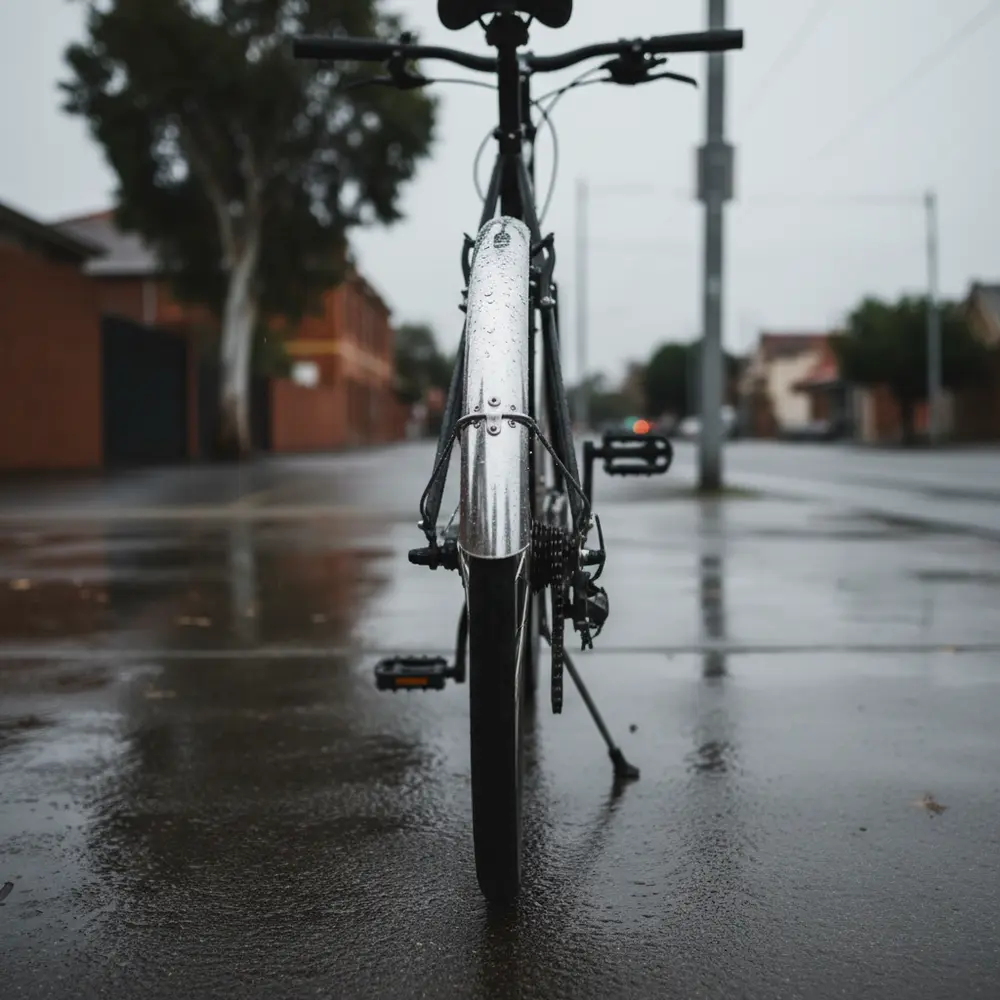
Riding through an Australian winter without mudguards is a quick way to arrive at work soaked from the waist down, or to spray the rider behind you with a face full of dirty road water. A decent set of mudguards is one of the simplest, most affordable upgrades you can make to a bike, and it pays off from the very first wet ride.
By the end of this guide you will know which type of mudguard suits your bike, how to check whether your frame can actually take them, and how to install a set yourself at home without any specialist tools. We will also cover which Australian cities make mudguards a genuine necessity versus a nice-to-have.
Note for Australia:
- Winter in Australia runs June to August. Perth, Melbourne, Hobart, and Adelaide see the most consistent winter rainfall and benefit most from mudguards.
- Brisbane and Darwin have dry winters, so mudguards matter less there in winter months, but remain useful year-round for commuters.
- Sydney sits in the middle, with moderate winter rainfall making mudguards a smart call for anyone riding more than a couple of times a week.
At a glance:
- Check your frame for eyelets and tyre clearance before buying any mudguards.
- Full-length mudguards suit commuters and touring bikes with eyelets. Clip-ons suit road and gravel bikes without them.
- SKS, Zefal, and Crud are the most widely available brands in Australian shops and online retailers like Pushys.
- Installation is beginner-friendly. Most full sets take under an hour with basic tools.
Key takeaways:
- Mudguards help a lot, but wet weather riding still means some wet. Waterproof socks and a jacket matter too.
- If your road bike lacks eyelets, clip-on mudguards are a practical compromise, not a second-rate option.
- Correct tyre clearance is the single most important fitment check before you buy.
Why Mudguards Are Worth It for Australian Winters
Mudguards do two things well: they keep spray off you, and they keep spray off whoever is riding behind you. On a wet road, a bare tyre throws up a continuous rooster tail of water, grit, and whatever else is sitting on the road surface. That ends up on your back, your face, and your drivetrain.
For commuters, the case is straightforward. Nobody wants to sit in an office chair dripping. For group riders, fitting mudguards in wet conditions is basic etiquette in Australia, and some organised rides actively expect it. Mudguards for winter cycling are consistently recommended as one of the first wet-weather upgrades by experienced riders and mechanics alike.
They also protect your bottom bracket, bearings, and drivetrain from the constant water ingress that shortens component life. That is a side benefit that does not get talked about enough.
Which Australian Cities and Regions Get the Wettest Winters
Not every part of Australia has the same relationship with winter rain. According to Australian winter rainfall data from the Bureau of Meteorology, rainfall patterns vary significantly by city and region.
| City | Winter Rainfall Pattern | Mudguard Priority |
|---|---|---|
| Perth | Mediterranean climate. Most annual rain falls June to August. | High. Mudguards are a winter essential. |
| Melbourne | Consistent rainfall year-round with wetter winters. | High. Commuters and regular riders should fit them. |
| Hobart | Cool, wet winters. Regular rainfall across the season. | High. Particularly for any off-road or mixed-surface riding. |
| Adelaide | Moderate winter rainfall, drier summers. | Medium-high. Worth fitting for regular winter rides. |
| Sydney | Moderate year-round, some winter rain. | Medium. Practical for commuters riding several days a week. |
| Brisbane | Dry winters. Rain mostly in summer and spring. | Lower priority in winter, still useful for commuters. |
| Darwin | Dry season in winter. Very little rainfall June to August. | Low in winter. Summer riding is a different story. |
Fenders vs Mudguards - Is There Actually a Difference
Short answer: no, not really. "Mudguard" is the term most commonly used in Australia and the UK. "Fender" is the American English equivalent. They refer to the same thing. In Australia, you will hear both used interchangeably, and any bike shop will know what you mean whichever word you use.
Some brands use "fender" in their product names for the international market, which is why you will see both terms on retailer websites like Pushys. For this guide, we will use mudguard throughout, but the advice applies equally to any product labelled as a fender.
Types of Mudguards and Which Bikes They Suit
Choosing the right type of mudguard comes down to your bike, not your preference. The frame geometry and available mounting points dictate what will actually fit. Here is a straightforward breakdown.
Full-Length Mudguards - Best for Commuters and Touring Bikes
Full-length mudguards give the best coverage. They run the full arc of both wheels, front and rear, and are secured to the frame using metal stays and bolts through dedicated mounting points called eyelets. They are the best option if your bike has them.
The SKS Chromoplastics range is one of the most consistently recommended full-length options and is widely available in Australia. Zefal also makes solid sets at various price points. Expect to pay roughly $50 to $80 for a quality full-length set. You can check current availability and pricing at bike mudguards available in Australia via Pushys.
Full-length mudguards are the right choice for hybrid bikes, touring bikes, city bikes, and any road bike with eyelets and enough tyre clearance. They are not a good fit for most race-geometry road bikes, which typically lack both the clearance and the eyelets needed to mount them properly.
Clip-On and Snap-Fit Mudguards - Best for Road and Gravel Bikes
Clip-on mudguards attach to the seatpost and fork crown without requiring eyelets or drilling. They are tool-free to fit on most bikes and take about five minutes to install. The trade-off is coverage. They protect your back and face reasonably well, but do not fully shield your feet or lower legs the way a full mudguard does.
The Crud Roadracer Mk3 is a well-regarded option for road bikes and has been highlighted by reviewers including BikeRadar's best mudguards review as a top clip-on choice. Ass Savers make an ultra-minimal option that is barely noticeable on the bike and works well for occasional wet rides rather than daily commuting.
If your road bike does not have eyelets, clip-ons are the practical solution, not a compromise you should feel bad about. Most serious road cyclists in Australia use exactly this setup.
MTB Fenders - Best for Trail and Mountain Bikes
Mountain bike fenders are shorter, tougher, and designed for the different geometry and tyre sizes on trail bikes. They usually clip to the fork crown at the front and the seatpost or seat tube at the rear. Coverage is intentionally limited because full wrapping would cause mud packing on a trail bike.
For trail riding in wet Australian conditions, even a basic MTB fender keeps the worst of the mud out of your face and reduces buildup in the fork. They are a cheap upgrade and worth having if you ride trails through the wetter months.
What to Check Before You Buy - Tyre Clearance and Mounting Points
This is the most important section if you are new to mudguards. Get this wrong and you will either buy something that does not fit or end up with a mudguard that rubs the tyre and causes real problems.
There are two things to check on your bike before purchasing:
- Eyelets: Small threaded holes on the fork ends, dropouts, and seat stays. These are the mounting points for full-length mudguards. If your bike does not have them, you will need clip-on mudguards or an adapter solution.
- Tyre clearance: The gap between your tyre and the frame or fork. According to the SKS mudguard fitting guide, a minimum of 6mm clearance on each side between tyre and mudguard is recommended to prevent mud or debris from jamming. If your tyre already sits close to the frame, a full mudguard may not fit safely.
Race-geometry road bikes with tight clearances around 25mm or 28mm tyres often cannot fit full mudguards at all. This is not a fixable problem with adapters or zip ties. If there is not enough room, there is not enough room. Be honest with yourself about this before spending money.
For guidance on choosing accessories that suit your specific bike setup, check out our cycling accessories guides on Segment Club.
How to Install Mudguards - A Step-by-Step Guide
Installing a full set of mudguards is a manageable job for a beginner at home. You do not need a bike stand, though one makes the rear easier. Set aside about an hour for your first attempt and do not rush the alignment step.
What you will need:
- A Phillips head screwdriver and a flat head screwdriver
- A set of Allen keys (2mm to 5mm covers most mudguard hardware)
- Zip ties as a backup for any stay that needs extra securing
- Pliers for bending stays if required
Step-by-step installation:
- Check clearance and eyelets first. Confirm you have the 6mm minimum gap around the tyre and that your frame has eyelets at all required mounting points before you open the box.
- Fit the rear mudguard first. Loosely attach the mudguard body to the rear eyelets using the supplied hardware. Do not tighten anything fully yet. Adjust the mudguard so it sits centred over the tyre and runs parallel to the wheel.
- Attach and adjust the rear stays. The stays are the thin metal or plastic rods that connect the sides of the mudguard to the dropout eyelets. Bend them gently if needed to achieve a snug fit without the mudguard sitting on the tyre. Leave a small, even gap on both sides.
- Fit the front mudguard. Attach it to the fork crown eyelet at the top and route the stays down to the fork blade eyelets. Centre it over the tyre the same way you did at the rear.
- Check clearance on both sides and tighten all fixings. Spin each wheel slowly and watch for any rubbing. Once you are happy with the alignment, tighten all bolts and stay fixing points. Do not over-tighten plastic fittings.
- Test ride and re-check. Ride around the block, then re-check all fixings. Vibration from the road can loosen things slightly on the first ride out.
For clip-on mudguards: No tools required on most models. Clip the rear unit to the seatpost, adjust the angle so it sits above the tyre without touching, and repeat the same process for the front unit on the fork crown. Done in five minutes.
Common Mistakes to Avoid
- Buying full-length mudguards for a bike without eyelets. Check your frame first. This is the most common mistake beginners make.
- Not leaving enough clearance between tyre and mudguard. Too tight and the guard rubs or jams with debris. Aim for at least 6mm on each side.
- Tightening the stays unevenly. This causes the mudguard to sit off-centre and rub one side of the tyre. Take your time with the alignment before final tightening.
- Ignoring mudguard rattle after installation. Rattle usually means a loose stay or a stay vibrating against the frame. It is fixable with small adjustments or a wrap of tape. Do not ignore it and hope it stops.
- Fitting a mudguard that is too narrow for your tyre. Mudguard width should match or slightly exceed your tyre width. A 25mm mudguard on a 40mm tyre does very little.
- Skipping the test ride check. Always go back and re-check all fixings after the first ride. Road vibration will reveal any loose points.
If You Are New to Mudguards
- Start with clip-on mudguards if you are unsure whether your bike can take full ones. They are cheap, easy to fit, and easy to remove.
- Take your bike to your local shop and ask them to check for eyelets and tyre clearance before buying anything. Most shops will do this for free in five minutes.
- Watch a video of someone installing the same mudguard model you bought. SKS in particular have good installation resources on their website.
- Do not worry too much about weight. Mudguards are heavier than nothing, but for commuting and winter riding, comfort and practicality outweigh a few extra grams.
- For general beginner cycling advice and gear tips, have a look at the beginner cycling tips on Segment Club.
If You Have Fitted Mudguards Before
- Consider upgrading to a longer mudguard flap at the front to deflect spray away from your feet. SKS and Zefal both offer extended flap options.
- Check your stays annually. Metal stays can develop hairline cracks over time, especially on bikes ridden on rougher roads or trails.
- If you get persistent rattle despite correct installation, try wrapping the stay contact points with a thin layer of electrical tape or foam tape. This often eliminates the last bit of vibration noise.
- For gravel bikes, check whether a clip-on set designed for wider tyres, like the Crud Roadracer or similar options, gives you better coverage than the road-specific version you may already own.
Maintaining Your Mudguards So They Last the Season
Mudguards do not need a lot of attention, but a quick check every few weeks through winter will keep them working properly and quietly. Here is what to do:
- Wipe them down when you clean your bike. Mud and grit can build up inside the guard and cause rubbing against the tyre.
- Check all bolts and stay fixings. A quick rattle-test by hand will tell you if anything has worked loose. Re-tighten anything that moves.
- Inspect the stays for bends or cracks. A bent stay from a kerb bump or a trail impact can pull the guard out of alignment. Straighten it or replace the stay.
- Check the mudguard body for cracks near the bolt holes. Plastic can crack over time, especially if over-tightened. A cracked guard near the fixing point will eventually fail and may come loose while riding.
For more advice on keeping your bike in good shape through winter, check out our article on bike maintenance for Australian conditions.
Frequently asked questions
Do I need eyelets on my bike to fit mudguards?
You need eyelets for full-length bolt-on mudguards. If your bike does not have eyelets, clip-on mudguards attach to the seatpost and fork crown without any mounting hardware. Check your frame before buying. A quick look at the dropout ends and fork crown will tell you immediately if eyelets are present.
What is the difference between mudguards and fenders?
They are the same thing. Mudguard is the term used in Australia and the UK. Fender is the American English equivalent. You will see both words used on retailer websites and product packaging. Either term will get you the right product at your local bike shop.
Can I fit mudguards to a road bike?
It depends on the bike. Touring road bikes, endurance road bikes, and most hybrid bikes can take full-length mudguards if they have eyelets and enough tyre clearance. Most race-geometry road bikes with tight clearances cannot fit full mudguards safely. Clip-on options like the Crud Roadracer are the practical solution for those bikes. Check our road bike accessories guide for more on what works for different road bike styles.
How much clearance do I need between my tyre and the mudguard?
A minimum of 6mm on each side is the recommended clearance, as outlined by SKS in their mudguard fitting guidance. Less than this and you risk the guard contacting the tyre when the wheel flexes slightly under load, or when debris temporarily narrows the gap. Always measure before buying.
Will mudguards stop me getting wet completely?
No. Mudguards significantly reduce the spray from your own wheels hitting your back, face, and feet, but wet weather riding still means some exposure to rain and road water. You will still want waterproof shoe covers, a good jacket, and gloves. Think of mudguards as one part of a complete wet weather riding setup, not a standalone fix.
Summary
- Mudguards are one of the best value upgrades you can make for wet Australian winters, particularly in Perth, Melbourne, Hobart, and Adelaide.
- Check for eyelets and tyre clearance on your specific bike before purchasing. This step saves money and frustration.
- Full-length mudguards offer the best coverage for commuter and touring bikes. Clip-ons are the right call for road bikes without eyelets.
- Installation is beginner-friendly. Take your time with alignment, do a test ride, and re-check all fixings afterwards.
- If you have questions about your specific setup or want help choosing the right mudguards for your bike, feel free to get in touch with us at Segment Club.
This is educational content, not financial advice.