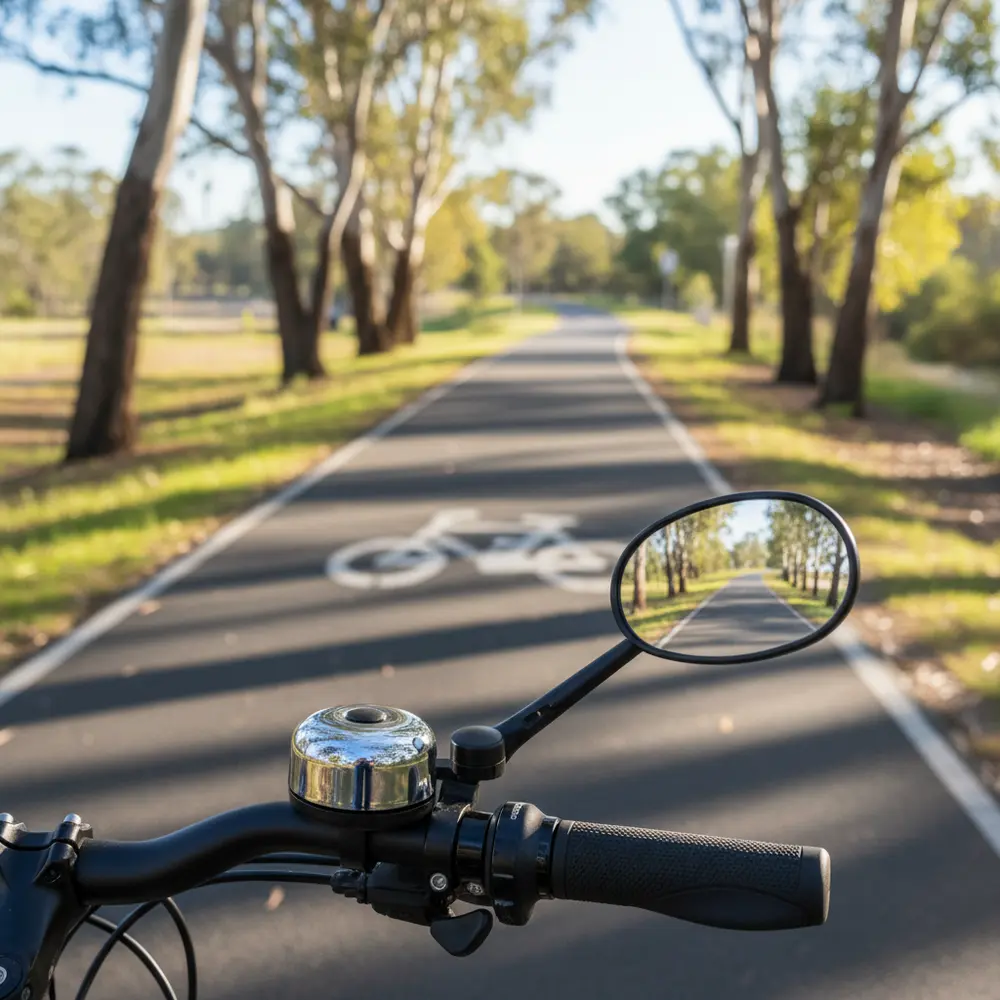
Australian shared paths are busier than ever, and a near-miss with a pedestrian or another rider is not the way you want to end a morning ride. Two simple cycling accessories, a bell and a mirror, cost very little and solve a lot of real problems that beginner riders face every day on paths like Melbourne's Capital City Trail, Sydney's Parramatta River Track, or Brisbane's Riverwalk.
By the end of this article you will know which bell and mirror types suit your riding, how to fit them without cluttering your bars, and exactly what Australian law requires. No fluff, just the practical stuff you need before your next ride.
Note for Australia:
- A bell or audible warning device is a legal requirement for cyclists in most Australian states and territories, including Victoria, Queensland, and New South Wales. Check your own state's rules to confirm.
- In Queensland and NSW, the bell must be audible from at least 30 metres away, as set out in Queensland road rules for bicycle bells and NSW bicycle bell road rules.
- Mirrors are not legally mandated for bicycles in Australia, but they are strongly recommended for road and shared path use.
At a glance:
- A bike bell is legally required in most Australian states, and a cheap one still does the job.
- Dome bells suit casual and commuter riders; thumb bells suit riders who prefer one-finger operation.
- Handlebar mirrors are the easiest to fit and adjust; helmet mirrors suit road riders who move their head naturally.
- Both accessories can be fitted without tools in most cases and cost under $30 combined.
Key takeaways:
- Check your state road rules before your next ride, because a missing bell can result in a fine.
- A mirror reduces the need to take your eyes off the path ahead when checking for traffic behind you.
- Mount both accessories before you ride, not after your first close call.
Why a Bell and Mirror Belong on Every Australian Bike
Shared Paths and the Reality of Busy Trails
Anyone who has ridden a busy shared path on a weekend morning knows the problem. Pedestrians walk two or three abreast, dogs appear from nowhere, and other riders come up fast from behind. The shared path safety research from Bicycle Network confirms that cyclist-pedestrian conflicts on shared paths are a genuine and documented issue across Australia.
A bell gives you a clear, polite way to signal your approach without shouting or braking hard. A mirror lets you know what is coming up behind you before you make a move to pass or merge. Together, they close two of the biggest awareness gaps for any rider on a busy path.
Many experienced riders skip both accessories, particularly on road bikes. That is their call. But if you are newer to riding, or you are commuting or doing recreational laps on mixed-use paths, these two items earn their place on your bike quickly.
What Australian Road Rules Say About Bike Bells
The rules vary by state, so do not take anyone's word for it as the final say. That said, the pattern is consistent across the major states. Victoria's road authority outlines requirements clearly on the VicRoads cycling laws page, and Queensland and NSW both require an audible warning device that can be heard from at least 30 metres.
The Queensland Department of Transport and Main Roads also covers this in plain language on their Queensland cycling rules and safety page. The key point is this: the bell must work, and you must use it when approaching pedestrians or other riders. A silent decorative bell mounted on your bars does not meet the legal requirement.
Always check your own state or territory road rules directly to confirm the current requirement, as these can be updated.
Choosing the Right Bike Bell
Dome Bells vs Thumb Bells vs Horns - What Works Best
There are three main types worth knowing about. Here is a quick comparison to help you decide.
| Bell Type | How It Works | Best For | Downside |
|---|---|---|---|
| Dome bell | Twist or flick a rotating ring to strike the dome. | Casual riders, commuters, kids bikes. | Can be slower to operate with gloves on. |
| Thumb bell | Press a lever with your thumb to strike a small bell. | Riders who want quick one-finger operation. | Can be quieter than a dome bell at the same price. |
| Electronic horn | Battery-powered, produces a loud electronic tone. | Riders who need volume on very busy paths or roads. | Heavier, needs batteries, can startle people if used close up. |
For most riders on Australian shared paths, a good dome bell is the go-to choice. It is loud enough, simple to use, and costs very little. Thumb bells are popular with commuters who keep their hands near the brakes and want fast operation. Electronic horns are worth considering if you ride on roads with traffic, but they are overkill for most path riding.
Volume, Tone and Durability - What to Look For
A bell that sounds like a distant wind chime is not going to cut it on a crowded path. You want a clear, strong tone that carries through ambient noise, particularly wind and chatter from groups ahead of you. A thicker dome generally produces a louder and longer-lasting ring than a thin pressed-metal one.
- Look for stainless steel or quality aluminium construction for corrosion resistance in wet conditions.
- Check the clamp diameter before you buy. Most handlebars are 22.2 mm at the grip area, but some bars are wider, so measure yours first.
- Test the ring before you install it. A bell that rattles or produces a flat tone will annoy you and is less effective.
- Avoid very cheap bells with plastic strikers. They tend to fail or produce a weak sound within a few weeks of daily riding.
Choosing the Right Bicycle Mirror
Handlebar Mirrors vs Helmet Mirrors vs Glasses-Mounted Mirrors
The three main mirror mounting options each have a different feel to ride with. Handlebar mirrors clamp to the end of your bar or to the bar itself near the grip. Helmet mirrors attach to the side or front of your helmet using a small adhesive mount or a clip. Glasses-mounted mirrors clip to the frame of your sunglasses.
For beginners, a handlebar mirror is the easiest starting point. It is always in the same position, you do not need to move your head to use it, and it is straightforward to adjust and retighten. Helmet and glasses mirrors give a wider field of view as they follow your head movement, which some riders prefer once they are comfortable on the bike.
If you are not sure where to start, Bicycle Network's riding tips for Australian cyclists are a good resource for general path and road riding advice. For a deeper look at commuter-specific accessories, also check out our guide to cycling accessories for Australian commuters on the Segment Club.
Fit, Angle and Vibration - Getting a Clear View
The most common frustration with handlebar mirrors is vibration. On rough path surfaces or chip seal roads, a poorly tightened mirror will vibrate enough to make the reflection useless. The fix is simple: tighten the mount firmly, and check it again after the first few rides as it settles.
- Angle the mirror so you can see a clear lane or path width behind you without moving your head more than slightly.
- Bar-end mirrors, which slot into the hollow end of your handlebar, tend to vibrate less than clamp-on mirrors because they have less flex.
- Wipe the mirror glass before each ride. A dusty or fogged mirror is no better than no mirror at all.
- If your mirror keeps rotating under normal riding, add a thin layer of electrical tape around the mount point to increase friction before clamping down.
Running Both Together Without Cluttering Your Cockpit
The cockpit is the space around your handlebars, and it gets crowded fast on a commuter or hybrid bike. Bells, mirrors, lights, computers, and phone mounts all compete for bar space and access to your brake levers and gear shifters. The golden rule is that your brake levers must always be within easy reach, no exceptions.
Position your bell on the side of your non-dominant hand, typically the left side in Australia where your rear brake sits. Mount it close enough to your grip that you can operate it without shifting your hand position. Your mirror should sit at the very end of the bar or as far outboard as possible, so it does not interfere with your grip.
If your bars feel genuinely crowded, a bar-end mirror is often the cleanest solution because it uses space that nothing else is competing for. For drop handlebars on road or touring bikes, bar-end positioning is generally preferred over clamp-on positioning near the hoods. Check out our article on bike setup tips for new riders if you are finding the cockpit hard to organise.
Common Mistakes to Avoid
- Buying a bell without checking the clamp diameter first, then finding it wobbles or does not fit your bars.
- Mounting the mirror at an angle that only shows the sky or the ground, then never readjusting it.
- Over-tightening the bell or mirror clamp and cracking plastic components, or stripping the bolt thread.
- Installing a thumb bell with the trigger facing the wrong direction, so it points away from your thumb when your hand is on the grip.
- Ignoring mirror vibration and assuming the blurry view is normal. It is fixable.
- Skipping the bell entirely because "everyone does it." You could still be fined, and it genuinely helps on busy paths.
Installation Tips for Bells and Mirrors
Most bells and mirrors come with a small Allen key bolt for the clamp. You do not need a full toolbox to fit either one. Here is how to approach it cleanly.
- Slide any existing grips or bar tape back slightly if needed to access the bar end or mounting zone.
- Loosen the clamp bolt just enough to slide the bell or mirror mount onto the bar at the right position.
- Rotate the accessory to the correct angle before tightening. For the bell, make sure the striker faces upward and the trigger is accessible. For the mirror, angle it toward your eye line.
- Snug up the clamp bolt firmly but not aggressively. Hand-tight plus a quarter turn with the Allen key is usually enough for aluminium clamps.
- Take a short test ride at walking pace, then stop and check that neither accessory has shifted. Retighten if needed.
If You Are New to Cycling Accessories
- Start with a dome bell and a handlebar mirror. They are the easiest to fit and adjust on your own.
- Buy from a local bike shop if you can, so staff can check clamp compatibility on the spot.
- Do not spend a lot on your first mirror. A basic model will tell you very quickly what you like and what you want to change.
- Ask the shop to show you how to adjust the mirror angle before you leave. It takes 30 seconds and saves a lot of frustration.
- Read your state's cycling rules once before your first commute. The Cycling Australia road safety page is a good starting point for national-level guidance.
If You Have Ridden Before but Skipped These Accessories
- A thumb bell is worth trying if you found a dome bell awkward to operate while keeping your grip.
- Consider a helmet or glasses-mounted mirror if you already move your head naturally to check traffic. It can feel more intuitive than a fixed handlebar mirror.
- If you ride drop bars, a bar-end mirror is cleaner than a clamp-on and less likely to vibrate loose on rough roads.
- If you have already been fined or warned about a missing bell, treat it as a prompt to also check your mirror setup at the same time.
- More riders are using shared paths in Australia as federal investment in cycling infrastructure continues to grow. The paths are busier, and both accessories are more useful than they were five years ago.
Bell and Mirror Ready Check
Run through this checklist before each ride, especially after you first install your bell and mirror.
- Bell is securely mounted and does not rotate or shift when operated.
- Bell produces a clear, strong audible ring when triggered.
- Bell trigger is accessible without moving your hand off the grip area.
- Mirror is tightened and holds its angle without drooping or rotating.
- Mirror glass is clean and gives a clear rear view from your normal riding position.
- Neither accessory blocks your brake lever reach or gear shifter access.
- Both accessories comply with your state's road rules. If in doubt, check your state road authority website directly.
Print this list or screenshot it and keep it somewhere easy to find when you first set up your bike. It takes less than a minute and it will save you the frustration of realising mid-ride that your mirror has rotated 90 degrees.
Frequently asked questions
Is a bike bell legally required in all Australian states?
A bell or audible warning device is required in most Australian states and territories, including Victoria, Queensland, and New South Wales. The specific rules vary slightly between states, so check your own state road authority's website to confirm the current requirement and any penalties for non-compliance.
How loud does a bike bell need to be in Australia?
In Queensland and New South Wales, the law specifies that the audible warning device must be heard from at least 30 metres away. This is confirmed in the Queensland and NSW road rules legislation. Other states have similar intent in their requirements. A quality dome bell or thumb bell from any reputable retailer will generally meet this threshold.
Can I use a mirror instead of doing shoulder checks?
A mirror is a useful addition to shoulder checks, not a full replacement for them. Mirrors have blind spots, particularly at angles to the side, and a quick shoulder check before merging or turning remains good practice. Use the mirror to get a general read on what is behind you, then confirm with a shoulder check when you are about to make a move.
Do bicycle mirrors affect handling or stability?
A well-fitted mirror has minimal effect on handling. The main issue is vibration on rough surfaces, which blurs the view rather than affecting how the bike rides. A bar-end mirror fitted into the hollow end of the handlebar tends to be the most stable option for riders concerned about mirror movement.
Where can I get more help choosing accessories for my bike?
Your local bike shop is the best first stop, particularly for checking handlebar clamp diameter compatibility before you buy. You can also visit the Segment Club contact page if you have questions, or browse the Accessories and Modifications section of the Segment Club blog for more practical guides written for Australian riders.
To wrap up
- A bell is a legal requirement in most Australian states and genuinely useful on busy shared paths.
- A dome bell suits most riders; a thumb bell suits those who prefer faster, one-finger operation.
- A handlebar mirror is the easiest starting point for beginners; helmet and glasses mirrors suit more experienced riders.
- Fit both accessories before your first ride, run the ready check above, and adjust after your first few trips.
- Check your state road rules directly for the current legal requirements in your area.
This is educational content, not financial advice.